
Transforming your old jeans into trendy shorts is a fun, no-sew project! Start with a pair of 100% cotton jeans and lay them flat. Measure your desired inseam—around 8-9 inches for Bermuda style—and mark it. Use sharp fabric scissors to cut, ensuring both legs are even. To add a unique touch, distress the edges with a cheese grater or snip small slits. This DIY not only saves money, but also promotes sustainability. Explore more creative techniques and tips for your stylish transformation! If you find that your new shorts still have a loose fit, especially in the thigh area, consider how to fix baggy crotch in jeans for a more tailored look. Simply pin the excess fabric and sew a quick stitch or try using safety pins as a temporary solution until you can properly alter them. With a few simple adjustments, you’ll have the perfect pair of trendy shorts that not only fit well but also reflect your unique style!
Key Takeaways
- Measure your desired inseam length (4 inches for shorts, 8-9 inches for Bermuda) and mark with a washable tool for precision.
- Cut jeans with sharp fabric scissors, ensuring both legs are symmetrical by folding jeans in half before cutting.
- Distress shorts by making horizontal cuts and using a cheese grater on edges to create a trendy, worn-in look.
- Wash and dry the shorts post-cutting to enhance fraying and achieve a unique finish.
- Showcase your completed DIY project on social media to inspire others and promote sustainable fashion practices.
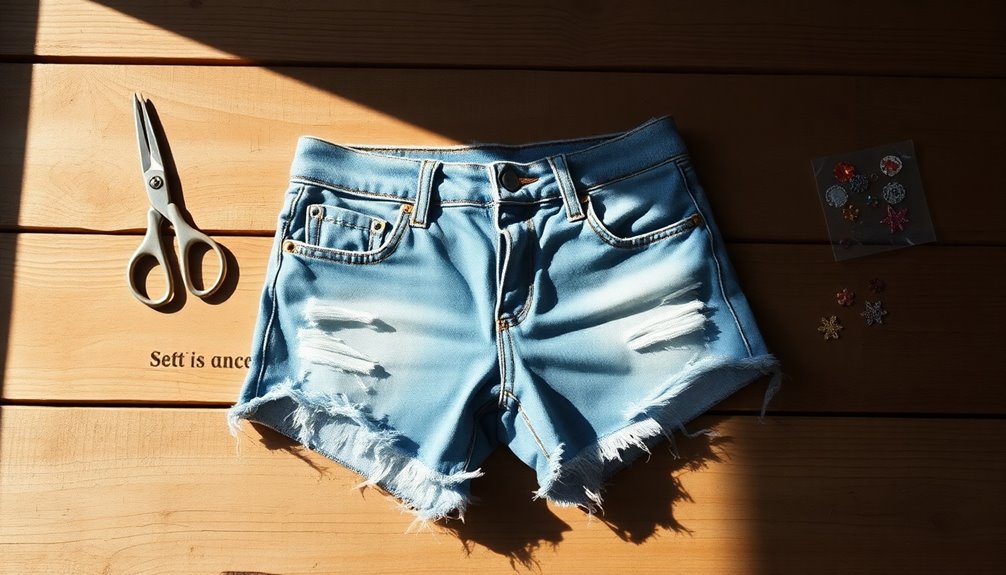
Supplies Needed for Your DIY Project

To kick off your no-sew jeans project, gather a few essential supplies. Start with a pair of jeans that fit well around your waist and hips, preferably made of 100% cotton for comfort and durability.
Sharp fabric scissors are vital; they'll guarantee you make clean cuts, especially when you're defining your cutting lines. A measuring tape helps you determine the perfect length for your new shorts—aim for an inseam of 8-9 inches for that trendy Bermuda look.
Don't forget a marking tool, like chalk or a Sharpie, to indicate precise cutting lines for symmetry. Finally, having a reference pair of shorts nearby can guide you in comparing lengths and achieving your desired style effortlessly. Additionally, using high-quality fabric scissors will ensure a smoother cutting experience and better results.
Happy cutting!
Preparing Your Jeans for Cutting
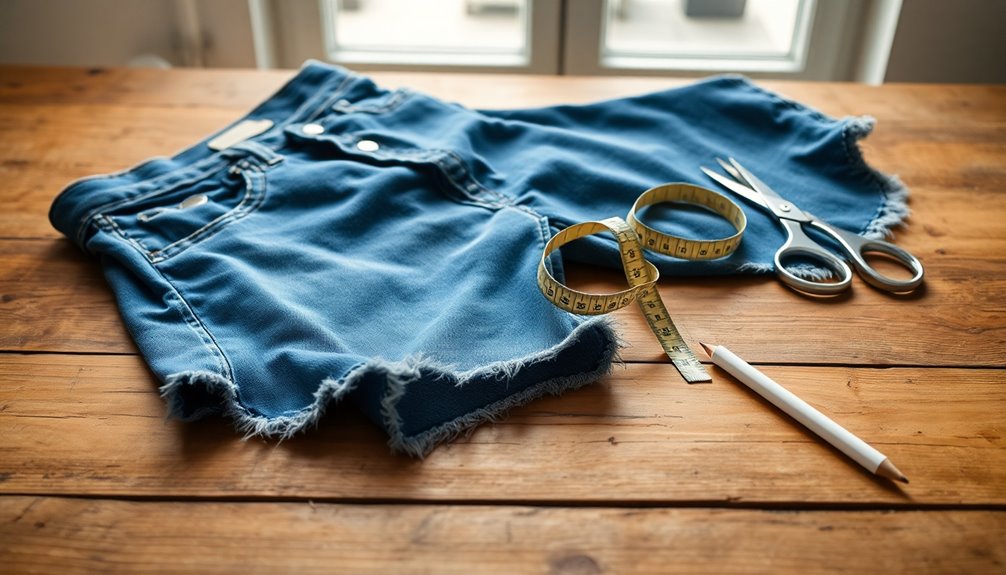
Before diving into cutting your jeans, it's crucial to prepare them properly to achieve the best results.
Start by laying your jeans flat on a clean surface, aligning the inseam from the crotch to the ankle for accuracy. Use a measuring tape to find your desired inseam length, usually around 8-9 inches for Bermuda shorts, and avoid cutting through pockets.
Mark this length with a washable tool like chalk or a marking pencil. To visualize the final look, trim the excess fabric to knee-length.
Fold one side of the jeans to guarantee both legs match before marking. This careful process of preparing your jeans for cutting will help you cut right and create trendy shorts that fit perfectly.
Measuring the Perfect Inseam

When it comes to upcycling your jeans, measuring the perfect inseam is key for a great fit.
You'll want to take into account the ideal lengths for Bermuda shorts or shorter styles and how your body shape affects the fit.
Plus, using the right measuring techniques will guarantee you get the best results without any mishaps.
Ideal Inseam Lengths
Finding the perfect inseam length can make all the difference in your upcycled jeans projects. For trendy short shorts, aim for an inseam of about 4 inches if you want a flirty, revealing look.
If you prefer a bit more coverage, Bermuda shorts usually range from 8 to 9 inches, offering comfort without sacrificing style.
Remember to pull out the front pockets while measuring to avoid cutting through them, which would ruin your shorts' functionality.
Also, keep in mind that hemming requires extra length, so factor that in when deciding on your final inseam measurement. Proper nutrition is important to maintain focus and creativity during your crafting process.
Body Shape Considerations
Understanding your body shape can greatly enhance your upcycled jeans projects, particularly when measuring the perfect inseam. Body shape considerations play an essential role in achieving a flattering fit.
For Bermuda shorts, aim for an inseam of 8 to 9 inches to guarantee comfort and style across various body types. If you prefer shorter styles, consider an inseam of about 4 inches, adjusting based on your personal preference and desired coverage.
Remember to account for your body curves, especially around the butt and thighs, for a better fit. Also, pull out front pockets while measuring to avoid cutting through them.
Knowing your inseam measurements won't only help with your shorts but also assist in future shopping endeavors. Additionally, having a friendly temperament can make your fashion choices more enjoyable as you confidently showcase your unique style.
Measuring Techniques Explained
To measure the perfect inseam for your upcycled jeans, start by laying the pants flat on a surface, guaranteeing there are no wrinkles.
Use measuring techniques that involve measuring from the crotch peak down to your desired length, whether it's 8 to 9 inches for Bermuda shorts or around 4 inches for a casual look.
Remember to pull out the front pockets to avoid cutting through them accidentally.
Also, account for the extra length needed for hemming, as you'll typically fold the fabric under twice.
Make certain the measuring tape follows the natural curve of your body to guarantee a comfortable fit around your hips and thighs, resulting in a polished finish for your trendy shorts. Additionally, ensuring color accuracy in the fabric can enhance the overall appearance of your new shorts.
Cutting Techniques for a Stylish Finish

How can you achieve a stylish finish when cutting your old jeans? Start by using sharp fabric scissors for clean, straight cuts.
While wearing the jeans, mark your desired length to guarantee a comfortable fit. For a flattering silhouette, cut the back of the shorts slightly longer than the front.
To make certain both legs match in length and shape, fold the jeans in half before cutting. A cutting mat can protect your surface and provide a stable base for precision.
Remember, the key is to measure twice and cut once. This way, you'll end up with trendy shorts that look polished and well-crafted. Additionally, consider utilizing vertical space in your closet for better organization of your new shorts along with your other clothing items.
Keep it simple, and you'll love your new style!
Distressing Your Shorts for a Unique Look
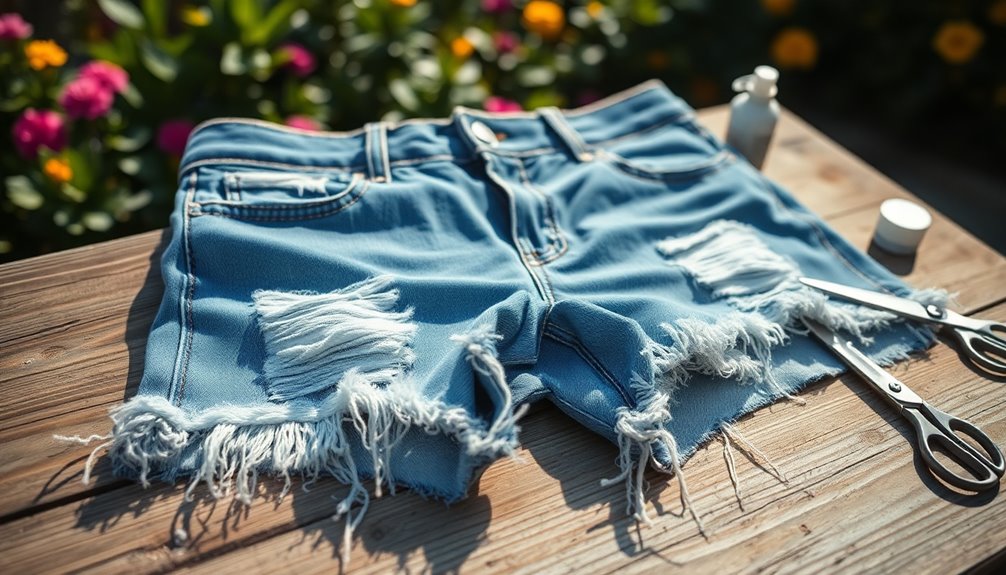
Distressing your shorts can give them a unique, trendy vibe that stands out. You can achieve a natural fraying look by making random cuts and washing the fabric afterward to enhance the texture. Regular cleaning of your sewing tools can ensure that your projects go smoothly and yield the best results. Let's explore some customization ideas that will help you create a one-of-a-kind piece.
Distressing Techniques Overview
While you might think distressing your shorts is a challenging task, it can actually be quite simple and fun. You can experiment with various distressing techniques to create that perfect worn-in look. Try making thin horizontal cuts along the fabric, varying lengths, and angles for a more natural appearance. Snipping small slits along the seams gives you extra room and adds an edgy flair.
After cutting, washing and drying your shorts amplifies the fraying. Here's a quick overview of some techniques:
| Technique | Effect |
|---|---|
| Horizontal Cuts | Creates fraying and worn-in look |
| Varying Angles | Enhances natural appearance |
| Slits on Seams | Adds room and edgy style |
| Thread Removal | Personalizes your design |
Incorporating essential oils into your DIY projects can also enhance your crafting experience by providing calming scents while you work.
Achieving Natural Fraying
After exploring various distressing techniques, you're ready to achieve that coveted natural fraying effect on your upcycled shorts.
Start by washing and drying your denim; this enhances the frayed look while softening the fabric. Next, create intentional distressing with small horizontal cuts along the hem and side seams. This loosens the threads, contributing to a worn-in appearance.
For added texture, make random cuts instead of uniform lines to mimic vintage denim's natural wear and tear. To emphasize the distressed look, manually pull out some blue threads after making your cuts.
Finally, you can speed up the fraying process using sandpaper or a cheese grater on the edges before washing, ensuring your shorts have that perfect, unique finish. Embracing this upcycling practice aligns with sustainable habits that enhance overall well-being.
Customization Ideas for Distressing
Creating a unique distressed look for your upcycled shorts opens up a world of customization possibilities.
Start by making random horizontal cuts along the fabric, varying the depth and spacing to achieve a natural appearance. Focus on thin lines; they'll create a softer, stylish effect once you wash and dry the shorts.
After cutting, toss them in the wash to enhance fraying and achieve that worn-in texture. For added flair, remove blue threads from the hem or other areas to emphasize the rugged look.
Don't forget to distress areas like the pockets or thighs, balancing the design while keeping it unique. Additionally, consider how lighting plays a role in showcasing your new shorts during Halloween festivities, as a well-lit outfit can make a big difference.
You'll love how these simple techniques transform your shorts into a trendy statement piece!
Finalizing Your Design and Presentation

Once you've cut your jeans to the desired length, it's important to finalize your design for a polished look.
Always make certain both legs are symmetrical by folding them in half and adjusting as necessary. For a stylish hem, consider rounding the bottom and flipping the cut piece to guarantee symmetry on the opposite side.
If you want to distress your shorts, make random thin cuts to enhance the overall look, especially after washing and drying them.
Before you wash, check for any additional adjustments, like verifying the back has enough fabric for your preferred style.
Finally, present your completed shorts in a fun way, inviting feedback and encouraging others to share their own DIY projects. Remember that creating a cohesive design can elevate your upcycled fashion to the next level.
Embracing Sustainability Through Upcycling
While many people mightn't realize it, upcycling jeans into trendy shorts is a powerful way to embrace sustainability. By transforming your old denim, you not only reduce landfill waste but also take a stand against fast fashion.
Here are three compelling reasons to engage in upcycling:
- Reduce Waste: The fashion industry generates 92 million tons of textile waste annually. Upcycling greatly cuts this number.
- Save Money: DIY projects allow you to create unique designs without spending on new clothes.
- Foster Community: Join initiatives like the #NoNewClothes campaign, promoting creativity and sustainable living.
Frequently Asked Questions
How to Turn Old Jeans Into Shorts?
To turn your old jeans into shorts, start by selecting a pair that fits well.
Mark your desired length with washable markers, usually around 4-9 inches. Cut just below the mark, ensuring both legs are even.
For a distressed look, make small horizontal cuts along the hem. Wash the shorts to encourage fraying.
Finally, you can cuff the hem for a polished finish or secure it with stitches for added durability. Enjoy your new look!
How to Turn Pants Into Shorts Without Sewing?
You won't believe how easy it's to transform those old pants into fabulous shorts without touching a needle!
Start by laying them flat and measuring about 8-9 inches from the bottom. Grab sharp scissors and snip straight across, cutting just below your mark for a perfect fray.
Want a distressed vibe? Make small cuts to enhance the look.
Finally, wash them to release that stylish, carefree aesthetic—your summer wardrobe just got an upgrade!
How Do You Upcycle an Old Pair of Jeans?
To upcycle an old pair of jeans, start by laying them flat and measuring your desired length. Cut just below this mark to allow for fraying.
You can add character by distressing the fabric with horizontal cuts and pulling out threads. Once you've achieved the look you want, fold the hem for a neat finish or leave it raw for a relaxed vibe.
Finally, wash them to enhance the frayed effect and enjoy your new creation!
What to Make With Old Jeans No Sew?
You can create a variety of no-sew projects with old jeans! Consider making a denim tote bag by cutting and tying the edges together.
You could also craft braided bracelets using strips of denim; just cut the fabric into thin pieces and braid them for a trendy accessory.
If you're feeling creative, try making coasters by cutting circles from the fabric and using fabric glue to hold them together for a rustic touch.
Conclusion
As you slip into your new shorts, take a moment to appreciate your handiwork. Each cut and fray tells a story of transformation, but what happens next? Will you wear them proudly to a summer gathering or let them languish in the back of your closet? The choice is yours—but remember, every piece of clothing has the potential to spark joy and conversation. So, what will you do with your next upcycled creation? The journey's just begun.