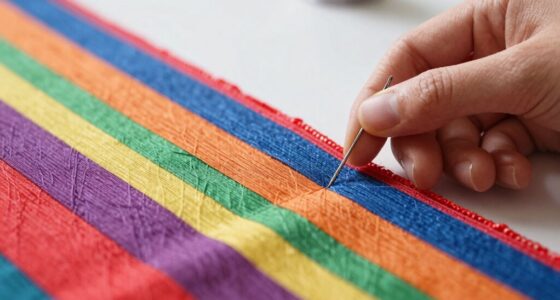

To master twin-needle hems without tunneling, start by choosing the right needle width for your fabric—narrow for lightweight and wider for heavier materials. Fine-tune your tension and stitch length, usually around 3.0–3.5mm, and test on scrap first. Use a stabilizer if needed and handle the fabric steadily to prevent puckering. With proper setup and patience, you’ll achieve smooth, professional hems every time—keep going, and you’ll discover more tips to perfect your technique.
Key Takeaways
- Select the appropriate twin needle width and fabric-specific needle type for clean, even stitches.
- Adjust tension slightly lower and increase stitch length to prevent tunneling and puckering.
- Use a stabilizer or interfacing on lightweight fabrics to maintain fabric stability during sewing.
- Test settings on scrap fabric before sewing the actual hem to find optimal tension and stitch length.
- Maintain steady fabric feed with the correct presser foot and avoid pulling or pushing the fabric.

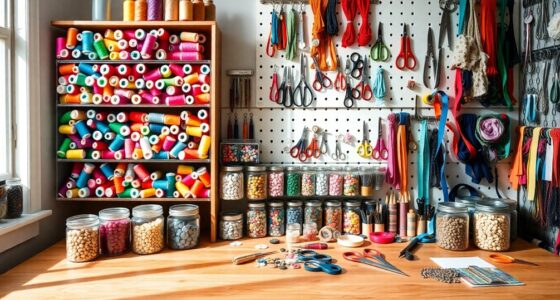
Creating professional-looking hems is easier than you might think, especially when you master the twin-needle technique. When you’re working with different fabric types, understanding how they interact with your sewing machine settings is key to achieving smooth, even stitches without tunneling. Whether you’re hemming lightweight cottons or thicker denim, knowing how to adjust your machine properly will make a noticeable difference.
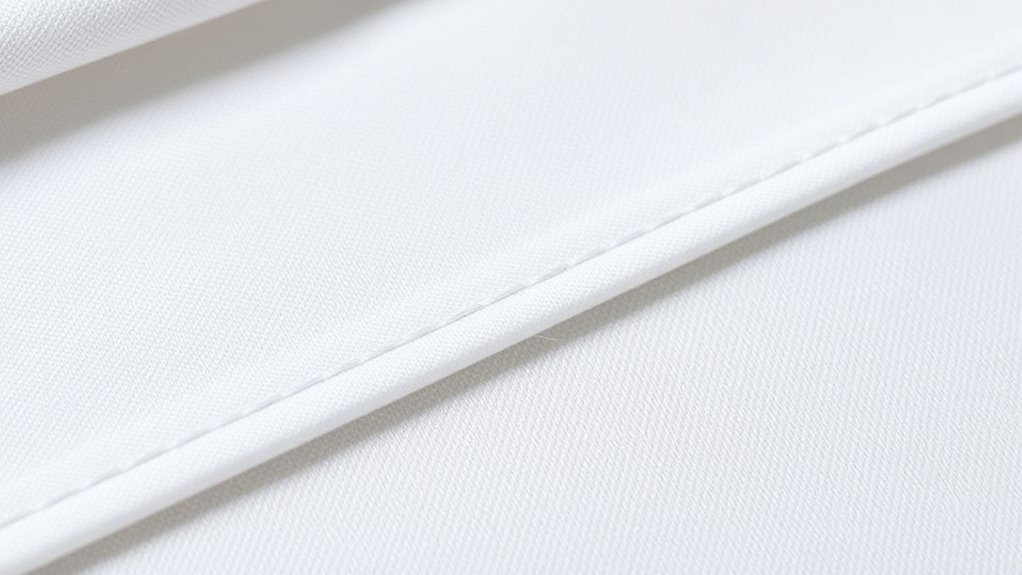
Start by selecting the right twin needle for your project. The width of the twin needle determines the distance between the two parallel stitches, so pick one suited to your fabric and desired look. For lightweight fabrics like chiffon or linen, a narrower twin needle works best, while heavier fabrics such as canvas or denim may require a wider needle. Once you’ve got the correct needle, focus on your sewing machine settings. Set your stitch length to a slightly longer setting—around 3.0 to 3.5mm—to allow the fabric to feed evenly and prevent tunneling. Use a straight stitch with the twin needle, and ensure your tension is adjusted properly; typically, reducing the tension slightly helps prevent puckering and tunneling.
Choose the right twin needle and adjust your machine settings for smooth, professional hems.
Next, choose the right presser foot—often a standard or even a walking foot can help maintain consistent fabric feeding, especially with thicker or slippery fabrics. Before starting your hem, do a test run on scrap fabric similar to your project. This allows you to fine-tune your sewing machine settings, especially the tension and stitch length, to prevent tunneling and puckering. During sewing, keep a steady, gentle pressure on the fabric, guiding it smoothly through the machine without pulling or pushing, which can cause uneven stitches or tunneling.
If you notice tunneling occurring, don’t panic. Adjust your tension or increase the stitch length slightly, and check that your fabric is feeding evenly. Sometimes, using a stabilizer or interfacing can help stabilize lightweight fabrics and reduce tunneling. Remember, patience is essential—taking a few extra moments to test and calibrate your machine will pay off with a professional-looking hem.
Mastering twin-needle hems without tunneling is a skill that improves with practice. By understanding your fabric types and adjusting your sewing machine settings accordingly, you’ll find that creating clean, durable hems becomes second nature. The key is in the details: choosing the correct needle, setting the right tension, and maintaining steady fabric feed. Additionally, fabric stability plays a crucial role in preventing tunneling and ensuring even stitches. With these tips, you’ll produce polished hems that look professionally finished every time, elevating your sewing projects to a whole new level.

SINGER Home Décor Presser Foot Kit | Includes Piping, Bias Binder & Ruffler Attachment | Perfect for Tailored Finishes, Bias Binding & Pleating | Compatible with SINGER Sewing Machine
PROFESSIONAL HOME DECOR FINISH: Elevate your sewing experience with this versatile presser foot kit, designed to give your...
As an affiliate, we earn on qualifying purchases.
Frequently Asked Questions
Can Twin-Needle Hems Be Used on Stretchy or Delicate Fabrics?
You can use twin-needle hems on stretchy or delicate fabrics if you focus on fabric stabilization and needle compatibility. To prevent tunneling, stabilize the fabric with lightweight fusible interfacing or stabilizers. Choose needles designed for delicate or stretch fabrics, such as stretch twin needles, to guarantee smooth stitching. Proper tension adjustments also help achieve clean, even hems without damaging the fabric, making twin-needle hemming a viable option for delicate materials.
What Are the Common Mistakes to Avoid When Sewing Twin-Needle Hems?
Imagine sewing as a dance—mistakes can trip you up. When working with twin-needle hems, avoid common pitfalls like neglecting fabric tension, which can cause puckering or tunneling. Always choose the right needle for your fabric; using the wrong one leads to skipped stitches or damage. Keep your tension balanced and test on scrap fabric first. With care, your hems will glide smoothly, like a well-choreographed performance.
How Do I Choose the Right Twin Needle for Different Fabrics?
When choosing the right twin needle, consider your fabric’s stretch and the fabric weight. For lightweight or stretchy fabrics, opt for a smaller needle size, like 75/11 or 70/10, to prevent damage and tunneling. For thicker or woven fabrics, go for larger sizes, such as 90/14. Always match your needle size to your fabric’s stretch and weight to guarantee clean, professional-looking hems without tunneling or puckering.
Is Special Machine Adjustment Needed for Twin-Needle Hemming?
When twin-needle hemming, you typically need to make tension adjustments to guarantee even stitches and prevent puckering. You also should choose the correct presser foot to accommodate the twin needles and fabric thickness. Some machines might require specific adjustments, like changing the stitch width or needle position, but generally, focusing on tension and presser foot selection helps you achieve professional-looking hems without tunneling.
Can Twin-Needle Hems Be Done on a Regular Home Sewing Machine?
Think of your home sewing machine as a trusty steed ready for a new adventure. Yes, you can do twin-needle hems on it, but first, check your machine compatibility. You’ll need to do a twin needle setup, adjusting the stitch width and tension. While some machines handle this easily, others may need special adjustments. So, verify your machine is compatible and follow the right setup for smooth, professional-looking hems.

SINGER® Heavy Duty 4452 (Grey) High Speed Sewing Machine + Accessories | 32 Built-In Stitches Deliver 110 Stitch Applications | 50% More Power for Thick Fabrics, 1100 Stitches/Min, 1-Step Buttonhole
ENHANCED PIERCING POWER: Stronger motor provides more power for sewing multiple layers and thicker fabrics.
As an affiliate, we earn on qualifying purchases.
Conclusion
Now that you’ve uncovered the secrets to mastering twin-needle hems, you’re equipped to turn raw fabric into a polished masterpiece. With each careful stitch, you’ll weave confidence into your sewing, transforming simple hems into silent works of art. Like a skilled artist shaping their canvas, you hold the power to create flawless finishes that whisper professionalism. So go ahead—sew with purpose, and let your stitches sing a song of craftsmanship and pride.

SINGER Heavy Duty 4432 (Grey) High Speed Sewing Machine +Accessory Kit | 32 Built-In Stitches Deliver 110 Stitch Applications | 50% More Power for Thick Fabrics, 1100 Stitches/Min, 1-Step Buttonhole
HEAVY DUTY METAL FRAME: Adds stability and provides long lasting durability
As an affiliate, we earn on qualifying purchases.

SINGER® Heavy Duty 4411 (Grey) High Speed Sewing Machine + Accessories | 11 Built-In Stitches Deliver 69 Stitch Applications | 50% More Power, 1100 Stitches/Min | Metal Frame, 4-Step Buttonhole
POWERFUL FOR TOUGH FABRICS: With 50% more power, the SINGER Heavy Duty 4411 is built to handle tough...
As an affiliate, we earn on qualifying purchases.