
To remove embroidery with backing at home in 2025, start by gathering a seam ripper, tweezers, and a lint roller. Turn your garment inside out and carefully cut the embroidery threads with the seam ripper. Use tweezers to pull out any leftover bits. Afterward, check both sides for remnants and clean up any debris. Confirm your fabric is intact before considering any future embroidery projects. There's more important information to help you through this process.
Key Takeaways
- Turn the garment inside out to access the embroidery backing and minimize fabric damage during removal.
- Use a seam ripper to cut threads carefully, ensuring to remove both top and bobbin threads.
- If applicable, carefully remove any stabilizer used in the embroidery to prevent altering the fabric.
- Utilize a lint roller or tape to clean up any residual threads and debris after removal.
- Inspect the fabric post-removal with a magnifying glass to ensure no leftover threads or stabilizer remains.
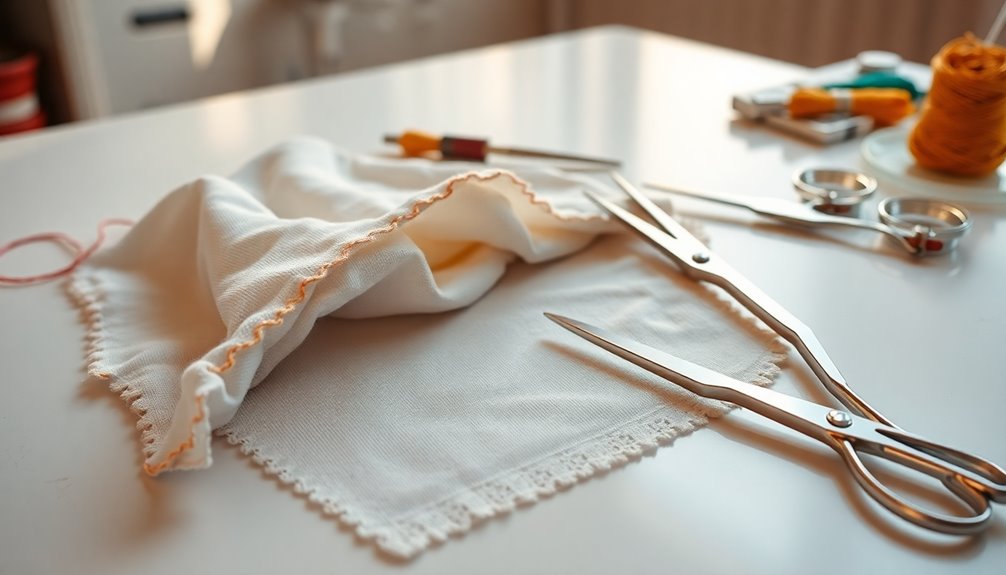
Tools Required for Embroidery Removal
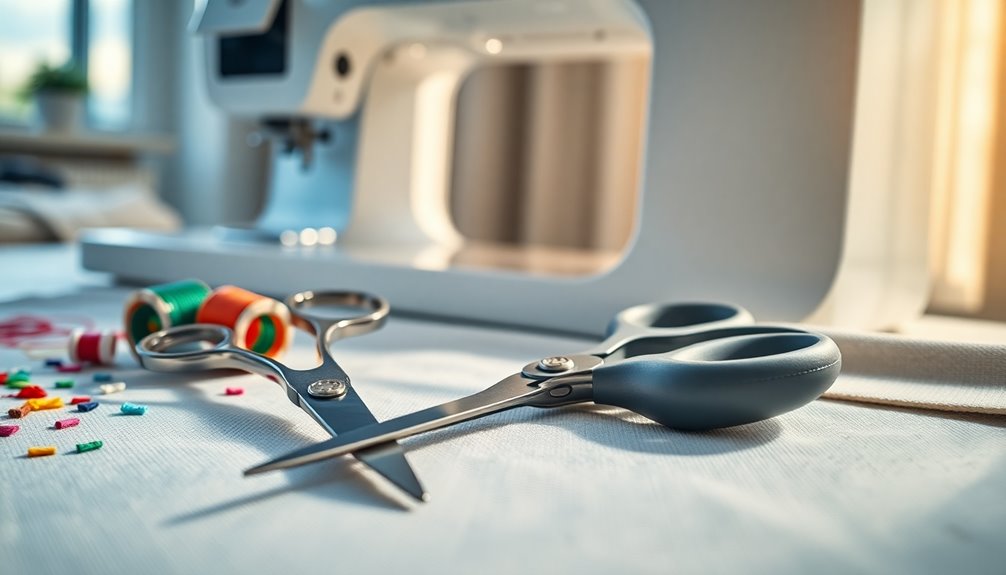
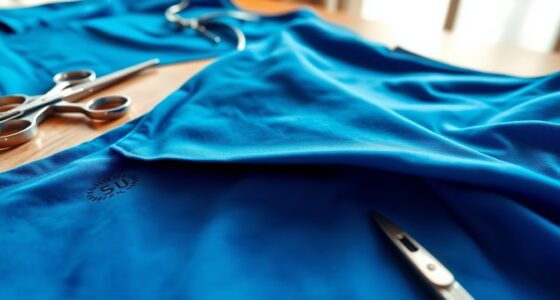
When you're ready to tackle embroidery removal at home, having the right tools on hand makes all the difference. A seam ripper, typically around $5, is essential for safely cutting and removing stitches without damaging your fabric.
For a quicker approach, consider using a stitch eraser or hair trimmer, which effectively clips threads beneath the embroidery.
Once you've removed the main embroidery, tweezers or fabric scissors help pick up any leftover threads. A magnifying glass can assist in spotting those stubborn bits that may be hard to see.
Finally, to clean up the remaining threads, grab a lint roller or some tape to gather and dispose of any debris, ensuring your garment looks pristine.
Preparing Your Garment for the Process
Before you plunge into removing the embroidery, it's crucial to prepare your garment properly.
Start by turning it inside out; this gives you easier access to the back side, helping you avoid damaging the front during the process.
Take a little bit of time to identify any stabilizer used in the embroidery and carefully remove it with a seam ripper—this prevents ripping into the fabric.
Lay the garment flat to minimize wrinkles and provide a smooth working area.
Gather all necessary tools, including your seam ripper, tweezers, and a lint roller, so you're fully equipped.
Finally, inspect the embroidery closely; knowing its structure will guide you in removing an embroidery effectively.
I'm going to help you through this!
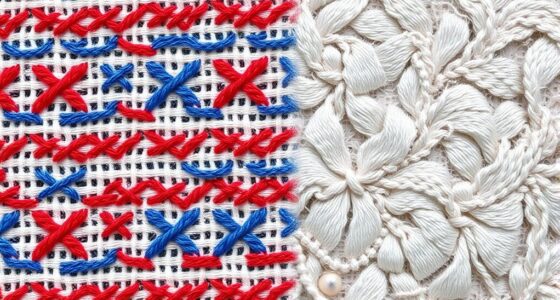
Understanding the Structure of Embroidery

To effectively remove embroidery, you need to understand its structure.
The front side showcases the vibrant design while the back holds the bobbin threads, which are essential for removal.
Recognizing these components will help you use the right tools and techniques, ensuring you don't damage your fabric.
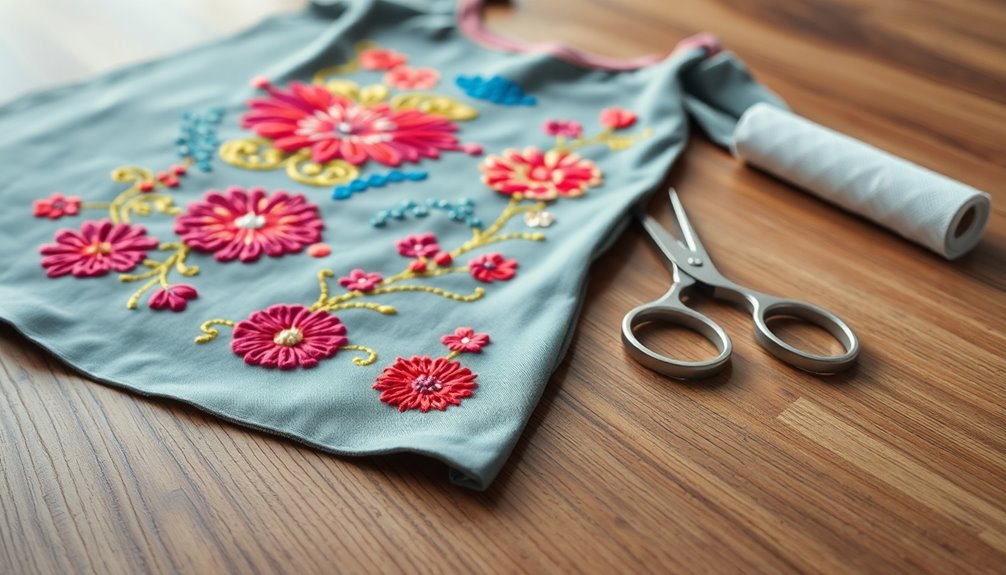
Front Side Overview
Understanding the front side of embroidery is essential for effective removal, as it showcases the vibrant colors and intricate designs achieved through various stitching techniques. This side is where you'll see the artistry of the embroidery, often featuring different thread types and patterns that create a visually appealing effect.
When removing embroidery, you need to recognize how these top stitches hold the design in place along with the stabilizer backing. A careful approach allows you to identify the right spots to cut, ensuring you won't damage the underlying fabric.
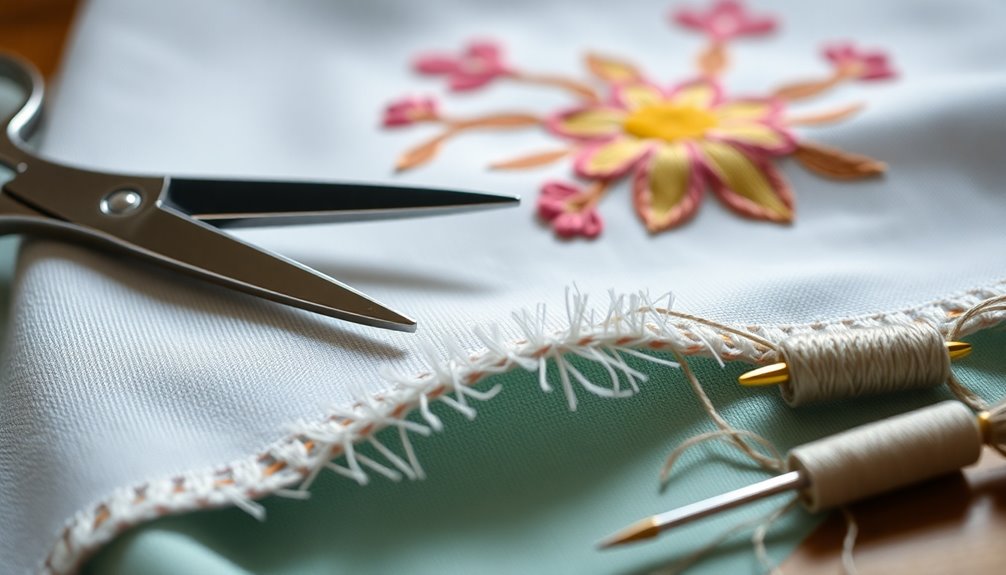
Bobbin Thread Function
The bobbin thread plays an essential role in embroidery, acting as the foundation that supports the top thread and creates the overall design. This lower thread interlocks with the top thread, providing stability and structure to your stitching.
Typically made from strong, durable materials, the bobbin thread withstands the tension during the embroidery process, ensuring your design remains intact. You'll notice that it often differs in color or density from the top thread, impacting the appearance on both sides of the fabric.
Understanding the bobbin thread's function is important for effective embroidery removal, as it helps you identify which threads to cut. Proper tension is critical, too, preventing puckering or distortion during both application and removal.
Stabilizer Importance Explained
Stabilizers are the unsung heroes of embroidery, providing essential support to your fabric during the stitching process. They prevent distortion and help your design maintain its shape.
You'll find various types, like tear-away, cut-away, and water-soluble, each tailored to different fabrics and techniques. Choosing the right stabilizer is important; using the wrong one can lead to puckering or thread breakage, ruining your project.
Some stabilizers are temporary, designed to be removed after stitching, while others are permanent, staying with the fabric for added support. Butter's role in traditional baking can be likened to the function of stabilizers, as both provide essential support and enhance the final outcome.
Understanding their role is significant, especially when it comes to removing embroidery without damaging the underlying fabric. So, always consider your stabilizer choice for the best results!
Step-by-Step Guide to Using a Seam Ripper

Using a seam ripper can make removing embroidery a breeze if you follow these steps carefully.
Start by turning your garment inside out to access the stitching from the back. This gives you better visibility and control.
Gently insert the sharp end of the seam ripper beneath the embroidery threads, cutting a few threads at a time to avoid damaging the fabric.
Use the rubber tip of the seam ripper to lift the cut threads away, making cleanup easier.
Work patiently, flipping the garment to check your progress, ensuring you don't accidentally cut into the fabric.
After you've removed the embroidery, use tweezers or small scissors to extract any lingering threads for a thorough finish.
Efficient Techniques With a Stitch Eraser

If you're looking to remove embroidery quickly and efficiently, a stitch eraser is your best bet.
This tool not only saves you time but also minimizes the risk of damaging your fabric.
Let's explore the benefits and how to use it step-by-step for a clean finish.
Benefits of Stitch Eraser
While traditional methods like seam rippers can be tedious, a stitch eraser streamlines the process of removing embroidery with impressive efficiency. This electronic tool grabs and clips threads swiftly, making it perfect for high-quality, machine-made designs.
You'll find that it drastically reduces the time and effort required compared to seam rippers. Plus, it's versatile enough to handle various embroidery styles, and if you're looking for a budget-friendly option, a hair trimmer can serve as a substitute. Additionally, using a high refresh rate can enhance your overall embroidery removal experience, ensuring precision and speed.
Just remember to pull the fabric tight and work from the outside in for the best results. After using the stitch eraser, inspect your garment closely and use tweezers and lint rollers to guarantee a polished finish.
Step-by-Step Usage Guide
To effectively remove embroidery with a stitch eraser, start by turning your garment inside out. This way, you can easily access the embroidery backing and identify the threads to be removed.
Next, pull the fabric taut and use the stitch eraser to clip threads without damaging the fabric, working from the outside in. Focus on shaving over the stitches, specifically targeting the bobbin threads to loosen the design.
Once you've cut the main threads, use tweezers to meticulously extract any remaining pieces embedded in the fabric.
Finally, check your garment for leftover threads and clean up any debris with a lint roller or tape before washing, ensuring your fabric looks pristine and ready to wear again.
Cleaning Up After Removing Embroidery

Once you've successfully removed the embroidery, it's essential to clean up any leftover threads or debris to restore your fabric's appearance.
Start by using a lint roller, clothing brush, or tape to pick up stray threads. For embedded threads that may remain, grab tweezers or small fabric scissors to extract them carefully.
Don't forget to inspect the garment thoroughly, both front and back, ensuring all remnants of embroidery and backing are gone before washing. You might find small pieces of thread that can typically be washed out during laundering.
After washing and drying, do a final inspection to confirm the complete removal of the embroidery and check the garment's condition for future use.
Inspecting the Garment for Remaining Threads

After you've removed the embroidery, it's essential to inspect the garment for any leftover threads.
Use a magnifying glass to check the areas closely, and run your fingers over the fabric to feel for any uneven spots.
This thorough inspection will help guarantee your garment stays in great shape without any remnants of the design.
Visual Thread Inspection
As you finish removing the embroidery, it's essential to inspect the garment for any remaining threads, since some may be hidden within the fabric.
Start by checking both the front and back carefully. A magnifying glass can help you spot those small, stubborn threads that mightn't be visible to the naked eye.
Gently run your fingers over the area to feel for any leftover strands that could cause irritation or snagging later. To pick up any loose threads, use a lint roller or tape; these tools are effective and won't damage the fabric.
Finally, conduct a thorough inspection after washing and drying your garment to verify that all threads have been removed, as some may loosen during the process.
Fabric Integrity Check
Inspecting the garment for remaining threads is an essential step in guaranteeing the fabric's integrity after removing embroidery.
First, hold the garment up to a light source to spot any leftover threads or stabilizer. A magnifying glass can help you closely examine areas where the embroidery was, as small threads might blend in.
Gently run your fingers over the fabric to feel for any bumps that could indicate remnants.
After washing the garment, check again, as residual threads may become more noticeable once the fabric dries.
To catch any small leftover threads dislodged during washing, consider using a lint roller or tape.
This thorough inspection guarantees your fabric remains smooth and intact.
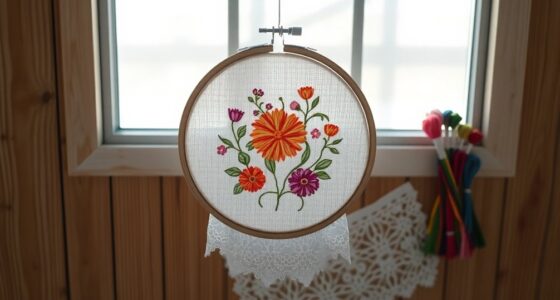
Tips for Re-Embroidering or Patching
When you're ready to re-embroider or patch your fabric, make certain it's clean and free of any leftover threads to create an ideal surface for your new design.
Choose an embroidery patch that matches the fabric type and color for a seamless, professional look. Before applying the patch, reinforce the area with interfacing to provide stability and prevent future damage.
Using high-quality embroidery thread suitable for the fabric is essential for durability and colorfastness. Always test your embroidery technique on a scrap piece of fabric first. This step helps you avoid mistakes and guarantees your design turns out beautifully.
With these tips, you can confidently refresh your fabric and bring new life to your garment.
Maintenance of Tools for Future Use

To keep your embroidery removal tools in top shape, it's crucial to maintain them regularly. Clean your seam ripper and stitch eraser often to prevent residue buildup, guaranteeing they function effectively.
Store your tools in a dry place, and protect sharp edges to maintain cutting efficiency and prevent accidents. For electrical tools like stitch erasers, inspect the cord for wear and tear, replacing any damaged components for safety.
Sharpen your tweezers and fabric scissors periodically to enhance precision in removing leftover threads.
Finally, keep a small container or pouch dedicated to your embroidery tools to prevent loss and guarantee easy access for future projects.
With proper maintenance, your tools will serve you well for years to come.
Final Thoughts on Embroidery Removal

Although removing embroidery can seem challenging, with the right tools and techniques, you can achieve a clean finish at home. To begin, it’s essential to gather the necessary tools, such as a seam ripper, scissors, and tweezers, to make the process easier. Start by carefully snipping the threads around the embroidered area, taking your time to avoid damaging the fabric. If you’re unsure about the process, there are plenty of online tutorials that demonstrate how to remove embroidery from scrubs, providing step-by-step guidance for a successful outcome.
Start by turning your garment inside out to easily access the backing without damaging the front fabric. Use a seam ripper or stitch eraser to cut through the embroidery threads carefully.
Once you've removed the threads, tweezers can help you extract any leftover pieces, while a lint roller or tape can eliminate remaining debris.
Regularly inspect your progress to verify all threads and stabilizers are addressed.
Afterward, check for any stubborn remnants and consider options for re-embroidering or patching, enhancing your garment's longevity and overall appearance.
Happy crafting!
Frequently Asked Questions
How to Remove Embroidery That Has a Backing?
To remove embroidery with backing, start by turning the garment inside out.
Grab a seam ripper and carefully cut away the stabilizer backing, taking care not to damage the fabric.
Use a razor to gently shave over the stitches, cutting the bobbin threads.
Slowly, pick out any remaining threads with tweezers, then clean up loose pieces with a lint roller or tape.
Finally, wash and dry the garment to check for any leftover threads.
Can Embroidery Be Removed Without Damage?
Yes, you can remove embroidery without damaging the fabric, but it requires patience and care.
Start by turning the garment inside out to access the stitches. Use a seam ripper or stitch eraser to gradually cut the threads, taking your time to avoid snags.
Once you're done, check for any leftover threads and use a lint roller or tape to pick them up.
This method guarantees your fabric stays intact and undamaged.
How Do You Remove Embroidery From Clothes at Home?
To remove embroidery from clothes at home, start by turning the garment inside out.
Use a seam ripper to carefully lift and cut the threads, tackling a few at a time to avoid damage. If you have a stitch eraser, that can speed things up.
Afterward, remove any leftover threads with tweezers or fabric scissors, and use a lint roller to pick up loose fibers.
Finally, inspect the garment to guarantee you've removed everything.
Should Embroidery Backing Be Removed?
You've got to remove that embroidery backing like it's the world's most stubborn stain!
Yes, you should definitely remove it. Leaving it in can make your fabric feel stiff and uncomfortable, trapping heat and moisture.
Plus, it can leave those pesky outlines that ruin the look of your garment.
Conclusion
Removing embroidery can feel like untangling a web, but with the right tools and techniques, you can reclaim your garment's canvas. As you engage in this process, remember, it's not just about the removal; it's about rediscovering the potential of your fabric. Whether you're reimagining a design or patching a beloved piece, each stitch tells a story. So grab your seam ripper and let your creativity flow—your fabric's next chapter awaits!