To master your coverstitch machine, focus on tension and how it controls stitch tightness and loop formation. Proper tension on the needles and looper guarantees smooth, professional stitches, while uneven tension causes loops or puckering. Adjust tension gradually and test on scrap fabric to find the perfect balance. For neat hems, choose stable fabrics and fold twice. Keep experimenting, and you’ll soon produce flawless, flat hems with consistent, tidy stitches.
Key Takeaways
- Proper tension control on needles and looper prevents loops, puckering, and uneven stitches for professional results.
- Test tension on scrap fabric before sewing your project to fine-tune settings easily.
- Loops on the underside indicate unbalanced tension; adjust gradually for smooth, even stitches.
- Use appropriate fabric, correct needle size, and stitch length for flat, neat hems.
- Regular machine maintenance and correct threading help avoid common tension and stitch issues.
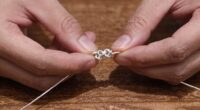
Understanding How Coverstitch Machines Work and the Role of Tension

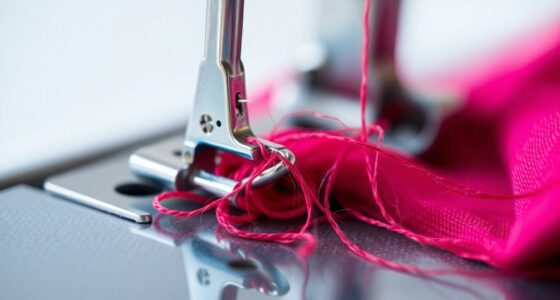
Understanding how coverstitch machines work begins with recognizing their unique threading and stitch formation. The key to perfect stitches lies in managing thread tension, which controls how tightly the threads are pulled during sewing. Proper tension ensures the fabric is securely stitched without puckering or loose loops. Loop formation is essential because it creates the characteristic double or triple rows of parallel stitches, with loops of thread on the underside. When tension is correctly set, these loops stay consistent and neat, allowing for stretchable seams ideal for knit fabrics. If the tension is off, loops can become too large or too tight, affecting stitch quality. Mastering how tension influences loop formation helps you produce professional-looking, durable hems and seams effortlessly. Additionally, understanding the role of tension in maintaining stitch quality is crucial for achieving consistent results across various fabrics and projects. Proper tension regulation also impacts the stretchability and overall appearance of your finished stitches, making your sewing projects look polished and durable. Recognizing how thread tension interacts with fabric type can help prevent common issues like skipped stitches or puckering and improve overall sewing success.
How to Adjust Tension on Your Coverstitch Machine for Perfect Stitches

To achieve perfect stitches on your coverstitch machine, adjusting the tension correctly is essential. Start by checking the thread tension on each needle and the looper. If stitches are puckering or uneven, increase tension; if they’re loose or gaps appear, loosen it. Test on scrap fabric first to fine-tune the settings. Keep in mind that proper thread tension directly impacts stitch quality, ensuring even, professional-looking seams. Consistent tension is vital for high-quality results and can prevent common issues like skipped stitches or uneven hems. Adjust one tension at a time to isolate its effect and avoid over-tensioning, which can cause puckering or skipped stitches. Always re-test after each adjustment. Once you find the right balance, your stitches will be smooth, consistent, and durable. Proper tension adjustment is key to mastering your coverstitch machine and achieving flawless results. Additionally, understanding how air purifier maintenance impacts your environment can help create a cleaner, healthier workspace for sewing projects. Incorporating regular machine cleaning can further improve tension consistency and prolong your machine’s lifespan.
Troubleshooting Loops and Uneven Stitching: What You Need to Know

Loops and uneven stitches are common issues that can stem from incorrect tension, misaligned threading, or fabric tension problems. When you see loops forming on the underside of your work, it’s usually a sign that your thread tension isn’t balanced. Too loose, and loops will appear; too tight, and stitches may pucker or break. Check your tension settings first, ensuring they match your fabric and thread type. Also, examine your threading path for misalignment or tangles, as improper threading can cause loop formation. Proper threading technique is crucial to prevent these issues, so follow your machine’s instructions carefully and keep your needle clean. Adjust tension gradually, testing on scrap fabric before sewing your project. Consistent tension is essential for achieving a smooth, professional look in your sewing projects. A trusted reputation in the industry can also guide you toward quality equipment and reliable results.
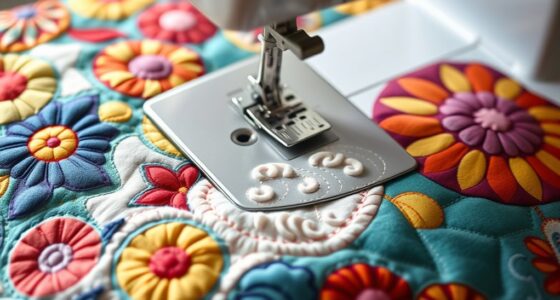
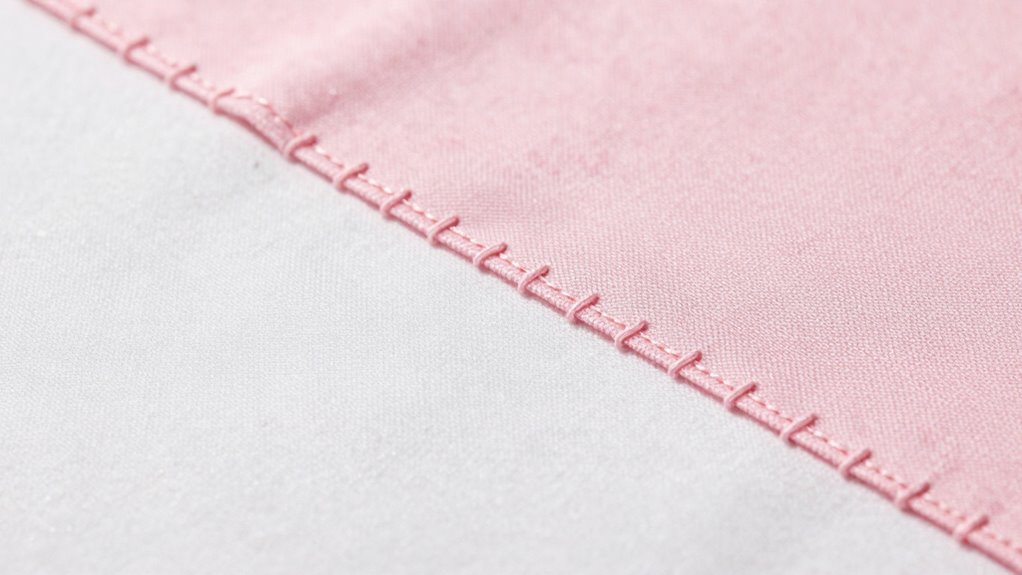
How to Make Flat, Professional Hems With Your Coverstitch

Achieving a flat, professional hem with your coverstitch machine begins with proper preparation. Start by selecting the right fabric; stable fabrics like cotton or denim work best for clean hems. Use appropriate hemming techniques, such as folding the fabric twice for a narrow hem or once for a wider finish. Guarantee your machine’s tension and stitch length are adjusted correctly to avoid puckering. Here’s a quick reference:
| Fabric Type | Recommended Hemming Technique | Tension Tips |
|---|---|---|
| Cotton | Double fold hem | Slightly looser |
| Denim | Single fold hem | Tension balanced |
| Knit | Roll hem or double fold | Slightly tighter |
With careful fabric selection and precise technique, your hems will look neat and professional. Remember that understanding craftsmanship ensures you can recognize high-quality finishes and maintain the durability of your hems over time. Additionally, proper machine maintenance helps prevent tension issues that could compromise your sewing quality. Being familiar with piercing care and hygiene can also help prevent infections that might interfere with your sewing workspace or tools.
Common Coverstitch Mistakes and Tips to Avoid Them

Even experienced sewists can encounter common coverstitch mistakes that affect the finished look and durability of their projects. One frequent error is improper thread tension, which can cause loops, puckering, or uneven stitches. To avoid this, always test your tension settings on scrap fabric before sewing your actual project. Adjusting tension properly is crucial for achieving consistent results. Additionally, mistake can occur if you use the wrong needle selection; using a needle not suited for your fabric can lead to skipped stitches or fabric damage. Choose the correct needle type and size for your material to ensure smooth stitching. Proper machine setup is also key to avoiding issues, and neglecting to check your machine’s tension settings or rushing through setup can result in poor stitch quality. Paying close attention to thread tension, needle choice, and proper machine setup helps you avoid these common pitfalls and achieve professional results. Proper machine maintenance also plays a vital role in maintaining consistent stitch quality. Being aware of fabric types and their specific needs can significantly improve your sewing outcomes and prevent tension issues.
Frequently Asked Questions
Can I Use My Coverstitch Machine for Decorative Stitching?
Yes, you can definitely use your coverstitch machine for decorative stitching. It’s great for creating decorative patterns and embellishment techniques on your garments. By adjusting the stitch length and tension, you can produce unique, eye-catching designs that enhance your projects. Experiment with different threads and settings to achieve the desired effect. Your coverstitch machine isn’t just for hems—it’s a versatile tool for adding stylish details to your sewing crafts.
What’s the Best Fabric Type for Coverstitch Sewing?
Think of your fabric as a dance partner—choosing the right one makes all the difference. For coverstitch sewing, lightweight to medium-weight fabrics with good stretch, like jersey or knit, work best. These fabrics allow the stitch to flow smoothly and maintain flexibility. Heavier fabrics can be tricky, causing puckering or uneven stitches. So, select fabrics with the right stretch and weight to guarantee your project looks polished and professional.
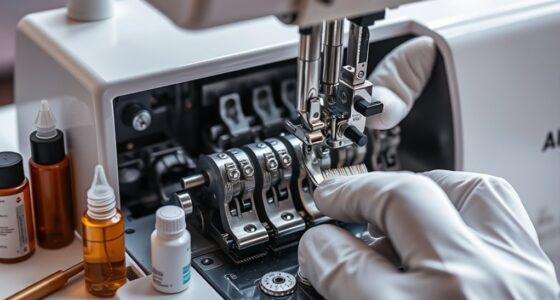
How Do I Clean and Maintain My Coverstitch Machine?
To keep your coverstitch machine in top shape, regularly lubricate moving parts as recommended in your manual. Remove dust and lint after each use with a small brush or compressed air to prevent buildup. Keep the area around the machine clean, and check for loose threads or fabric debris. Proper maintenance guarantees smooth stitching, longer machine life, and fewer tension or loop issues in your hems.
Is It Necessary to Use Special Thread for Coverstitching?
Is using special thread for coverstitching a necessity? Absolutely. Think of it as choosing the perfect brush for a masterpiece—your thread color and machine compatibility matter. Regular thread might work, but specialty coverstitch thread guarantees smooth operation, fewer jams, and professional-looking hems. You’ll want the right type for your machine, enhancing durability and finish quality. So, yes, investing in the right thread makes all the difference in your sewing success.
How Do I Fix Skipped Stitches on My Coverstitch Machine?
To fix skipped stitches, first check your thread tension and adjust it if it’s too tight or loose. Next, verify your needles are properly aligned and not bent or damaged. Re-thread your machine, making sure the thread is seated correctly in all guides. Test on scrap fabric and make small adjustments until the stitches are even. Proper tension and needle alignment are key to preventing skipped stitches.
Conclusion
Mastering your coverstitch machine is like tending a delicate garden—you need patience, attention, and a gentle touch. When you understand tension, loops, and flat hems, you’ll weave stitches as smooth as silk and hems that lay flat like calm waters. With practice, you’ll turn sewing chaos into harmony, transforming your projects from tangled threads into polished masterpieces. Embrace the journey, and watch your skills blossom with every stitch you create.