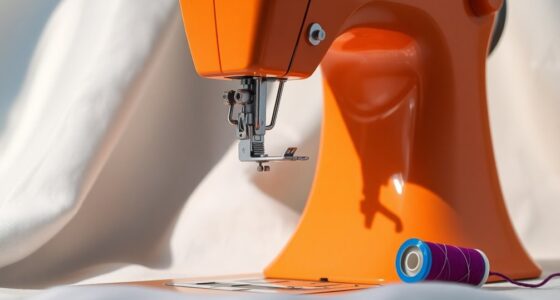

To make a sewing table insert, start by measuring your machine's dimensions for a snug fit. Create a template from sturdy material, allowing for unique contours. Cut the tabletop using a router for smooth edges and guarantee the depth matches your insert's thickness. Construct an insert box that matches your machine's size, securing it with brass inserts and screws. Finish with coats of lacquer for a polished look. There's more to discover about customizing your insert for functionality!
Key Takeaways
- Measure the sewing machine's dimensions accurately, including width, depth, height, and any protruding features for a snug fit.
- Create a template using sturdy material to outline the insert shape, accommodating any unique contours of the machine.
- Cut the tabletop for the insert using a router, ensuring smooth edges and a proper depth to match the acrylic thickness.
- Construct the insert box to match the machine dimensions, securing it with threaded brass inserts for stability and durability.
- Finish the insert by sanding the surface smoothly and applying multiple coats of lacquer or polyurethane for a polished look.

Brother Sewing Machine, XM2701, Lightweight Machine with 27 Stitches, 6 Included Sewing Feet
27 Unique built-in stitches: The XM2701 includes 27 built-in stitches including decorative, blind hem, zigzag, and stretch stitches...
As an affiliate, we earn on qualifying purchases.
Understanding Your Sewing Machine Dimensions

Before you start crafting your sewing table insert, it's important to measure your sewing machine's dimensions accurately.
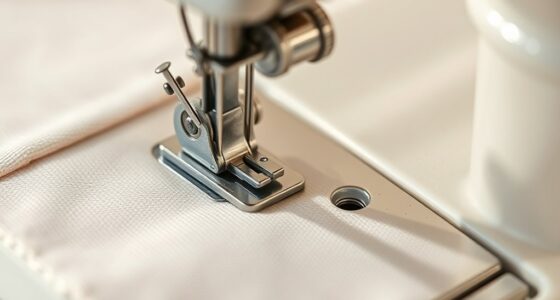
Begin by noting the width and depth of your machine's base, ensuring a snug fit in the table cutout. Most machines require a rectangular opening, so take measurements of the overall footprint and any added features, like a free arm.
Use a caliper or measuring tape to gauge the height from the table surface to make sure the insert allows your machine to sit flush with the tabletop.
Don't forget to account for any knobs or buttons that might protrude, as these will affect the cutout shape.
Always double-check your measurements; minor discrepancies can lead to an ill-fitting insert that disrupts your sewing experience.

Brother CS7000X Computerized Sewing and Quilting Machine, 70 Built-in Stitches, LCD Display, Wide Table, 10 Included Feet, White
70 UNIQUE BUILT-IN STITCHES: The Brother CS7000X sewing and quilting machine includes 70 built-in stitches including utility, decorative,...
As an affiliate, we earn on qualifying purchases.
Creating a Template for the Insert
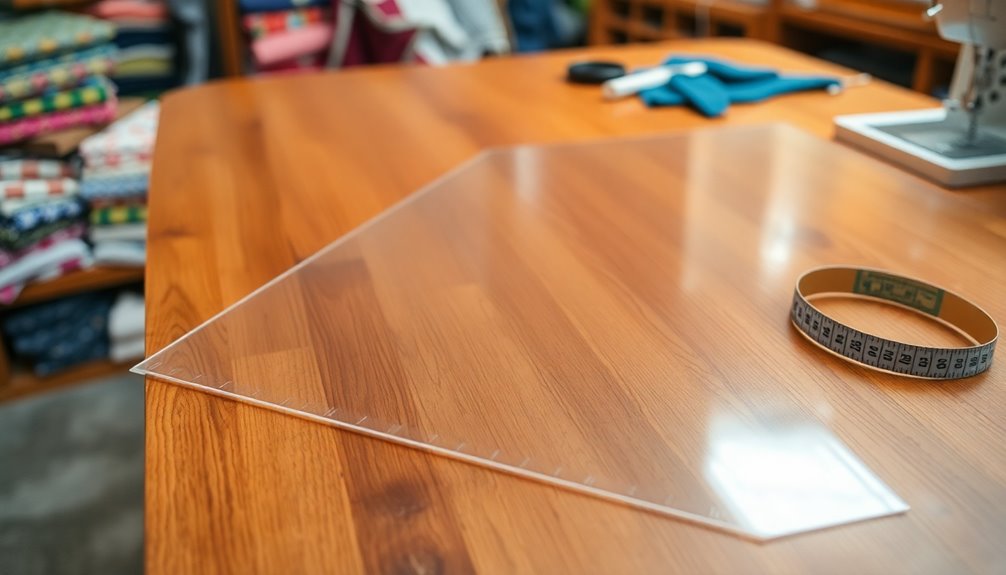
To create a precise template for your sewing table insert, start by measuring the dimensions of your sewing machine's base and free arm.
Choose a sturdy material, like cardboard or paper, to trace the machine's outline accurately.
This template will guarantee a snug fit in your table cutout, accommodating any unique contours.
Measuring Machine Dimensions
When you're ready to create a sewing table insert, measuring your machine's dimensions is essential for a perfect fit. Start by measuring the width, depth, and height of your sewing machine's base.
Use these precise measurements to create a template from cardboard or paper by tracing the outline of the base. Don't forget to mark any extra features, like the free arm or protruding parts, on the template to avoid interference with the acrylic insert.
Make sure the template is slightly larger than the actual dimensions to allow for a snug fit, considering the thickness of the acrylic material. Once finalized, double-check all measurements before using the template to mark the acrylic sheet, ensuring accuracy in your cutout.
Template Material Selection
After finalizing your measurements, selecting the right material for your template is key to guaranteeing a successful sewing table insert.
For effective template material selection, consider using hardboard or MDF. Both provide a sturdy and smooth surface that's easy to cut and shape to your sewing machine's specific dimensions. Ascertain your template extends slightly beyond the machine's footprint for added stability.
Use a jigsaw for rough cuts and a router to refine the edges for a flush fit. If your design requires features like a knee lift or cable entry, a jig will help maintain consistent hole placement.
Once you've cut the template, test the fit with your sewing machine in place, making adjustments as needed.

Brother Sewing and Quilting Machine, XR3774, 37 Built-in Stitches, Wide Table, 8 Included Sewing Feet
37 UNIQUE BUILT-IN STITCHES: The Brother XR3774 includes 37 built-in stitches including blind hem, decorative and quilting stitches...
As an affiliate, we earn on qualifying purchases.
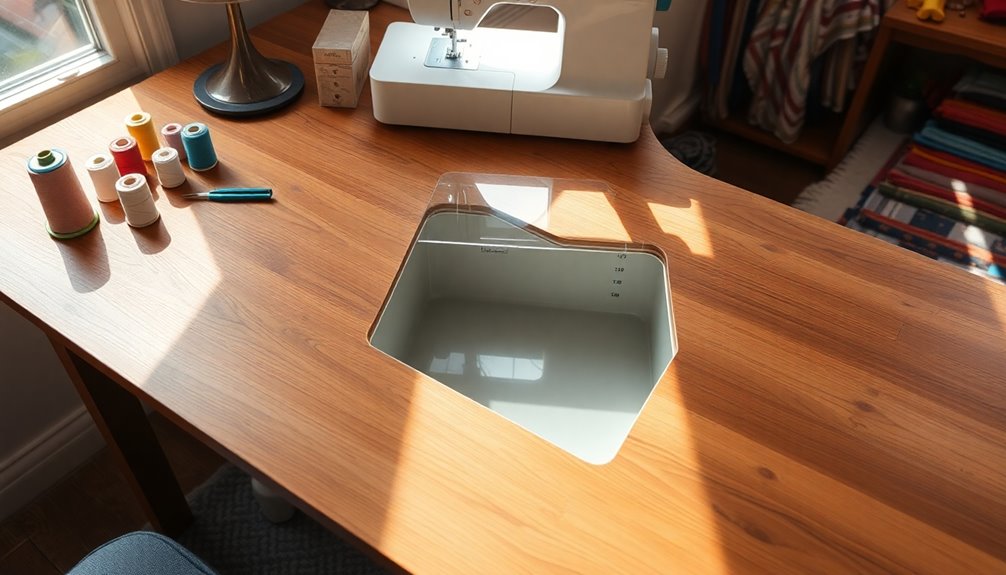
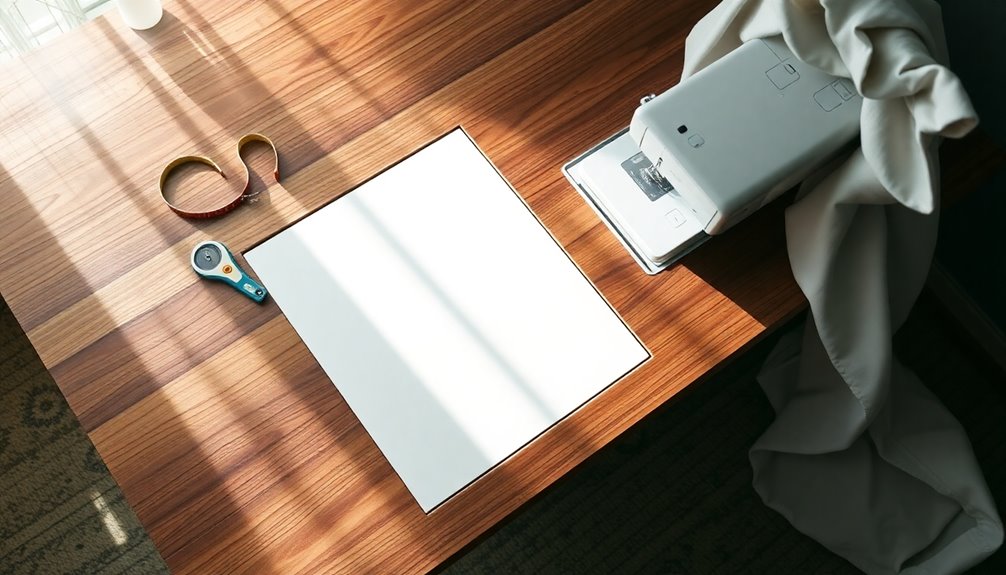
Cutting the Tabletop for the Insert

Creating a precise cutout for your sewing machine insert is essential for a seamless fit. Start by measuring your sewing machine bed to outline the dimensions needed for cutting the tabletop.
Using a router is ideal, as it creates smooth edges for the acrylic insert to fit flush with the table surface. Make a template from hardboard or cardboard to visualize your cut accurately.
Before you begin routing, drill pilot holes at each corner of the marked area; this helps guide the router and reduces splintering.
Once you've made the cut, don't forget to sand the edges to eliminate any roughness, ensuring the acrylic insert can be easily inserted and removed without snagging.

Brother XR9550 Sewing and Quilting Machine, Computerized, 165 Built-in Stitches, LCD Display, Wide Table, 8 Included Presser Feet, White
165 unique built-in stitches: The Brother XR9550 computerized machine includes 110 built-in utility, decorative and heirloom stitches including...
As an affiliate, we earn on qualifying purchases.
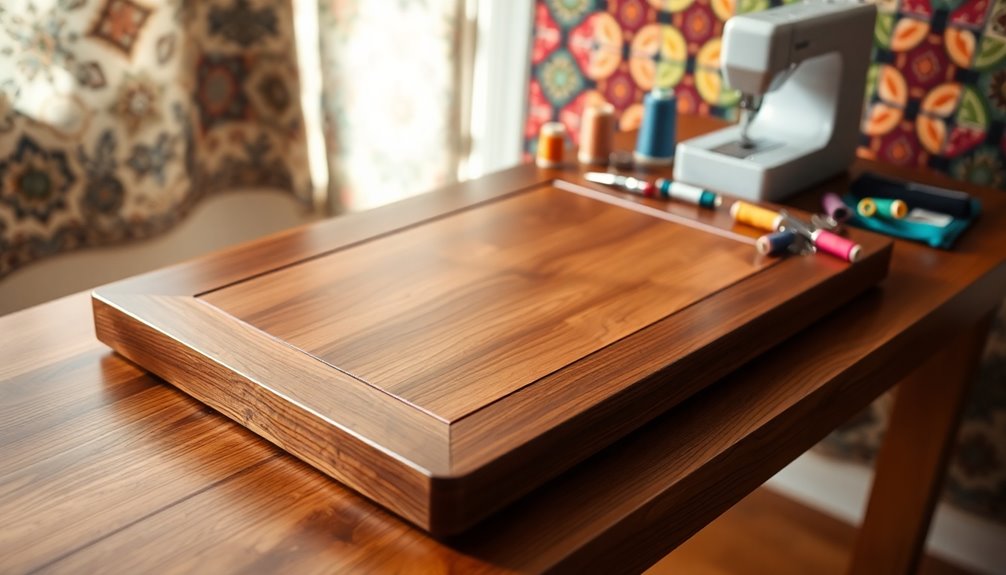
Constructing the Insert Box
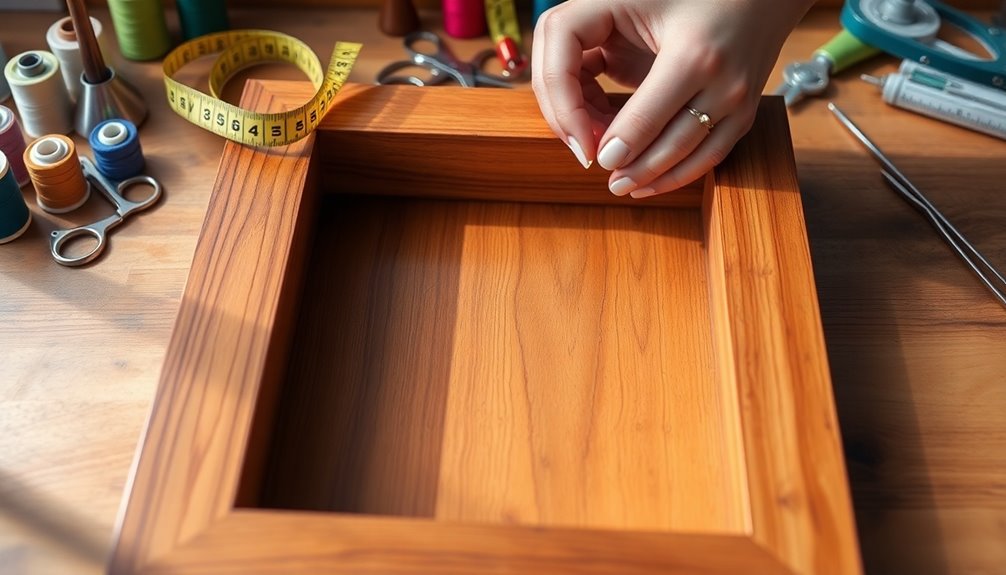
To guarantee your sewing machine insert fits perfectly, you'll need to construct an insert box that matches its dimensions. Typically, aim for around 18" x 8" and 2.375" deep internally.
Start by creating a template from hardboard, then make rough cuts with a jigsaw before using a router with a .75 roundover bit to shape the edges. This enhances safety and prevents snagging.
Once your insert box is cut to size, install threaded brass inserts for fastening. Use wood screws and t-nuts to secure stability.
Finally, finish the insert box by applying multiple coats of matte lacquer or polyurethane, sanding between coats for a smooth, professional appearance. Your insert box is now ready for use!
Securing the Insert Box to the Table
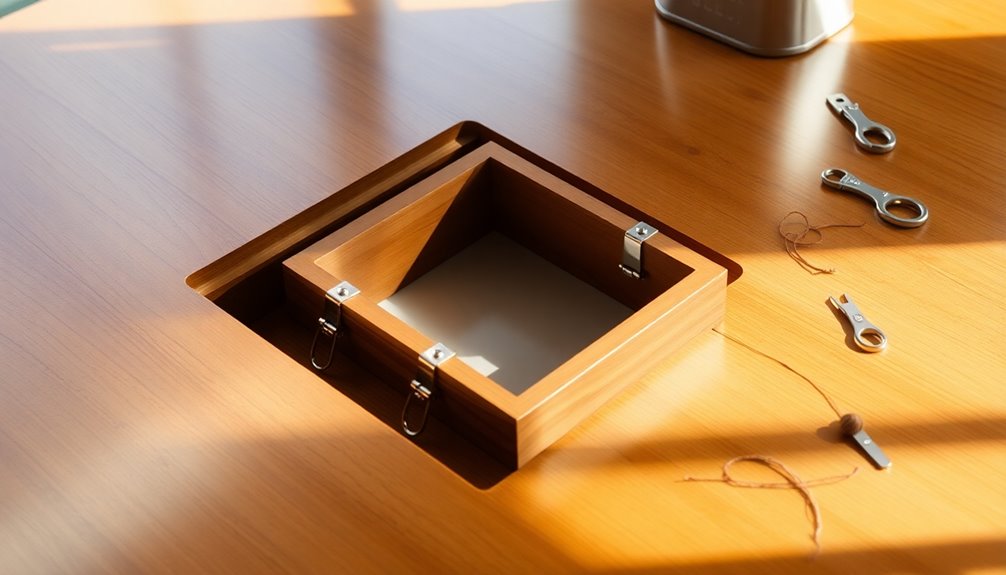
Securing the insert box to the table is essential for a stable sewing experience. Start by using threaded brass inserts or T-nuts for a strong hold. Pre-drill holes in both the insert box and the table surface to prevent wood splitting. Attach the insert box with wood screws, spacing them evenly around the perimeter.
| Step | Action |
|---|---|
| Pre-drill holes | Prevents wood from splitting |
| Attach with screws | Distributes weight and stress evenly |
| Use a router | Guarantees the insert box sits flush with the table surface |
Finally, adjust the screw heights or use shims as necessary to guarantee the insert box is level with the sewing machine bed for a seamless sewing experience.
Finishing Touches for a Polished Look
Now that your sewing table insert is securely in place, it's time to focus on the finishing touches for a polished look.
You'll want to smooth the surface and seal the edges, ensuring both safety and aesthetics.
Finally, consider any final assembly details that'll enhance usability and give your insert a professional finish.
Surface Smoothing Techniques
Achieving a smooth and polished finish on your sewing table insert requires careful attention to detail and the right techniques. Start with sanding the surface using progressively finer grits of sandpaper, beginning at 120-grit and finishing with 320-grit for a sleek look.
Once sanded, apply a coat of polyurethane or lacquer, allowing adequate drying time between coats. Lightly sand with 320-grit sandpaper between applications to achieve a glass-like finish.
To enhance comfort, use a router with a roundover bit on the edges, eliminating sharp corners and creating a snag-free surface for handling fabric.
Ascertain the insert is clean and dust-free before applying any finish; this will help you achieve a durable, flawless result.
Edge Sealing Options
To enhance the overall appearance and durability of your sewing table insert, consider various edge sealing options that can elevate its finish.
Here are some effective methods:
- Edge Banding: Apply edge banding, made from PVC or wood veneer, for a professional look and added protection against chipping.
- Sealing with Polyurethane: Brush or spray polyurethane on the edges to create a water-resistant barrier with a glossy finish.
- Router Roundover Bit: Use a router with a roundover bit to soften sharp corners, making the insert safer and more visually appealing.
- Sanding for Smoothness: Sand the edges with progressively finer grit sandpaper to achieve a smooth finish, minimizing snagging during sewing.
Consider staining or painting the edges for added aesthetic appeal and protection. Additionally, effective methods can significantly improve both the functionality and visual appeal of your sewing table insert.
Final Assembly Considerations
As you finalize your sewing table insert, attention to detail guarantees a polished look and ideal functionality.
Start by applying multiple coats of polyurethane to the tabletop, assuring durability. Sand between coats using 220- and 320-grit paper to achieve a smooth finish.
Make precise adjustments to confirm the insert fits flush with your sewing machine, possibly using a template for accuracy. Use a router with a roundover bit to smooth the edges of both the insert and the cutout, creating a snag-free surface.
For stability, consider using threaded brass inserts and wood screws to fasten the box securely to the table.
Finally, finish the edges of the insert with a matte lacquer for a visually appealing and polished appearance.
Tips for Customizing Your Insert
When customizing your sewing table insert, it's essential to start with accurate measurements of your sewing machine's free arm and bed, ensuring a snug fit.
Here are some tips to help you create the perfect insert:
- Measure the dimensions carefully, typically around 19.5 x 12 inches.
- Create a template using hardboard or cardboard to outline the cutout shape for adjustments.
- Use a router to cut the insert hole, ensuring the depth matches your acrylic insert's thickness for a flush finish.
- Incorporate features like a hole for a knee lift and cable entry, enhancing usability.
Frequently Asked Questions
How to Make a Stitching Table?
To make a stitching table, start by choosing a sturdy tabletop that's spacious enough for your projects.
Measure your sewing machine's base and mark the dimensions on the tabletop. Use a router to create an opening, ensuring it fits flush.
Construct a support box from MDF or plywood for stability. Finish with polyurethane for durability, and consider adding features like a knee lift hole for better ergonomics while you sew. Additionally, ensure that your support box has ample space for storage, allowing you to keep your sewing materials organized and easily accessible. If you’re looking to enhance your sewing projects further, learn how to frame embroidery professionally, which can elevate your finished pieces and make them suitable for display. Incorporating thoughtful design and practical features will not only improve your sewing experience but also contribute to the quality of your projects.
What Is a Sewing Machine Insert?
Did you know that using a sewing machine insert can reduce neck and shoulder strain by up to 30%?
A sewing machine insert is a flat piece, often made of acrylic or wood, designed to fit snugly around your machine's free arm. It levels your machine with the table surface, providing a larger work area.
This setup improves fabric feeding, making your sewing experience smoother and more enjoyable, allowing for better precision in your projects.
Is a Sewing Table Worth It?
Yes, a sewing table is definitely worth it!
You'll notice a significant difference in your sewing experience with a stable, flush surface. It improves accuracy and reduces strain on your body, making long sessions more comfortable.
Plus, many tables come with adjustable heights and built-in storage, keeping your workspace organized.
Investing in a custom table guarantees it fits your machine perfectly, maximizing both comfort and usability for all your projects.
How Do You Make a Sewing Tablecloth?
Imagine you're setting up your sewing space and want a stylish, functional tablecloth. To make one, choose durable fabric like cotton or polyester.
Measure your table, adding 1-2 inches for hems. Cut the fabric, pin the hem, and sew it using a straight stitch, backstitching for strength.
Press the hem for a neat finish. Consider adding bias tape for a personalized touch that brightens up your sewing area and makes it feel more inviting.
Conclusion
Creating a sewing table insert can transform your workspace, just like a well-tailored garment enhances your style. By understanding your machine's dimensions and following the steps to construct a perfect fit, you'll enjoy a seamless sewing experience. With a few finishing touches, your insert will not only be functional but also a beautiful addition to your sewing area. So, roll up your sleeves and get started on crafting a personalized insert that meets your needs perfectly!