
Using a muslin or toile as your test garment saves your valuable fabric by allowing you to check fit, make pattern adjustments, and identify issues early. Muslins are quick and inexpensive before cutting into your final fabric, while toiles offer more durability for detailed fitting. Skipping this step can lead to costly mistakes and poor fitting final projects. Keep exploring, and you’ll discover how to perfect your pattern process for great results.
Key Takeaways
- Muslin is an inexpensive, quick-to-sew fabric used for initial fittings, preventing costly mistakes on final fabric.
- Toile is a more durable, closely matched fabric used after muslin to refine fit and fabric behavior.
- Creating a test garment allows early detection of fit issues, saving time and fabric on expensive materials.
- Transferring adjustments from muslin or toile ensures precise pattern corrections, reducing risks of poor fit.
- Skipping the test garment step can lead to costly errors, fabric waste, and compromised final garment quality.
What Is a Muslin and How Is It Used in Sewing?
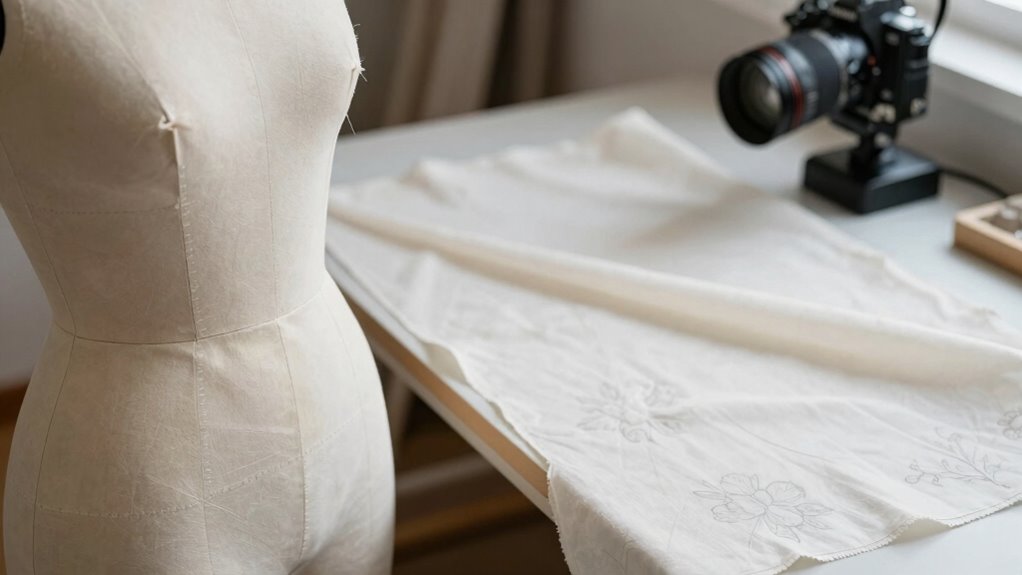
A muslin is a simple, inexpensive fabric typically made from cotton that designers and sewists use to create mock-ups of garments. It allows you to test your fabric selection before cutting into your more expensive material. Using a muslin helps you identify fit issues and make pattern alterations early in the sewing process. By fitting the muslin on your dress form or yourself, you can see how the garment drapes and adjust the pattern accordingly. This step saves time and fabric, ensuring your final piece fits perfectly. Pattern alteration becomes much easier when working with muslin because it responds well to pinning and tacking. Overall, a muslin acts as a vital prototype, giving you confidence before working with your actual fabric. Research supports that creating muslins can improve the overall fit and success of your sewing projects. Additionally, understanding the properties of fabric stability can help you choose the best muslin for your specific project. Choosing the right type of muslin, such as woven or knit, can further influence how accurately your mock-up will represent the final garment. Being aware of fabric weight and its impact on drape can help you select the most suitable muslin for your design intentions.
Muslin vs. Toile: Which One Should You Use for Your Test Garment?
When deciding between muslin and toile for your test garment, understanding their differences can help you choose the best option for your project. Muslin is affordable, easy to work with, and ideal for quick pattern alterations. Toile, often made from more durable fabric, offers a closer fabric simulation for fitting adjustments. Your choice depends on fabric selection and the level of accuracy needed. Use the table below to compare:
| Feature | Muslin | Toile | Suitable For |
|---|---|---|---|
| Fabric Type | Cotton, inexpensive | Tightly woven fabric | Pattern fitting and testing |
| Cost | Low | Slightly higher | Repeated fittings |
| Fabric Simulation | Less similar to final fabric | Closer to final fabric | Precise pattern alteration |
| Ease of Use | Quick to sew and adjust | More durable but heavier | Detailed fitting adjustments |
Additionally, some designers prefer to use electric dirt bikes for quick transportation around their workspace, demonstrating the versatility of different materials and tools in garment creation. Incorporating precise fabric simulation can significantly improve the fit and overall quality of the final garment. Researchers also emphasize the importance of fabric selection in achieving accurate fitting results, which can influence the success of the final product. When selecting your fabric type, considering the fabric simulation capabilities of each material can lead to more accurate fitting results. Choose based on your fabric selection and alteration needs.
When Is the Best Time to Make a Muslin or Toile?

You should make a muslin or toile before cutting into your actual fabric to make certain any issues early. It’s also helpful during pattern fitting to ensure everything lines up perfectly. Final adjustments often call for one last muslin or toile to confirm all tweaks are correct before sewing the final garment. Incorporating consistent storytelling during the fitting process can also help reinforce your design vision and ensure your final piece aligns with your creative goals. Additionally, performing these preliminary fittings can save you time and materials by catching errors early in the process.
Before Cutting Fabric
Making a muslin or toile before cutting into your main fabric is a crucial step that’s best done early in the sewing process. This allows you to assess fabric stability, ensuring your material behaves as expected during construction. Creating a test garment before cutting helps verify pattern accuracy, revealing any fit issues or design adjustments needed. It’s easiest to sew the muslin or toile when your pattern is finalized but before committing to your good fabric. Doing this early prevents costly mistakes and gives you confidence in your pattern’s fit and proportions. Remember, the goal is to catch potential problems before you cut into your prized fabric, saving time, money, and frustration later on. Timing is everything—make your muslin or toile before you cut into your main fabric. Community learning is a key part of the process, as experimenting with prototypes helps push the boundaries of design and fit.
During Pattern Fitting
Once your pattern pieces are assembled and the initial fitting adjustments have been made, it’s the perfect time to create a muslin or toile. This step allows you to test fitting techniques and evaluate how the fabric choice affects the garment’s structure. Using a muslin or toile helps identify issues like fit, dart placement, or seam allowances before cutting into your good fabric. Incorporating free floating techniques during this stage can further improve the accuracy of the fit. Additionally, this stage provides an opportunity to experiment with smart fitting technology, ensuring a better final result before investing in premium materials.
Final Adjustments Stage
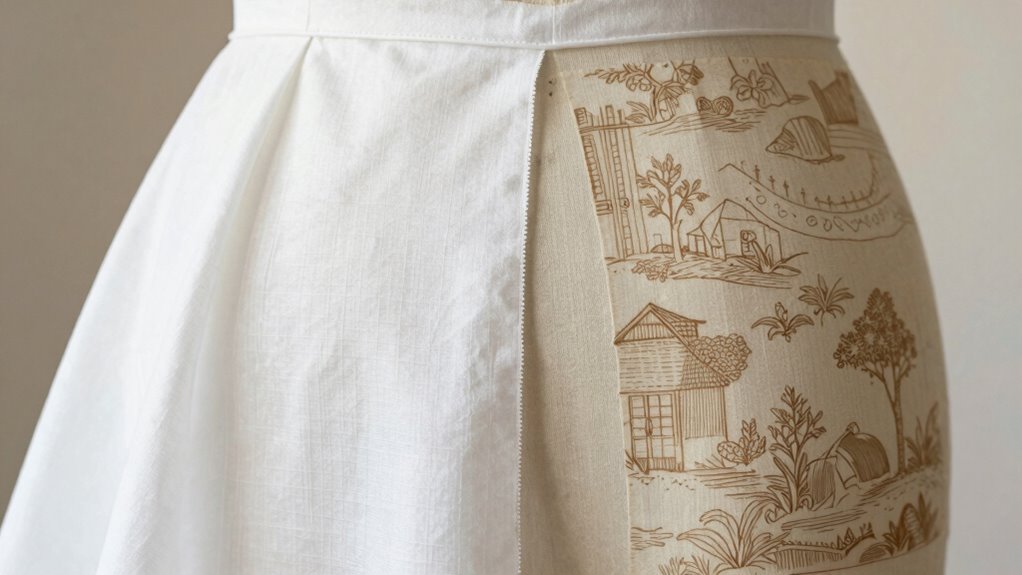
The ideal time to make a muslin or toile is after assembling your pattern and completing initial fittings but before cutting into your final fabric. This step guarantees you can test your fabric selection and make necessary pattern alterations without risking your good material. During this stage, you’ll see how the garment fits and functions, allowing you to refine details. Visualize a muslin draped on your dress form, revealing fit issues and fabric behavior. You might notice areas needing pattern alteration, like adjusting darts or shaping seams. Think of your muslin as a blueprint, highlighting adjustments before final fabric cuts. This process saves time and fabric, ensuring your final piece is both beautiful and well-fitted. It’s the critical bridge between design and finished garment. Incorporating proper fitting techniques and understanding fabric behavior at this stage can further enhance your sewing success.
How to Sew and Fit Your Muslin or Toile Before Cutting Your Good Fabric
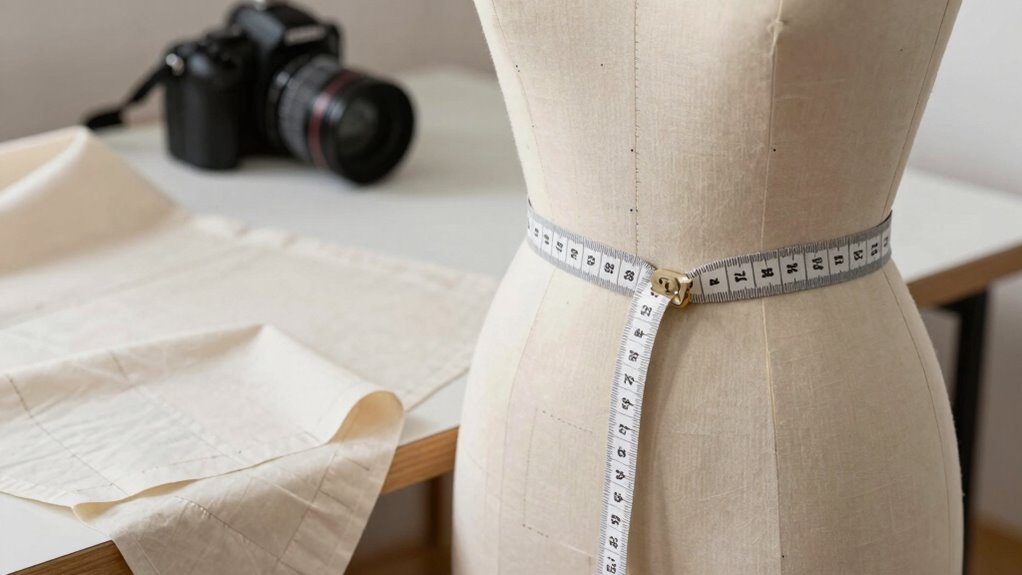
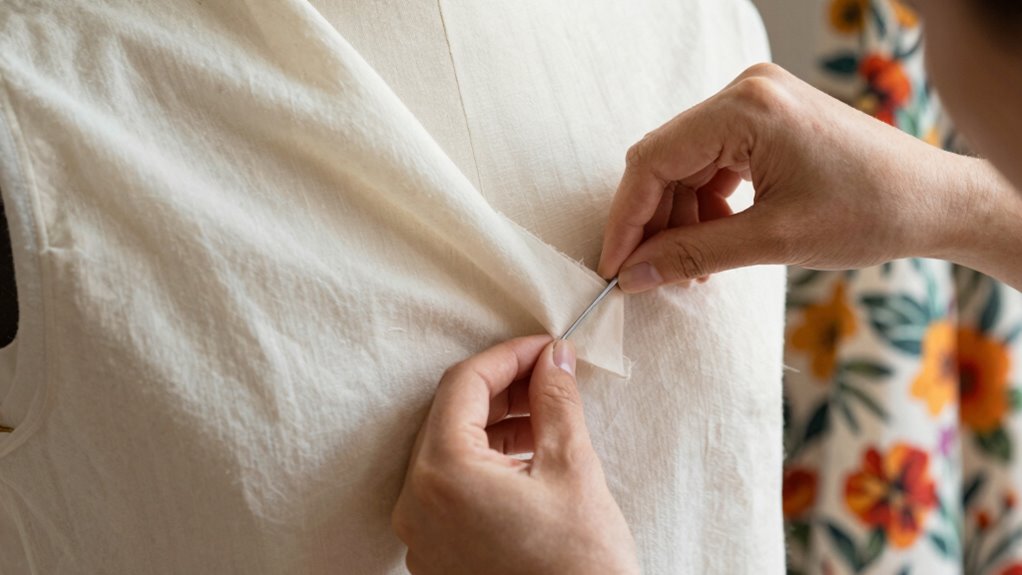
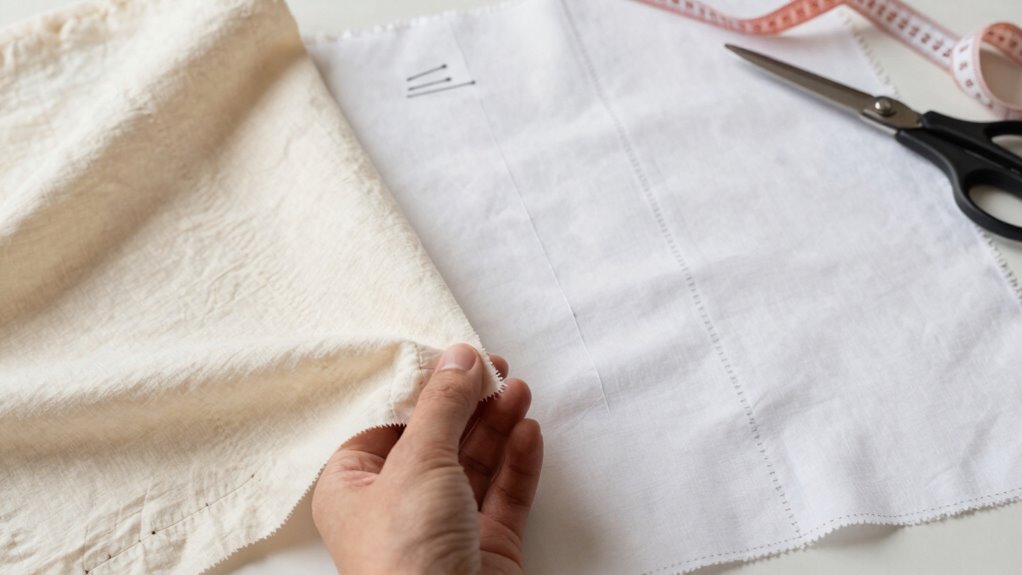
Before cutting into your good fabric, it’s essential to sew and fit your muslin or toile to catch any fit issues early. Carefully choose a fabric selection that closely mimics your final fabric to ensure accurate results. Sew the muslin or toile with the same pattern alterations you plan to make on your finished garment. Pay attention to fit points like shoulders, bust, waist, and hips, making adjustments as needed. Pin or baste seams to test movements and comfort. Don’t rush this step—solidifying the fit now saves you from costly mistakes later. Once you’re satisfied with the fit and pattern alteration, mark all changes clearly. This way, your final fabric will require minimal adjustments, making your sewing process more efficient.
Common Fit Problems in Your Test Garment and How to Fix Them

Many common fit issues become apparent when you try on your test garment, making it easier to identify where adjustments are needed. These fitting issues often stem from fabric distortions or miscalculations in measurements. You might notice:
- Excess fabric pooling at the back or shoulders
- Tightness around the bust or waist
- Gaping armholes or neckline
- Wrinkles or pulls indicating fabric strain
- Hemlines that hang unevenly
Recognizing proper fabric care can help prevent some of these distortions from occurring in the first place.
Refining Design Details Based on Your Muslin or Toile Fit
Once you’ve identified fit issues from your muslin or toile, focus on refining your design details to enhance the overall look and comfort. Adjusting elements like seam lines, darts, or pleats can improve fit and style. Pay careful attention to how fabric selection influences these details; a stiffer fabric may require different pattern alterations than a drapier one. Use the table below to guide your refinements:
| Design Element | Fabric Choice | Pattern Alteration |
|---|---|---|
| Neckline | Lightweight | Narrower edge |
| Sleeves | Stiff fabric | Add ease |
| Waistline | Stretch fabric | Slightly take in |
| Hemline | Flowy fabric | Lengthen or shorten |
Refining these details ensures your final garment fits perfectly and looks polished.
Transferring Adjustments From Your Test Garment to Final Fabric

To guarantee your final garment fits perfectly, you need to transfer your adjustments accurately. Mark your changes clearly on the test garment and carefully transfer seam lines to your final fabric. This step is essential for maintaining the fit and construction details you’ve worked so hard to perfect.
Marking Adjustments Clearly
Transferring your adjustments from the test garment to the final fabric requires clear and precise marking techniques. Use fabric chalk, tracing paper, or water-soluble pens to guarantee your markings stand out. Be systematic—mark seam lines, darts, and grainlines accurately, so your sewing techniques align perfectly. Visualize your fabric selection’s texture and color when marking, avoiding smudges or faint lines that could cause confusion. Keep these tips in mind:
- Use contrasting colors for visibility
- Mark from the test garment’s key points
- Keep markings sharp and clean
- Double-check measurements before marking
- Remove markings promptly after sewing
- Familiarize yourself with simple document management techniques to organize your sewing patterns and notes efficiently. Incorporating fabric-specific marking techniques can further enhance precision, especially when working with delicate or textured fabrics. Paying attention to fabric type considerations ensures your markings stay intact and accurate during handling and sewing. Additionally, understanding proper marking tools can help prevent accidental removal or smudging of your markings during the sewing process. Using fabric care instructions can also help maintain the longevity of your markings and sewing accuracy.
Transferring Seam Lines
When you’re ready to move your seam line adjustments from your test garment to your final fabric, precision is key. Start with your fitting markers to identify the altered seam lines on your muslin or toile. Use a fabric marker or tailor’s chalk to trace the seam lines directly onto the test garment, guaranteeing accuracy. Then, carefully transfer these markings onto your final fabric, maintaining the original seam allowances. For a clean seam line transfer, pin the test garment to your final fabric or use pattern weights, and use a ruler or French curve to trace the seam lines precisely. Double-check your markings before stitching. This careful seam line transfer ensures your final garment will fit as intended, saving you time and fabric waste.
Why Skipping the Test Garment Step Can Ruin Your Sewing Project

Skipping the test garment step might seem like a time-saver, but it can lead to costly mistakes and frustration later on. Without testing, you risk choosing the wrong fabric, which affects how your project fits and feels. It also prevents you from spotting issues with sewing techniques, like puckering or uneven seams. When you skip this step, you might find your fabric shrinks unexpectedly or the garment doesn’t match your measurements. These surprises can ruin your good fabric and force you to start over. Visualize ending up with a garment that’s ill-fitting, awkwardly draped, or damaged. To avoid these pitfalls, you need to see how your fabric responds to your sewing techniques before working on your final piece:
- Fabric puckering
- Uneven seams
- Shrinkage surprises
- Fit issues
- Fabric damage
Engaging in a test garment also helps you understand how fabric responds to sewing techniques, ensuring a more successful final project.
Frequently Asked Questions
Can I Reuse Muslins or Toiles for Multiple Projects?
Yes, you can reuse muslins or toiles for multiple projects if they’re still in good condition. To maximize fabric recycling, carefully store your muslins and inspect them before reuse. Reusing these test garments is a smart reuse strategy that saves fabric and reduces waste. Just verify they haven’t been altered or damaged, and consider washing them thoroughly to avoid transferring dyes or residues to your new project.
How Do I Choose the Right Weight for My Muslin or Toile?
Choosing the right fabric weight for your muslin or toile is essential for accurate fitting. Don’t worry about overly thick options; lighter muslin offers better drape and easier adjustments, while slightly heavier fabrics provide durability. Consider fabric weight considerations like ease of handling and how closely you want it to mimic your final fabric. Ultimately, select a muslin thickness that balances ease of fitting with realistic movement, ensuring your final garment fits perfectly.
What Tools Are Essential for Sewing a Test Garment?
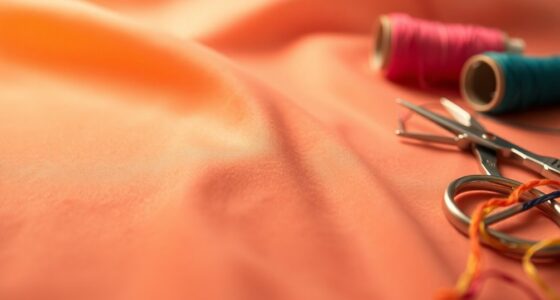
You need essential tools like sharp scissors and pins for sewing your test garment, along with marking tools such as fabric chalk or marking pens to trace pattern lines accurately. Choosing the right fabric choices for your muslin or toile is vital, so pick a similar weight and drape as your final fabric. These tools help you test fit and construction, saving your good fabric for the actual garment.
How Do I Accurately Mark Fitting Adjustments on My Muslin or Toile?
Imagine pinning a muslin, then using marking tools like chalk or fabric pens to trace adjustments. To accurately mark fitting adjustments, first, pin where the garment needs to be taken in or let out. Use fitting techniques like pinching excess fabric and marking the new seam lines with tailor’s chalk or fabric markers. This guarantees your alterations are precise, making the final fit perfect with minimal guesswork.
Are There Fabric Options Other Than Muslin or Toile for Test Garments?
Yes, you can use alternative fabrics like ponte, linen, or cotton sheeting for test garments. These options often provide similar stability and ease of sewing as muslin or toile. For eco-friendly choices, consider organic cotton or recycled fabrics. These materials help reduce environmental impact while allowing you to make fitting adjustments without risking your good fabric, ensuring your final garment fits perfectly before cutting into premium textiles.
Conclusion
Skipping the test garment step risks wasting wonderful fabric and ruining your sewing success. By taking the time to tweak, test, and transform your muslin or toile, you guarantee a perfect fit and flawless finish. Remember, patience pays off—practice, perfect, and prevent problems before they start. So, step smart, sew sensibly, and save your stunning style from costly mistakes. Your sewing journey becomes smoother, smarter, and more satisfying with this simple, essential step.