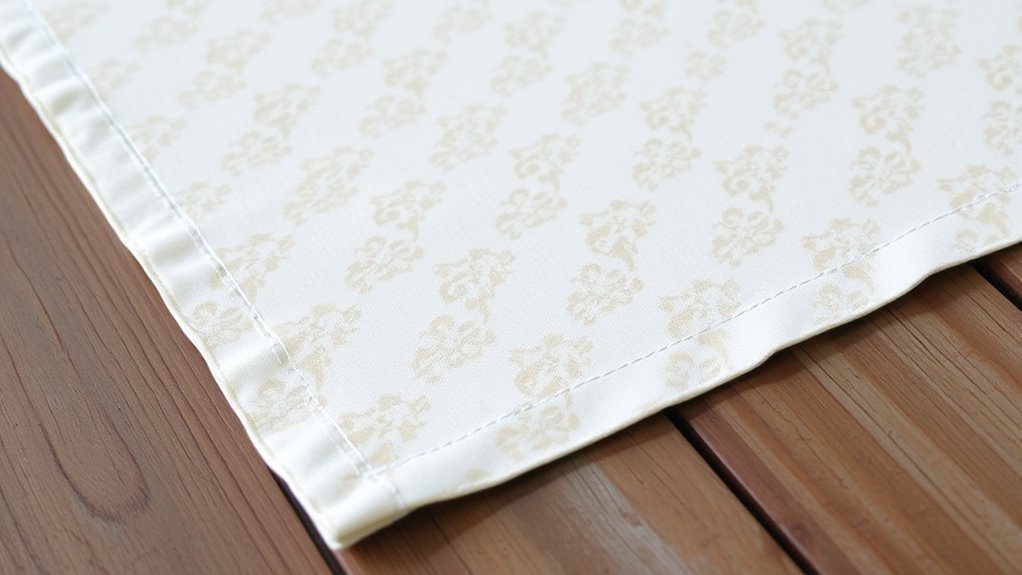

To sew a table runner with mitered corners, start by carefully measuring and cutting your fabric, including seam allowances. Sew the borders evenly, then fold each corner diagonally and pin it securely. Sew across the diagonal to form sharp mitered corners. Finish with a neat hem around the entire piece and press the corners flat. Adding decorative accents enhances the look. Keep going for detailed steps and tips to craft a professional and polished table runner.
Key Takeaways
- Measure and cut fabric accurately, including seam allowances, for precise border and corner construction.
- Sew borders with even stitches, fold corners diagonally, and pin securely before sewing across the diagonal for mitered corners.
- Press corners flat after sewing to achieve sharp, professional-looking mitered edges.
- Add decorative accents like embroidery or lace before hemming to personalize your table runner.
- Finish with a neat hem all around and carefully press for a polished, durable final piece.

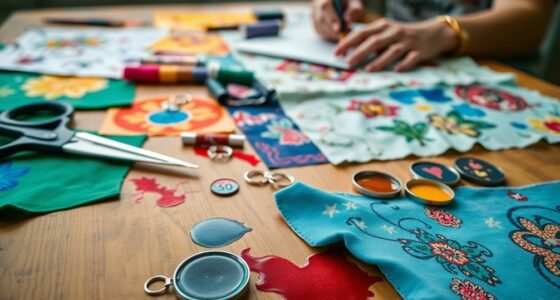
Have you ever wondered how to add a touch of elegance to your table setting? Creating a beautiful table runner with mitered corners is a fantastic way to elevate any occasion. The first step is choosing the right fabric. Your fabric selection sets the tone for the entire piece, so opt for textiles that complement your decor style. Cotton, linen, or even silk can work beautifully, depending on whether you want a casual or formal look. Keep in mind that the fabric’s weight and drape influence the final appearance, so select something that feels substantial yet easy to work with. Once you’ve picked your fabric, consider adding decorative accents like embroidery, lace trim, or even painted designs to personalize your table runner. These accents can bring in a pop of color or texture, making your creation uniquely yours.
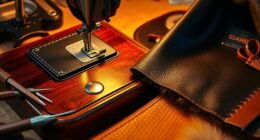
When you start sewing, precision is key. Measure your fabric carefully, allowing extra for seam allowances and the mitered corners. Cut your fabric straight and square, which will make the mitered corners easier to achieve neatly. To prepare for the corners, fold and press the edges under by about a quarter inch, creating a clean hem. As you sew the borders, take your time to keep the stitches even and close to the edge. When it comes to the corners, fold each corner diagonally so that the edges align perfectly, then pin them in place. Sewing across the diagonal creates the mitered effect, giving your table runner a polished, professional look. Make sure to backstitch at the start and end to secure the stitches.
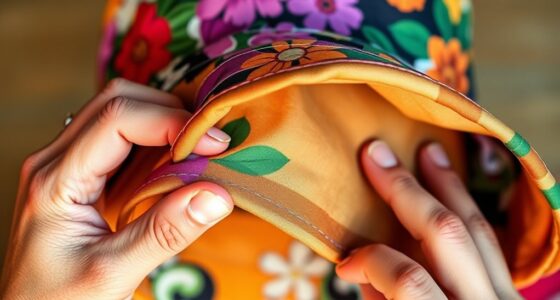
Attending to detail during this process makes all the difference. Press the corners flat with an iron after sewing, which sharpens the mitered effect. If you want to add decorative accents, do so before hemming or after, depending on the design. For example, appliqué or embroidery can be placed strategically along the borders or corners, adding visual interest. Finishing with a neat hem around the entire piece frames your work beautifully and ensures durability. The mitered corners will give your table runner a crisp, tailored look that’s perfect for formal dinners or everyday elegance. Additionally, using natural materials like linen or cotton can enhance the farmhouse charm of your decor. With patience and attention to detail, your handmade table runner will be a stunning centerpiece that impresses your guests and enhances your dining experience.
Frequently Asked Questions
Can I Use a Different Fabric Type for the Table Runner?
Yes, you can definitely use different fabric types for your table runner. Just consider fabric compatibility to make certain your chosen material holds up well and looks great. You’re encouraged to explore creative fabric choices, like mixing textures or patterns, to personalize your design. Keep in mind that some fabrics may require different sewing techniques or interfacing, but experimenting can result in a unique, eye-catching table runner that reflects your style.
What Size Should I Cut the Fabric for a Standard Table Runner?
For a standard table runner, you should cut your fabric to about 14-16 inches wide and 72-120 inches long, depending on your table size. Follow the cutting guidelines by adding 1/2 inch for seam allowances on each side. Measure carefully before cutting, and remember to account for the mitered corners, which may require slightly extra fabric for a polished look. Adjust dimensions for your specific table as needed.
How Do I Fix if My Mitered Corners Are Uneven?
If your mitered corners are uneven, start by trimming the corners for a cleaner look. Carefully trim excess fabric at the seam to make the corners more precise. Next, press the seams flat with a hot iron, using steam to set the corners properly. This will help straighten and align your corners. Re-evaluate and adjust as needed, ensuring your corners are even and crisp for a professional finish.
Can This Technique Be Used on Placemats or Other Projects?
Think of this technique as a versatile brushstroke on your sewing canvas. Yes, you can use it on placemats and other projects. Just guarantee fabric compatibility for smooth mitered corners and project versatility. Whether crafting coasters, pillow edges, or tablecloths, this method adapts beautifully. Your creativity is the limit, and this technique becomes your reliable tool for adding polished, professional touches to various fabric projects.
What Tools Are Essential for Sewing Mitered Corners?
You’ll need a few essential tools to sew mitered corners efficiently. Start with a sewing machine that handles precision stitching and basic sewing machine basics like adjustable stitch length. Make sure you prepare your fabric properly by pressing and cutting accurately. A clear ruler or measuring tape helps with precise measurements, and pins or clips keep corners aligned. Using these tools, you’ll achieve sharp, neat mitered corners every time.
Conclusion
Now that you’ve sewn your mitered corners with confidence, your table runner stands as a polished tapestry of craftsmanship, ready to host memories and meals alike. Like a perfectly stitched frame around a cherished painting, your attention to detail elevates your decor to art. Each mitered corner whispers of patience and skill, transforming a simple fabric into a graceful centerpiece. With your newfound sewing prowess, you’ve crafted more than a table runner—you’ve woven a touch of elegance into your home’s story.