To make custom embroidered patches, start by designing a simple sketch and transferring it onto sturdy fabric like felt or denim. Use vibrant embroidery threads and stitches such as satin or fill stitch to bring your design to life. Sew around the edges securely and trim excess fabric, then attach your patch using sewing, glue, or iron-on backing. For detailed tips, you’ll find more helpful steps to craft durable, personalized patches if you continue exploring.
Key Takeaways
- Design a simple, clear sketch and choose appropriate embroidery stitches to enhance the patch’s appearance.
- Select sturdy fabric and vibrant threads, then transfer your design onto the material before stitching.
- Embroider the design carefully using a machine or hand stitches, ensuring even and tight stitches for durability.
- Trim excess fabric and finish edges with your preferred method, such as sewing, gluing, or iron-on backing.
- Attach the patch securely by sewing around the edges or using heat-activated adhesive, then press firmly to ensure adhesion.
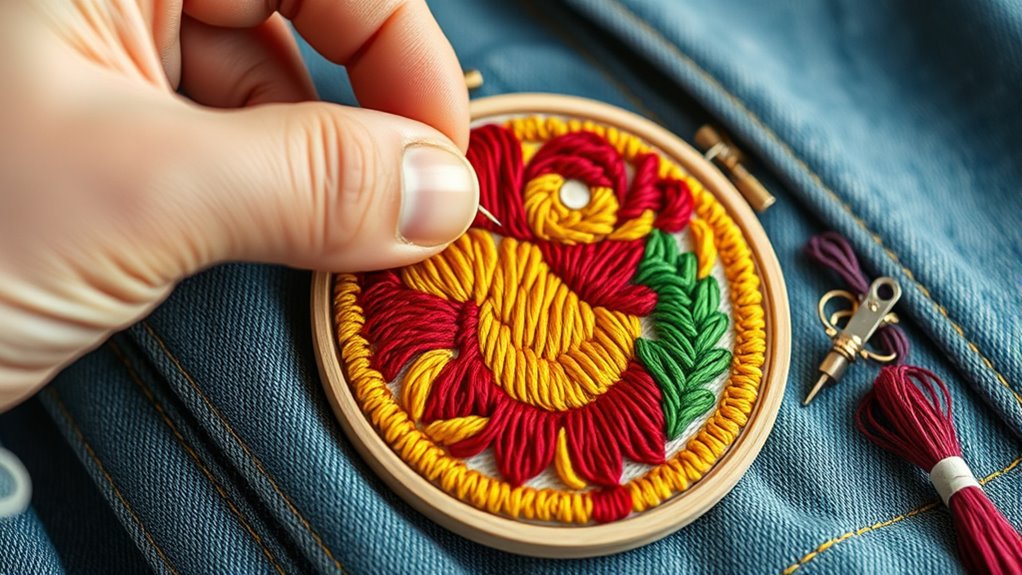
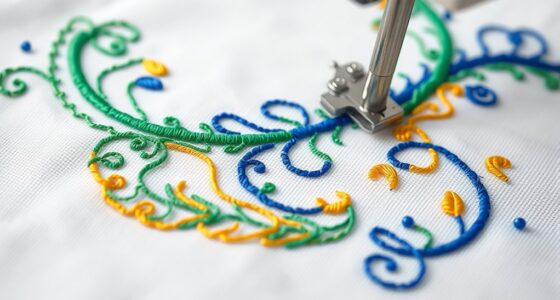
Embroidered patches have become a popular way to personalize clothing, accessories, and even bags. When you decide to create your own, the first step is designing your patch. Your patch design sets the tone, so think about what message or style you want to convey. Whether it’s a logo, a symbol, or a fun graphic, sketch it out clearly. Keep in mind that simple designs often translate better onto fabric, especially if you’re new to embroidery. Once you have your design, consider how it will work with embroidery techniques. Different embroidery stitches—like satin stitch, zigzag, or fill stitch—bring unique textures and effects to your patch. Selecting the right embroidery techniques is vital because it determines the durability and look of your finished patch. For example, satin stitch offers smooth, bold outlines, perfect for lettering or detailed borders, while fill stitches can fill larger areas with color and texture. Experimenting with these techniques before starting your final patch helps you understand how they work together to bring your design to life.
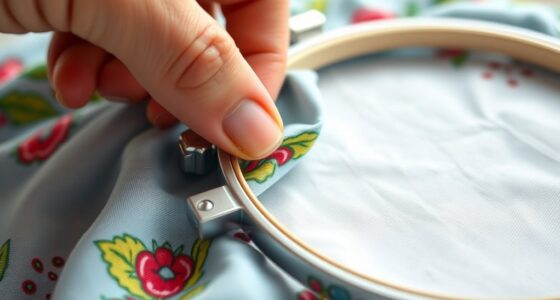
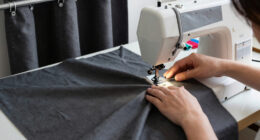
Next, you’ll need to choose your materials. Pick a sturdy fabric for the patch base—felt, twill, or denim work well—and select vibrant embroidery threads that match your design. Using quality threads ensures your patch will withstand washing and daily wear. Once you’ve gathered your materials, transfer your design onto the fabric. You can do this freehand if you’re comfortable, or use transfer paper or a lightbox for precision. Now, it’s time to start stitching. Follow your design carefully, paying attention to the embroidery techniques you’ve chosen. Keep your stitches even and tight to guarantee durability. As you work, adjust your tension and stitch length to match the intricacy of your design. Embroidery machines can streamline this process if you want a more uniform look or plan to make multiple patches. Once you’ve completed the embroidery, trim the excess fabric around your patch, leaving a small border if you prefer a finished edge.
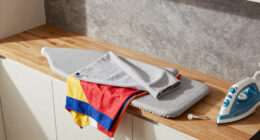
Attaching your custom patch is the final step. You can sew it onto your clothing or accessory using a simple straight stitch around the edges, or use fabric glue or iron-on backing if you want a quicker option. For iron-on patches, heat the iron according to the adhesive instructions, and press firmly for a few seconds to secure the patch in place. Whether you sew or glue, make sure your patch is firmly attached and smooth out any air bubbles or wrinkles. Creating your own embroidered patches allows you to showcase your personal style, and understanding patch design and embroidery techniques helps you craft professional-looking results. With patience and practice, you’ll be able to produce custom patches that look great and last long, adding a unique touch to your wardrobe or accessories.

ZEFFFKA Premium Quality Fabric Iron-on Patches Inside & Outside Strongest Glue 100% Cotton White Repair Decorating Kit 12 Pieces Size 3" by 4-1/4" (7.5 cm x 10.5 cm)
𝗣𝗮𝗰𝗸𝗮𝗴𝗲 𝗜𝗻𝗰𝗹𝘂𝗱𝗲𝘀: 12 iron-on fabric patches, size 3" by 4-1/4" (7.5 cm x 10.5 cm). Ideal size will…
As an affiliate, we earn on qualifying purchases.
As an affiliate, we earn on qualifying purchases.
Frequently Asked Questions
What Materials Are Best for Creating Durable Embroidered Patches?
You should choose sturdy fabric like twill or denim for durable embroidered patches, as they hold the embroidery well and resist wear. Opt for high-quality thread to guarantee vibrant colors and longevity. These materials combined give your patches strength and a professional look, making them perfect for long-lasting use. Proper fabric selection and thread quality are key to creating patches that withstand frequent washing and everyday wear.
Can I Customize Patches With Complex or Multi-Color Designs?
Imagine designing a patch with a detailed, multicolor logo for your sports team. Yes, you can customize patches with complex design customization and multicolor embroidery. Advanced embroidery machines handle intricate details and vibrant threads, making your design stand out. Just guarantee your design is high-resolution for the best results. So, go ahead—bring your detailed, colorful ideas to life on custom patches!
How Long Does the Patch Creation Process Typically Take?
The patch creation process usually takes around 2 to 3 weeks, depending on the production timeline. Once you approve your design during the design approval process, the manufacturer begins stitching your patches. If you have complex or multi-color designs, it might add extra days to the timeline. Communicating clearly and approving the design promptly helps make certain your patches are produced and shipped without delays.
Are There Eco-Friendly Options for Making Embroidered Patches?
Think of eco-friendly patches as a invigorating gust in fashion. You can choose sustainable fabrics like organic cotton or recycled polyester, which reduce environmental impact. Pair these with eco-friendly dyes that are less toxic and water-efficient. This way, your patches not only look great but also help protect the planet, making your creative expression a sustainable statement for a greener future.
What Are the Best Methods for Cleaning and Maintaining Patches?
To keep your embroidered patches looking great, follow simple laundry tips and stain removal techniques. Turn garments inside out before washing to protect the patches, and use gentle detergent. Avoid harsh bleach or fabric softeners. For stains, treat them promptly with a mild stain remover. Air dry your patches to prevent damage from heat, and if needed, gently iron them on low heat to maintain their appearance.

NICEVINYL Embroidered Iron-on Patches Applique: 72Pcs Random Assorted Decorative Patches Iron on/Sew on for Clothing Accessories
Iron on Patches Concept: NICEVINYL patches includes 72pcs of random embroidered patches,especially suitable for adults.Every appliques has a…
As an affiliate, we earn on qualifying purchases.
As an affiliate, we earn on qualifying purchases.
Conclusion
Now that you know how to craft and attach your custom embroidered patches, think of them as tiny stars you place on your fabric universe. Each stitch is a brushstroke on your personal canvas, turning plain material into a vibrant story. With your newfound skills, you’re the artist, the creator, the dreamer—painting your unique badge of identity. So go ahead, sew your imagination into every patch, and let your style shine like a constellation.

Friendship Bracelet String 50 Skeins Rainbow Color Embroidery Floss Cross Stitch Embroidery Thread Cotton Floss Bracelet Yarn, Craft Floss
50 different rainbow colors. Contains all the colors, blue, green, red, orange, pink, yellow, gray, black, white, etc.,…
As an affiliate, we earn on qualifying purchases.
As an affiliate, we earn on qualifying purchases.
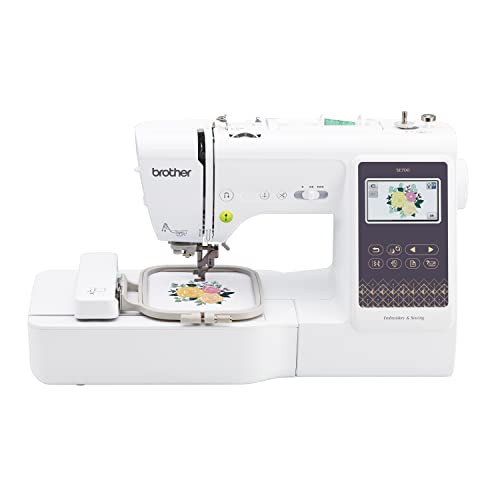
Brother SE700 Sewing and Embroidery Machine, Wireless LAN Connected, 135 Built-in Designs, 103 Built-in Stitches, Computerized, 4" x 4" Hoop Area, 3.7" Touchscreen Display, 8 Included Feet, White
SEWING and EMBROIDERY IN ONE: The SE700 is the ideal machine to start your sewing and embroidery journey…
As an affiliate, we earn on qualifying purchases.
As an affiliate, we earn on qualifying purchases.