
If your bust darts are misplaced, don’t start over. First, check fabric puckering, seam alignment, and grainline to confirm the issue. Carefully remove the darts by gently ripping the stitches, then mark the new position with chalk or a fabric pen. Pin and sew the darts carefully, paying attention to fabric tension and grainline. With patience, you can reshape and reposition them for a perfect fit—exploring these steps further will help you master the process.
Key Takeaways
- Carefully remove existing darts with a seam ripper, working slowly to prevent fabric damage.
- Mark the new dart placement precisely using tailor’s chalk or fabric pen aligned with grainline.
- Pin the fabric in the new position, ensuring proper tension and alignment before sewing.
- Sew along the marked lines with even stitches, then press to set the new dart shape.
- Test on scrap fabric first to refine your technique and ensure accurate repositioning without distortion.
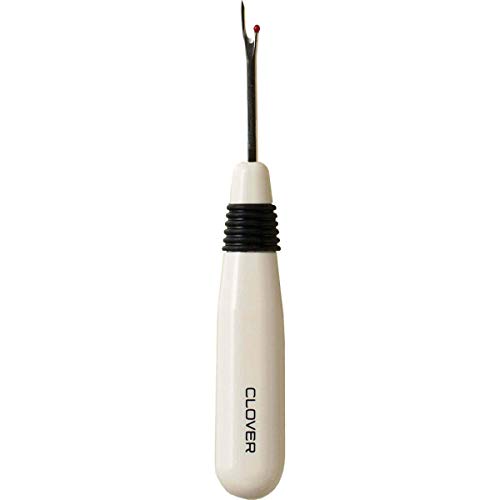
Clover White Ergonomic Seam Ripper
5"
As an affiliate, we earn on qualifying purchases.
As an affiliate, we earn on qualifying purchases.
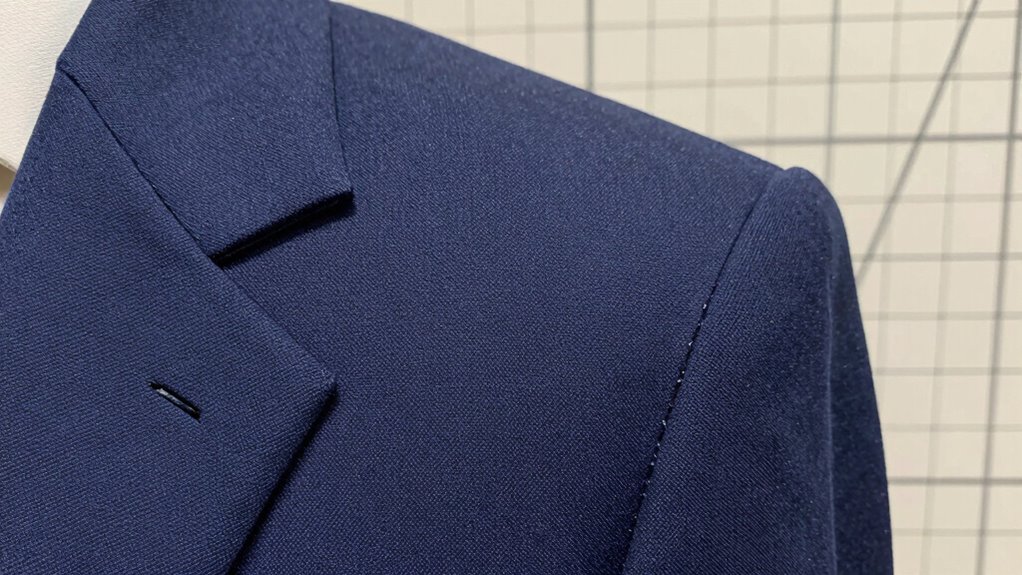
How to Check If Your Bust Darts Are Misplaced
To determine if your bust darts are misplaced, start by examining the fabric around the dart area. Check that the fabric grain runs smoothly through the dart, ensuring it aligns with the body’s natural grainline. Misplaced darts often cause puckering or uneven fabric, so look for distortions or pulling along the seam. Also, verify seam alignment; the dart should point toward the bust apex or the fullest part of your bust, with the seam lines matching up properly. If the dart appears off-center or the grain isn’t straight, it’s a sign it’s misplaced. Properly aligned darts follow the fabric’s natural flow and match the body contours, helping you determine if adjustments are needed before moving or redrawing your darts. Additionally, understanding how to check the grainline can prevent future dart misplacement and ensure a smooth fit. Paying attention to fabric grain is essential for achieving a professional-looking alteration and avoiding puckering or distortion. Recognizing the importance of body contours can also guide you in positioning darts correctly for the most flattering fit.

OZXTYO Triangle Tailors Chalk 10Pcs,Sewing Fabric Chalk and Fabric Markers for Quilting,Sewing Supplies Accessories
Tailor's Chalk: 4 Colors Available (Blue, Red, White, Yellow)
As an affiliate, we earn on qualifying purchases.
As an affiliate, we earn on qualifying purchases.
Why Correcting Dart Placement Improves Your Project’s Accuracy
Correcting dart placement guarantees your project fits precisely and looks professional. When you adjust darts, you improve overall accuracy by making certain of proper dart measurement and alignment with your body. Proper dart placement accounts for fabric tension, preventing puckering or distortion. Moving darts correctly ensures your fabric lies smoothly, enhancing the garment’s shape and fit. Additionally, understanding fabric tension helps prevent common fitting issues and results in a more polished finish. Being mindful of fabric stability during adjustments can further ensure your seams remain even and durable. Recognizing the importance of fabric stretch can also help in making precise dart adjustments for better fit and appearance. Considering seam allowances during repositioning can also contribute to a cleaner, more professional finish. Incorporating knowledge of connected home fitness technology can aid in developing a systematic approach to your fitting process, ensuring consistency in dart placement and garment fit.
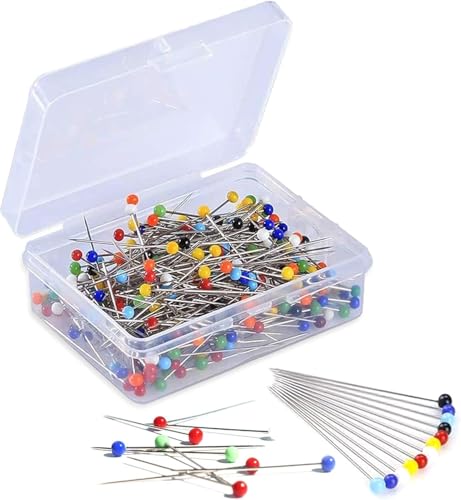
MINTHE 100PCS Sewing Pins for Fabric, Straight Pins Sewing with Pearlized Colored Heads, Quilting Supplies, Pearl, Stick, Corsage, Head
These Sewing Pins for fabric are perfect Sewing supplies & Quilting supplies. With a Stainless Steel Pin they…
As an affiliate, we earn on qualifying purchases.
As an affiliate, we earn on qualifying purchases.
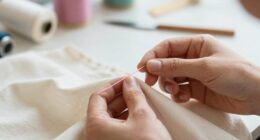
Remove Bust Darts Carefully Without Damage
Removing bust darts requires patience and a gentle touch to avoid damaging your fabric. Carefully loosen the pins, taking care not to pull or tear the fabric, which can cause fraying. When removing pins, do so slowly and in a straight line to minimize stress on the fabric edges. Once pins are out, gently lift the dart stitching, using your fingers or a seam ripper. Work slowly to prevent fabric fraying or unraveling. If you notice any fraying, trim the frayed edges carefully with small scissors. Avoid pulling on the fabric, as this can cause puckering or tears. Taking your time ensures the fabric stays intact and ready for repositioning without unnecessary damage. Proper handling techniques are essential to preserving the integrity of your fabric during this process. Being mindful of fabric stress helps prevent accidental damage and ensures a cleaner removal. Applying correct removal methods can make the process smoother and reduce the risk of damage. Patience is key to preserving the quality of your material, and understanding fabric durability can guide you in choosing the best approach for delicate fabrics. Additionally, knowing the history of pinball machines can give you a better appreciation for the intricacies involved in maintenance and repair.

Jnenery 35Pcs Large Eye Sewing Needles, 7 Sizes Stainless Steel Needles for Hand Sewing, Leather, Embroidery, Repair, Quilting- Easy Threading with Threader, Thimble for Crafters, Seniors, Travelers
Durable Stainless Steel Sewing Needles: Made of Premium stainless steel, these large eye needles are rustproof, durable, and…
As an affiliate, we earn on qualifying purchases.
As an affiliate, we earn on qualifying purchases.
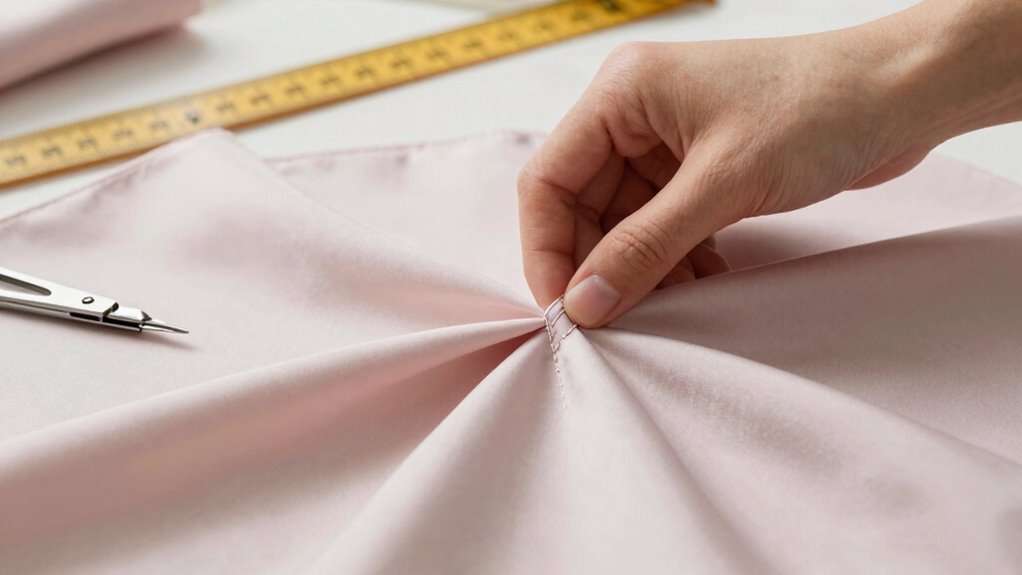
Reposition Darts Safely and Effectively
Repositioning darts requires careful planning to guarantee they fit your new design line without causing puckering or distortion. To do this effectively, consider how the dart’s new placement impacts fabric tailoring and seam fitting. Make sure you mark the new position precisely, using tailor’s chalk or a fabric pen. When moving darts, keep in mind fabric stretch and grainline to prevent distortion. Additionally, understanding how to handle fabric drape can help maintain the garment’s flow and appearance after repositioning. Use matching thread for seamless seam fitting. Reinforce dart edges with stay tape if needed. Adjust dart length to suit new placement. Test on scrap fabric to refine your technique. It’s also helpful to consider the fabric’s grain to maintain proper alignment during repositioning. Recognizing how fabric properties influence dart placement can further improve your results. Incorporating knowledge of private equity market trends can also inform your approach to fabric selection and investment in quality materials, ensuring durability and appearance. A thorough understanding of fabric elasticity can assist in predicting how the fabric will behave after repositioning, leading to more precise adjustments.
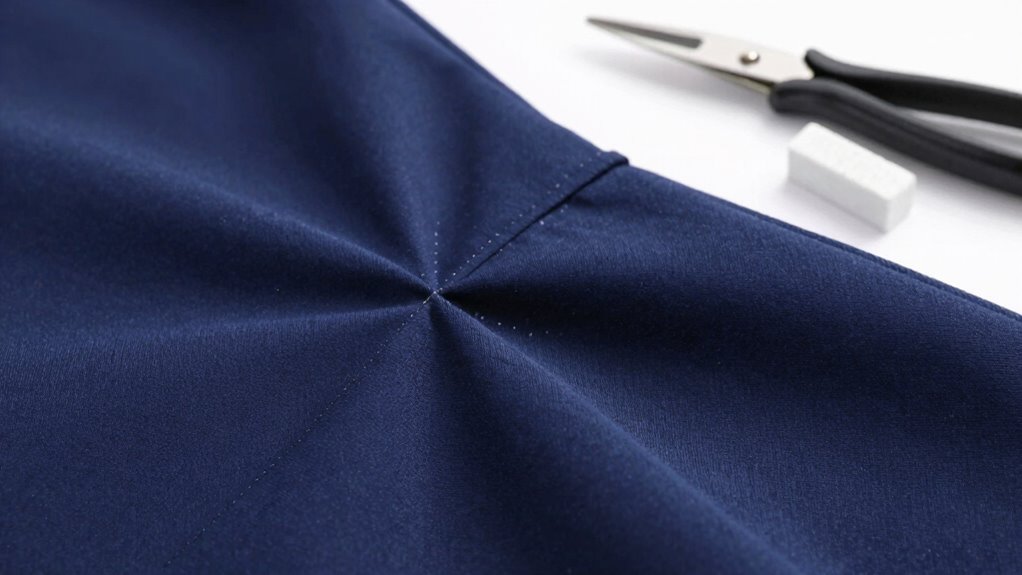
Mark and Reattach Darts for a Perfect Fit

To achieve a flawless fit, you need to carefully mark and reattach your darts after repositioning them. Start by dart pinning the fabric in its new position to hold the darts steady. Use tailor’s chalk or a fabric marking pen to trace the dart’s original shape and new placement. This ensures accuracy when sewing the darts back together. After pinning, press the fabric gently to set the marks and smooth out any puckers. When reattaching, sew along the marked lines, maintaining even stitches for a professional finish. Be sure to press the darts again after sewing to flatten the seams and enhance the shape. Proper dart pinning and fabric pressing are key to achieving a perfect, tailored fit without starting from scratch. Additionally, understanding the importance of precise measurements can help you achieve the best possible adjustment. Incorporating landscaping techniques can also help create a cohesive look in your sewing projects, especially when coordinating with outdoor themes. Paying attention to fabric selection can further improve the overall outcome of your adjustments. Ensuring proper body measurements before sewing can help prevent the need for future adjustments and improve fit. Moreover, selecting high-quality interfacing can provide additional support and structure to your darts, resulting in a more polished appearance.
Troubleshooting Common Dart Moving Problems
Troubleshooting Common Dart Moving Problems can be straightforward when you focus on precise techniques and proper handling. If darts are misaligned, you’ll need to correct their position carefully to guarantee a perfect fit. Addressing these common problems promptly keeps your project on track and looks professional. Proper vintage design elements can also influence how easily you can adjust or move components without damaging the overall look. Ensuring the smoothness of the surface can also facilitate easier adjustments and prevent damage during repositioning. Additionally, understanding the materials and finishes involved can help prevent scratches or marks during dart adjustments, especially on delicate surfaces.
Precise Dart Placement Techniques
Achieving precise dart placement often requires troubleshooting common problems that can throw off your accuracy. To do this effectively, focus on proper dart measurement and fabric tension. Accurate dart measurement ensures your darts are correctly positioned, preventing uneven shaping. Managing fabric tension minimizes puckering or distortion when moving darts. When adjusting darts, consider the following:
- Double-check your dart measurement before pinning or sewing
- Smooth out fabric tension to avoid stretching or bunching
- Use tailor’s chalk or fabric marker for exact placement
- Keep darts flat and aligned during pinning
- Test on scrap fabric to confirm your technique
Correcting Misaligned Darts
Misaligned darts can throw off the symmetry and fit of your garment, but the good news is that most issues are fixable with careful adjustments. To correct misaligned darts, start by pressing the dart open gently, then resew it, ensuring your stitching lines align perfectly. If the dart shape is off, you might need to reshape the dart by adjusting the dart intake or tapering the stitching. Be mindful of fabric stretching; over-stretching can distort the dart and cause misalignment. Use clips or pins to hold the fabric in place before resewing, and work slowly to maintain even tension. With patience and precision, you can realign the darts, restoring the garment’s proper fit and symmetry without starting from scratch.
Frequently Asked Questions
Can I Move Bust Darts on Any Fabric Type?
Yes, you can move bust darts on most fabric types, but consider fabric stretch and seam allowance. For fabrics with good stretch, like jersey, moving darts is easier and less likely to distort the fabric. Always leave enough seam allowance to re-sew the darts in the new position, and use a fabric marker to mark the new dart placement. Be gentle to avoid damaging delicate fabrics.
What Tools Are Best for Repositioning Darts?
Think of darts removal like a surgeon’s delicate work—you need precision tools. Use a seam ripper for careful removal, then grab tailor’s chalk or fabric marker to mark your new dart position. A small, sharp pair of scissors helps trim excess fabric, and a pressing cloth guarantees smooth sewing. These sewing techniques allow you to reposition darts accurately without damaging your fabric, making your adjustments seamless and professional.
How Do I Prevent Puckering When Moving Darts?
To prevent puckering when moving darts, you need to focus on careful dart manipulation and fabric stretching. Gently ease the fabric as you reposition the darts, applying even tension to avoid puckers. Use your fingers or pressing tools to smooth the fabric during the process, ensuring it stays flat. Taking your time and working slowly helps maintain fabric integrity and results in a clean, professional finish.
Is It Necessary to Resew the Entire Dart Line?
Think of a dart alteration as a delicate dance—you don’t need to resew the entire dart line if the fabric compatibility allows for it. As long as you carefully unpick just the dart, you can reposition it without starting from scratch. This way, you save time and keep the fabric intact, ensuring a smoother finish. Just be gentle, and your alteration will look seamless and professional.
How Long Does It Take to Correct Misplaced Bust Darts?
Correcting misplaced bust darts usually takes about 30 minutes to an hour, depending on your fabric type and sewing techniques. For delicate fabrics like silk, you’ll need gentle handling, while sturdier materials like denim are quicker to adjust. Carefully unpick the dart stitching, reposition the dart, then resew using precise sewing techniques. With patience, you can fix the darts efficiently without starting over, ensuring a perfect fit.
Conclusion
Just like Da Vinci carefully adjusted his masterpieces, you can perfect your garment by repositioning those misaligned bust darts. With patience and a gentle touch, you’ll bring harmony back to your project, ensuring a flawless fit. Remember, every stitch you undo and redo is a step toward sewing mastery. So, embrace the process—your finished piece will be a true work of art, better than the original sketch.