
To make pacifier clips that blend style and function, start by gathering supplies like fabric scraps, thread, clips, and optionally, beads. Prepare your fabric by cutting it into 4×10 inch rectangles and ironing the edges. Use straight or zigzag stitches to securely attach components and consider adding personalized touches with embroidery or colorful beads. Always guarantee safety by checking for wear and maintaining appropriate lengths. If you want to explore more tips and tricks, keep going!
Key Takeaways
- Select vibrant fabrics and embellishments like beads or charms for a stylish look while ensuring durability through proper preparation and sewing techniques.
- Follow precise fabric preparation steps, including folding and ironing, to create a polished and professional appearance for the pacifier clips.
- Use secure sewing methods, such as zigzag stitches and X patterns, to reinforce attachments and enhance the clip's functionality.
- Personalize clips with names or initials through embroidery, making each piece unique while maintaining safety and compliance with toy standards.
- Regularly inspect clips for wear and secure fastening, ensuring safety during use and preventing any risks associated with pacifier clips.

Demearly 25 PCS 1" Suspender Clips Metal Pacifier Clip Holder for Pacifiers DIY Baby Girl Toy Bibs Garter Making Supplies (Silver, Bulk)
- Clip Width: 1 inch / 25.4mm wide
- Baby Safe Certification: Passed CPSIA & CPC tests
- Material & Safety: Lead-free, BPA-free, heavy metal-free
As an affiliate, we earn on qualifying purchases.
As an affiliate, we earn on qualifying purchases.
Gather Your Supplies for DIY Pacifier Clips
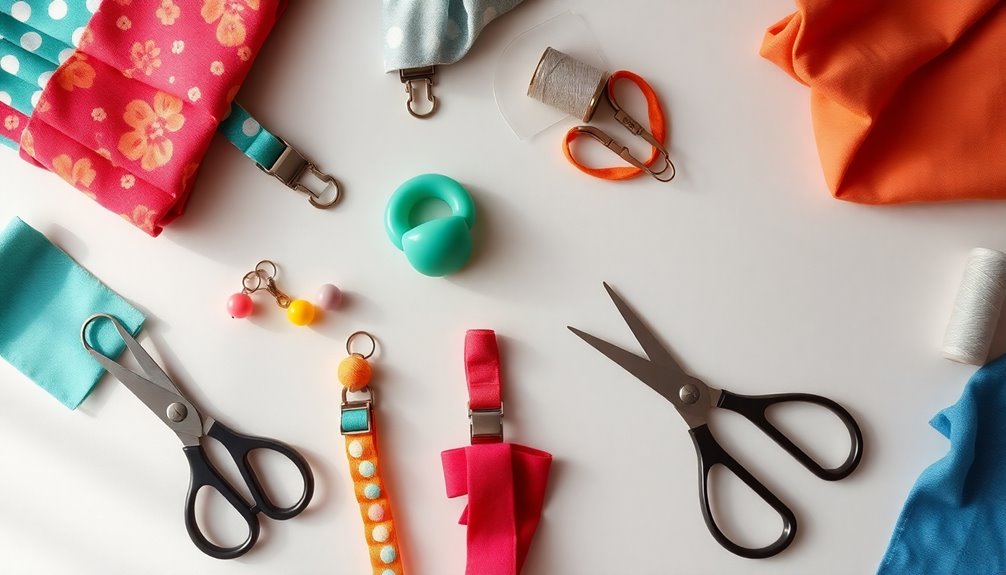
Before you plunge into making your DIY pacifier clips, it's essential to gather all the necessary supplies.
Start with fabric scraps—cotton or flannel works best—cut into a 4×10 inch rectangle for each clip. You'll also need coordinating thread and either ribbon or elastic, ideally ¼ inch wide for the pacifier attachment.
Don't forget to grab some pacifier clips in bronze or silver, about 1 inch in size. Make sure to include fusible interfacing for durability and heavy string or grosgrain ribbon measuring 7 inches long.
If you want to add a unique touch, consider using wooden beads as embellishments.
With your supplies ready, you're all set to create functional and stylish pacifier clips!
Step-by-Step Fabric Preparation
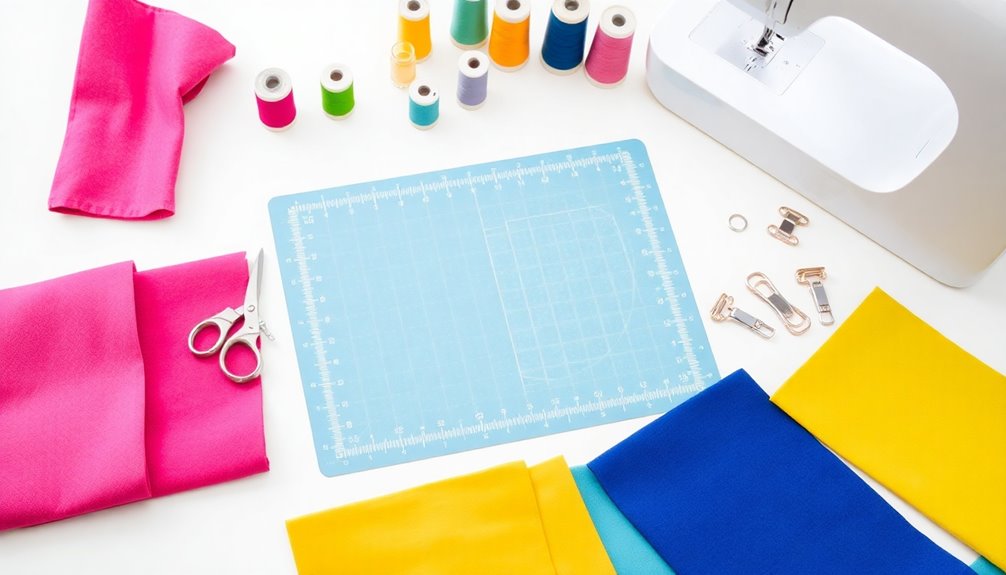
Now that you've gathered your supplies, it's time to prepare your fabric for the pacifier clips. Start by cutting your fabric into a 4×10 inch rectangle.
For neat edges, fold over the two 4-inch edges by ¼ inch and iron them down to prevent fraying. Next, fold the fabric lengthwise in half, creating a center crease to guide future folds. After establishing the center crease, unfold the fabric and make another fold along each long edge, pinning them in place to maintain alignment. This technique not only helps achieve sharp edges but also enhances your sewing projects, embodying the essence of sewing lifestyle and creative expression. Once pinned, sew along the edges with a straight stitch for a polished finish that combines both functionality and style.
Open it back up and fold each long side toward the center seam, ironing again for a polished look. Finally, fold the fabric in half along the center seam, pressing flat to create a thin strip.
This fabric preparation will guarantee you have the right shape and size to effectively attach to the pacifier while keeping small parts secure.
Sewing Techniques for Secure Clips

To guarantee your pacifier clips are both safe and stylish, mastering a few key sewing techniques is essential. Start by using a slow sewing technique to maintain control when securing the edges of your fabric strip. This assures your stitches are even and consistent.
When attaching the ribbon loop to one end, employ a straight or zigzag stitch for secure clips that won't come loose. For added durability, use the X method when sewing the folded end over the clip; this reinforces the connection against tugging. Experiment with fabric direction and starting points for the X stitch to achieve the best results.
Finally, regularly check your finished clips for any loose threads or weak points, allowing you to tie a knot on repairs as needed.
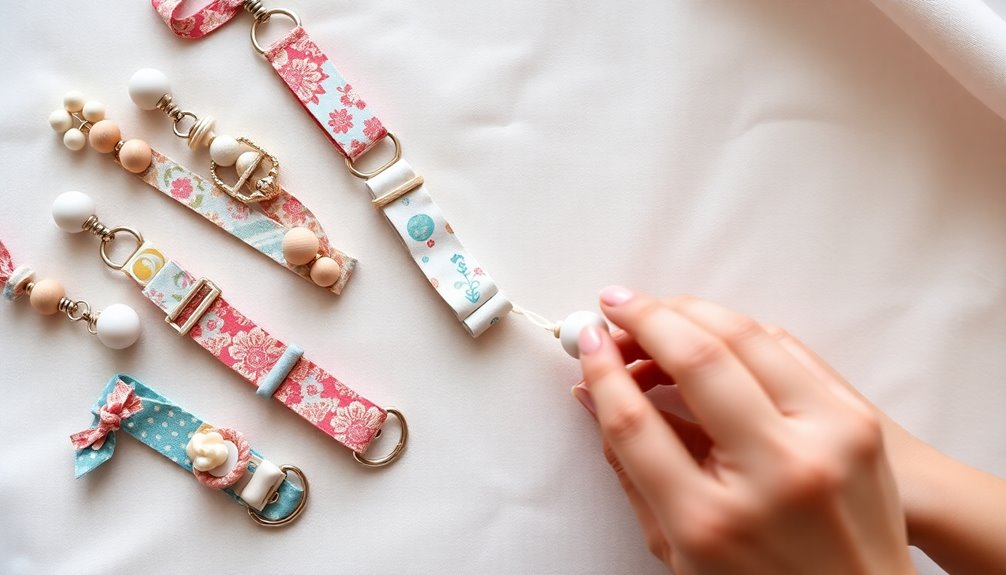
Personalization and Customization Options
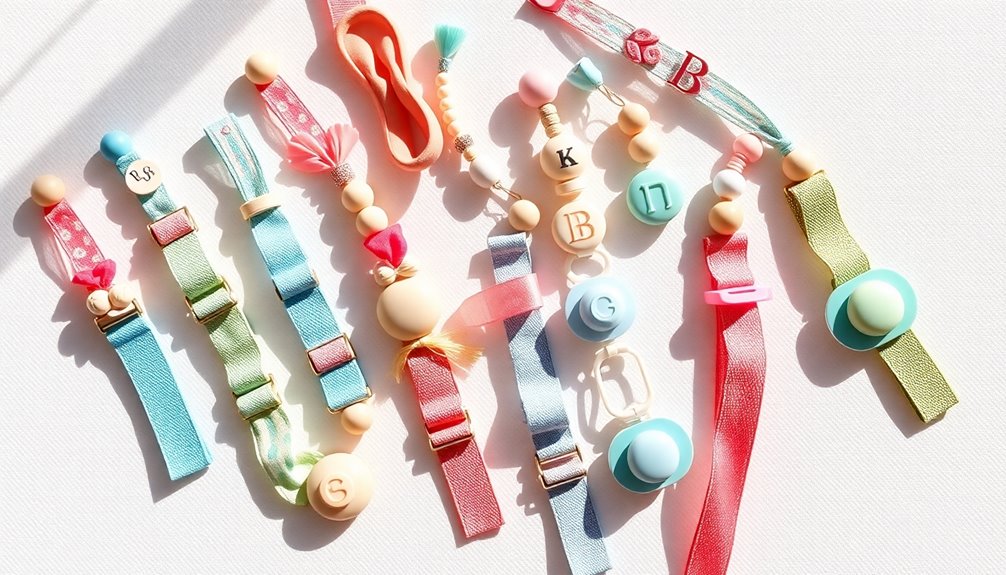
Personalizing your pacifier clips lets you express your baby's unique style and personality. With a variety of fabric choices, colors, and patterns, you can create designs that truly reflect your little one.
Customization options like adding names or initials with embroidery make the clips special and easily identifiable. Here are some ideas to inspire you:
- Choose eye-catching silicone beads for a pop of color.
- Incorporate themed charms or decorative embellishments for added flair.
- Adjust the length of the ribbon to fit your needs, while keeping safety in mind.
Safety Tips for Using Pacifier Clips

When using pacifier clips, safety should always be your top priority. To guarantee your baby's safety, follow these essential safety tips.
First, make sure the clip doesn't exceed the maximum length of 220mm to prevent strangulation risks. Regularly inspect clips for any wear and tear, verifying all components are securely fastened to avoid choking hazards.
Always supervise infants while using pacifier clips; your oversight is vital for their safety. Choose designs with smooth edges to prevent pinching or catching fingers.
Finally, comply with toy safety standards, like EN 71 for wooden beads, confirming all materials are resistant to saliva and suitable for babies.
Prioritizing these safety measures will help keep your little one safe and sound.
Frequently Asked Questions
How Do You Make a Pacifier Clip?
To make a pacifier clip, start by cutting a 4×10 inch rectangle of cotton or flannel.
Fold the edges and iron them for clean seams before sewing.
Secure an 8-10 inch length of ribbon into one end of the fabric tube and stitch it firmly.
Slide a pacifier clip onto the other end, fold it over, and sew it in place.
Always check the length to verify it meets safety standards.
How Do Pacifier Clips Work?
Did you know that approximately 80% of parents use pacifiers for their babies?
Pacifier clips work by attaching securely to your baby's clothing, keeping the pacifier close and preventing it from falling to the ground. They usually feature a strong spring mechanism for easy attachment and detachment.
Make certain to regularly check the clip's security and condition to guarantee it's safe and functional for your little one during use.
What Kind of String Is Used for Pacifier Clips?
When you're choosing string for pacifier clips, go for heavy string or 1/8 inch wide grosgrain ribbon.
These options are durable and strong enough for everyday use. You'll want the cord to be about 7 inches long; this length keeps the pacifier secure while being safe for your child.
Make sure the materials are non-toxic and child-safe, and always secure the cord well to avoid any choking hazards.
Why Do Pacifier Clips Have Beads?
Pacifier clips have beads for several reasons.
First, they add a fun, customizable look that can match your baby's outfits. They also give your little one something safe to chew on during teething, providing comfort.
The beads add weight, helping the clip stay securely in place and preventing drops. Plus, using non-toxic materials guarantees safety while enhancing durability, reinforcing the connection between the pacifier and the clip to prevent breakage.
Conclusion
Now that you've mastered the art of making pacifier clips, imagine the joy of seeing your little one sporting a stylish, personalized accessory. But wait—before you thread that last stitch, are you fully aware of the safety tips essential for keeping those clips secure? You wouldn't want a cute design to turn into a safety hazard, right? Dive back into the safety guidelines to guarantee your creation is both functional and worry-free. Your peace of mind matters!