
TL;DR

Get business pricing on tools and workshop supplies
- Business-only prices and quantity discounts
- Tax-exempt purchasing
- Multiple users, one account, clear invoices
Woodworking Halloween decorations are popular for their durability and charm. Using simple tools, eco-friendly materials, and clever designs, you can create festive, weather-resistant decorations that stand out. Learn tips to customize, light up, and safely build your spooky displays.
Imagine a yard filled with glowing, carved pumpkins and ghostly figures, all crafted from rough-hewn wood. That’s the magic of woodworking Halloween decorations. They’re sturdy, customizable, and add a rustic charm that plastic decorations just can’t match.
If you want your home to stand out this season, understanding the essentials—like materials, safety, and design—can turn simple wood into spooky art. Whether you’re a seasoned woodworker or just starting out, this guide will help you create decorations that are as durable as they are hauntingly beautiful.
Start with simple projects like painted plywood pumpkins or ghosts for quick, satisfying results.
Choose weather-resistant woods and sealants to keep decorations looking fresh season after season.
Lighting transforms wooden decor into a spooky spectacle—use battery-powered LEDs for safety and effect.
Reclaimed wood adds a rustic charm and helps you craft eco-friendly Halloween decorations.
Safety is key—wear PPE, handle tools carefully, and work in a clean, organized space.
How to Make Beginner-Friendly Wooden Halloween Decor That Spooks and Delights
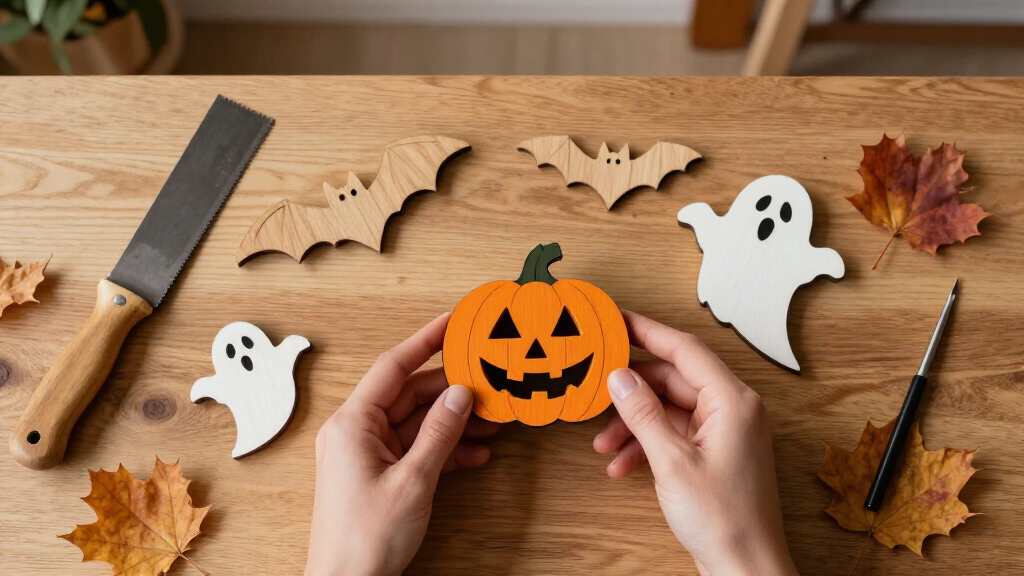
Starting with simple projects is the best way to dip your toes into woodworking for Halloween. Think cutouts of pumpkins, ghosts, or bats, all made from plywood or reclaimed wood. These projects don’t require fancy tools—just a jigsaw and some sandpaper.
For example, cut a pumpkin shape from a ¼-inch plywood sheet, then carve out a face with a jigsaw. Sand the edges smooth to avoid splinters, then paint or stain it for color. Adding a battery-operated LED light inside transforms it into a glowing jack-o’-lantern.
Safety tip: Always wear eye protection and keep your workspace clean to prevent accidents. A simple project like this could take an afternoon, and it’s perfect for kids or beginners.
woodworking Halloween decorations kit
As an affiliate, we earn on qualifying purchases.
As an affiliate, we earn on qualifying purchases.
Choosing the Best Materials for Weather-Resistant Halloween Decorations
When you turn your yard into a haunted scene, weather can be your enemy or your friend. Plywood is a popular choice because it’s affordable and easy to cut. But for outdoor durability, cedar or pressure-treated pine are better options—they resist rot and moisture.
Reclaimed wood, like pallets, offers a rustic look that’s perfect for spooky, vintage themes. Just make sure to clean and sand it thoroughly before starting. Applying a clear sealant or outdoor paint protects your decorations from rain, snow, and sun.
Imagine a skeleton made from weatherproof wood, standing tall in your yard, even after a storm. That’s the kind of durability you want for your Halloween haunt. Choosing the right materials ensures your decorations won’t warp, rot, or fall apart quickly, which is essential if you want your spooky setup to last through multiple seasons or weather events. The tradeoff often involves balancing cost, appearance, and longevity, so consider what matters most for your project.
Top 5 Tools Every DIYer Needs for Halloween Woodworking Projects
| Tool | Purpose | Tip |
|---|---|---|
| Saw (Jigsaw or Circular) | Cutting shapes and pieces | Use a fine blade for detailed cuts and a steady hand for smooth edges |
| Sander | Smoothing rough edges | Orbital sanders work well; start with coarse grit, then finish with fine |
| Drill | Making holes for lights or hanging | Use a spade or hole saw bit for clean cuts |
| Clamps | Holding pieces steady during assembly | Adjust clamps to avoid damaging soft woods |
| Paintbrushes & Sealants | Adding color and weatherproofing | Choose rust-proof brushes for longevity |
These tools make your project safer and more precise, whether you’re carving a spooky face or assembling a layered design. Investing in quality tools can also save you time and reduce frustration, especially when you’re working with tricky shapes or outdoor materials that require a good sealant.
How to Add Creepy Lights and Effects to Your Wooden Halloween Decor
Lighting transforms simple wood into an eerie spectacle. Battery-operated LED lights are your best bet—they’re safe, bright, and easy to hide behind or inside your decorations. For example, place a flickering candle LED inside a carved pumpkin for a haunted glow.
To integrate lights, drill small holes for wiring or use cutouts with built-in compartments. Fairy lights wrapped around a wooden skeleton or a bat cutout create a dynamic, spooky effect. The key is to make sure wiring is protected from weather and that lights are rated for outdoor use.
Imagine a set of wooden gravestones with flickering LEDs beneath, casting long shadows in the moonlight. Those small touches make all the difference. Proper lighting not only enhances the visual impact but also adds an element of safety, as well-placed lights can illuminate pathways and prevent accidents during trick-or-treating hours.
Compare Popular DIY Halloween Wood Projects — Which One Is Right for You?
| Project | Difficulty | Materials Needed | Best For |
|---|---|---|---|
| Plywood Pumpkin Sign | Easy | Plywood, paint, LED light | Beginners, quick decor |
| Reclaimed Wood Skeleton | Moderate | Old wood, screws, paint, lights | Intermediate hobbyists |
| Laser-Cut Haunted House Scene | Advanced | CNC or laser cutter, wood sheets | Experienced woodworkers, detail-oriented |
| Modular Wooden Bats | Easy to Moderate | Plywood or reclaimed wood, paint | Flexible, outdoor or indoor |
Selectting the right project depends not only on your skill level but also on your intended visual impact and available tools. For example, a plywood pumpkin sign is quick and simple, making it ideal for last-minute decor or beginners. In contrast, a laser-cut haunted house scene offers intricate details that can become a centerpiece but requires more advanced equipment and skills. Understanding these tradeoffs helps you plan effectively, ensuring your Halloween decorations are both impressive and achievable within your timeframe and resources.
Simple Steps to Create Your Own Spooky Wooden Decorations
- Design your decoration on paper or digitally. Sketch a ghost, bat, or pumpkin outline.
- Select your wood and gather tools. Use reclaimed wood for a rustic look or plywood for ease.
- Cut out your shape with a jigsaw, then sand edges smooth.
- Paint or stain for color. Add eyes, faces, or details for extra creepiness.
- Seal with weatherproof finish if placing outdoors.
- Add lighting or hanging hardware as needed.
For example, a friend once built a haunted tree with bat cutouts hanging from branches, illuminated by string lights. The process was straightforward and turned her yard into a spooky wonderland in a single weekend. Taking the time to plan each step ensures your project is manageable and results in a polished, professional-looking decoration that can be enjoyed year after year.
Key Tips to Make Your Halloween Wood Decor Last and Look Great
Durability and visual appeal go hand in hand. Use quality outdoor paints and sealants that resist UV rays and moisture. Sand all rough edges and apply a primer if painting for smoother results. This not only prolongs the lifespan of your decorations but also enhances their aesthetic appeal by providing a smooth, even surface for paint or stain.
For example, a carved wooden witch’s hat lasted three Halloweens in a row, thanks to a good coat of outdoor stain and sealant. Adding LED lighting inside enhances the spooky effect without risking fire or damage. Proper sealing and finishing are crucial because outdoor elements like rain, snow, and sun can quickly degrade untreated wood, leading to warping, cracking, or fading. Investing a little extra in quality finishes extends the life of your decorations and maintains their spooky charm across multiple seasons. Remember, a well-protected decoration not only looks better but also saves you money and effort in repairs or replacements.
Remember, safety first: always work in a well-ventilated area and handle power tools with care. Wearing PPE like goggles and gloves protects you from splinters and debris. Properly maintained tools and safety precautions contribute to a smoother, more enjoyable DIY experience, reducing the risk of accidents and ensuring your decorations turn out just as you envisioned.
Frequently Asked Questions
What are some beginner-friendly woodworking Halloween projects?
Simple cutouts like plywood pumpkins, ghosts, and bats are perfect for beginners. Using basic tools like a jigsaw and sandpaper, you can create charming decorations in an afternoon. Painting or staining adds a personal touch.
How can I make my outdoor decorations weatherproof?
Use treated or reclaimed wood, then seal everything with outdoor-rated stain or clear sealant. Applying a weatherproof finish protects your decorations from rain, snow, and UV rays, keeping them looking fresh year after year.
What tools and materials do I need to start woodworking Halloween decorations?
Essential tools include a jigsaw, drill, sander, clamps, and brushes. Materials like plywood, reclaimed wood, outdoor paint, and sealant are key. Battery-operated LED lights can add a spooky glow safely outdoors.
Are there eco-friendly or sustainable options for materials?
Absolutely. Reclaimed wood, pallets, and leftover scraps are eco-friendly choices that add rustic charm. Using these reduces waste and gives your decorations a unique, vintage look.
How can I incorporate lights or other effects into my wooden decorations?
Install small holes for wiring or place LED candles inside carved pumpkins or ghost cutouts. Wrap fairy lights around structures or hide small battery packs behind figures for a haunting glow without safety worries.
Conclusion
Your Halloween yard can become a haunting masterpiece with a few well-chosen wooden decorations. The beauty lies in their durability, the ability to customize, and the satisfying process of making them yourself. When you light up your spooky creations, you turn a simple yard into a scene straight out of a horror story.
So, grab your saw, dive into some reclaimed wood, and start building your haunted holiday. After all, the best decorations are the ones you craft with your own hands — they tell your story, one spooky detail at a time.
Fall yard work Picks
leaf blowers
As an affiliate, we earn on qualifying purchases.