To secure embroidery on clothes, choose the right fabric, like cotton or linen, and use stabilisers for support. Opt for appropriate needles and threads that match your fabric type. Use shorter stitches to enhance durability and prevent puckering, and knot your thread ends to keep them secure. Finally, follow care instructions, like washing in cold water and air drying, to protect your designs. Keep going to discover more tips for beautiful, long-lasting embroidery!
Key Takeaways
- Choose non-stretchy fabrics like cotton or linen for stable embroidery and to reduce design distortions.
- Use appropriate stabilisers, such as Stick and Stitch, to maintain structure during stitching and washing.
- Select the right needle size and type, matching it to the fabric weight for optimal stitching without damage.
- Employ shorter stitches and back stitches for durability, preventing puckering and ensuring secure designs.
- Follow care instructions, like washing in cold water and air drying, to preserve the integrity of the embroidery.

New brothread 6PCS 8.5"x11" Sticky Water Soluble Embroidery Stabilizer Printable Paper Stabilizer – Medium Weight – Allowed for Print or Draw Patterns Best for Hand & Machine Embroidery
★ PRINTABLE & SELF-ADHESIVE: Sticky Water Soluble Paper Stabilizer is a printable temporary self-adhesive, fabric-like stabilizer which features…
As an affiliate, we earn on qualifying purchases.
As an affiliate, we earn on qualifying purchases.
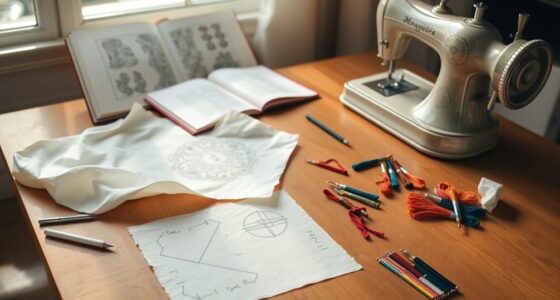
Understanding Fabric Types for Embroidery
When you're choosing fabric for embroidery, understanding the different types can make all the difference. Non-stretchy fabrics like 100% cotton, linen, and denim provide a stable base for your embroidered design, ensuring fewer distortions.
Medium-weight fabrics are particularly ideal, allowing for easier needle passage and maintaining stitch integrity.
On the other hand, stretchy fabrics, such as knit fabrics, require special techniques to accommodate their stretchiness, which can complicate your embroidery project. Delicate stitches may not hold up well on stretchy materials, risking damage during washing.

SCHMETZ Jean & Denim Sewing Machine Needles – Precision Needles for Heavy Fabric, Assorted Sizes, 5-Needle Cards, Pack of 1
MASTER EVERY STITCH: Compatible with all home sewing machines, SCHMETZ Jean & Denim Needles handle thick fabric like…
As an affiliate, we earn on qualifying purchases.
As an affiliate, we earn on qualifying purchases.
Importance of Stabilisers
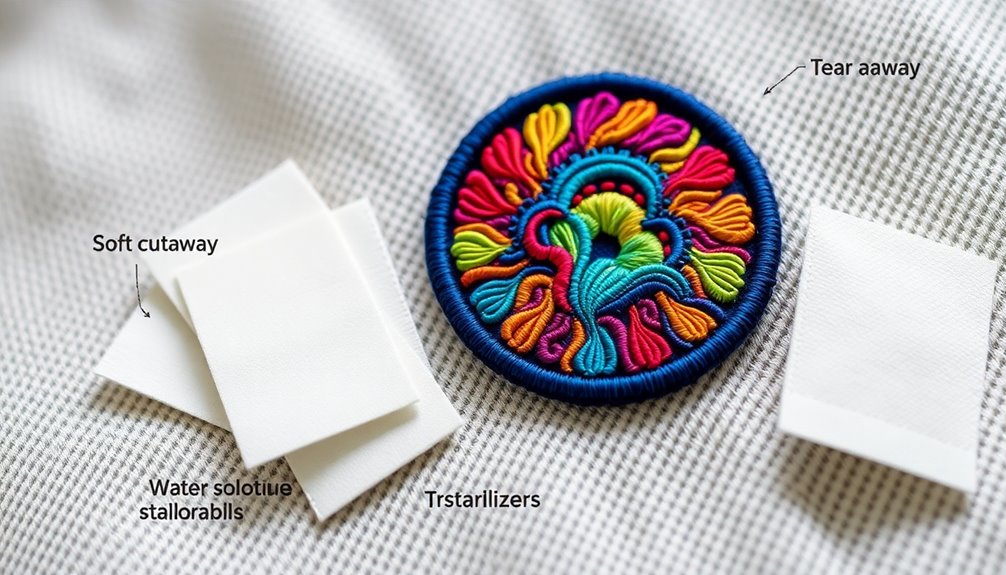
Choosing the right fabric is just the beginning; the importance of stabilisers can't be overlooked in the embroidery process. Stabilisers provide essential structure, preventing distortion of your designs during stitching and washing. They help maintain stitch integrity, especially on stretchy fabrics or delicate materials.
Here's a quick overview of the two main types of stabilisers:
| Type | Description |
|---|---|
| Stick and Stitch | Adheres to the fabric, providing support during stitching. |
| Cover-a-Stitch | Offers additional support without altering fabric's hand. |
For best results, guarantee proper application by cutting the stabiliser larger than your embroidery area. Testing different types on your fabric choice will help you determine the best option for durability and ease of embroidery.

BYMORE 262 Pack Embroidery Thread Floss Kit Including 200 Colors 8 M/Pcs Cross Stitch Sewing Thread with Floss Bins and 62 Pcs Cross Stitch Tool,4-Tier Transparent Storage Box
Package:The cross stitch set come with 200 different colors embroidery floss, 48 pcs embroidery needles, 4 pcs cross…
As an affiliate, we earn on qualifying purchases.
As an affiliate, we earn on qualifying purchases.
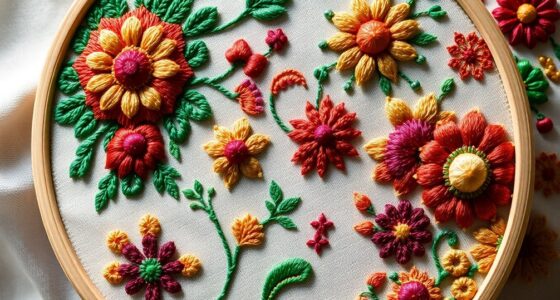
Needle and Thread Selection

Selecting the right needle and thread is essential for achieving a flawless embroidery finish. For cotton and denim fabrics, use standard embroidery needles, while larger needles suit thicker materials to prevent damage.
Match your thread material with the garment fabric; opt for cotton embroidery thread with cotton items and wool threads for woolen fabrics. When working with stretchy fabrics, choose a flexible needle to guarantee smooth stitching.
For detailed work on finer fabrics, use 2-3 strands of embroidery floss, maintaining stitch visibility without compromising garment integrity. To enhance your embroidery experience, it’s essential to understand how to prevent embroidery floss tangling. One effective method is to unwind a small amount of floss before you begin stitching and keep the remainder on the spool, which can help minimize knots. Additionally, using a thread conditioner can smooth the fibers and further reduce any potential tangles while you work.
Finally, consider the fabric's weight when selecting the needle size; sturdier needles are ideal for medium to heavy fabrics to avoid needle breakage during stitching. This careful selection enhances the durability of your embroidery patterns.
9 Pcs Large Embroidery Hoop Frame, Embroidery Frames for Display, Imitated Wood Cross Stitch Hoop, Circle/Oval/Octagonal Cross Stitch Frame Kits, Perfect for DIY, Craft Sewing, Home Decor
Package Includes: 9-piece embroidery hoops set: 3 shapes (round/oval/octagonal) with 3 sizes each (round: 5.1/6.7/8.3in; oval: 4.7×5.9/5.9×7.5/7×9.4in; octagonal:…
As an affiliate, we earn on qualifying purchases.
As an affiliate, we earn on qualifying purchases.
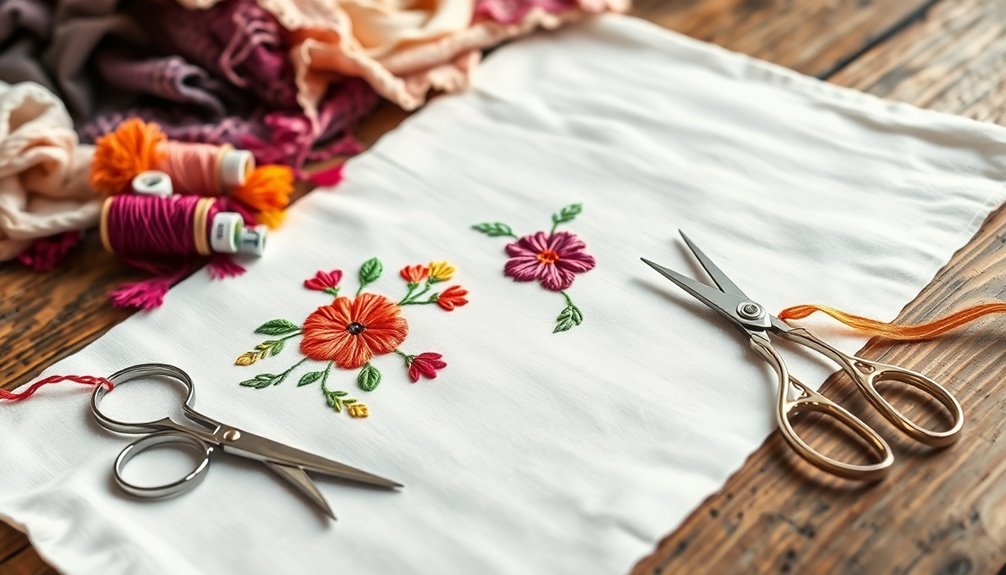
Stitching Techniques for Durability

After picking the right needle and thread, it's time to focus on the stitching techniques that will guarantee your embroidery lasts. Use shorter stitches—10mm or under—to enhance durability and prevent puckering, making sure your stitches lay flat.
Avoid long straight stitches; instead, opt for back stitches to create more secure stitches. Remember to knot the thread at both the beginning and end, leaving a ½ inch tail to prevent unraveling.
It's essential to monitor stitch tension, balancing security and comfort to avoid distortion in the fabric. Consider using fusible stabilizers to enhance durability and maintain stitch integrity during washing the fabric, while providing a softer texture against the skin.
This combination will make certain your embroidered clothing stands the test of time.
Care Instructions for Embroidered Clothing
To keep your embroidered clothing looking its best, you need to follow some essential care instructions.
Always wash your items in cold water to minimize color bleeding and preserve the integrity of the stitches. Turn garments inside out before washing to protect the fabric. For intricate designs with delicate threads, use a delicates bag to prevent snagging. High-quality threads are usually colorfast, but it's wise to test for any color bleeding beforehand.
When it comes to drying, air dry your embroidered pieces to avoid damage; sturdier fabrics like jeans can go in the machine on a delicate cycle. For those especially delicate threads, consider hand washing and steer clear of abrasive surfaces during laundering.
Frequently Asked Questions
How Do You Secure Embroidery on Clothes?
To secure embroidery on clothes, start by knotting your thread at both ends of your stitching.
Use a variety of stitches like back stitch and chain stitch for durability.
Consider adding fusible stabilizers on the fabric's reverse side for extra support.
Make sure your stitches aren't too tight to avoid puckering.
Finally, weave the needle under nearby stitches to create knots, securing loose threads before snipping tails close to the fabric for a clean finish.
How Do You Keep Embroidery From Coming Undone on Clothes?
Did you know that nearly 25% of embroidered items face unraveling issues after just a few washes?
To keep your embroidery from coming undone, always knot the thread securely at both ends, leaving a ½ inch tail. Use small stitches, around ⅛ to ¼ inch, for better durability.
Consider adding fusible stabilizers on the back for extra support.
Finally, regularly check for loose stitches after washing and repair them promptly to maintain quality.
How Do You Attach Embroidery to Clothes?
To attach embroidery to clothes, start by knotting your thread at both ends of your stitching.
Make sure you leave a ½ inch tail to keep it secure during wear and washing. You can also use fusible stabilizers on the back of the fabric for extra support.
As you stitch, weave your needle under nearby stitches and form knots.
Finally, snip any excess thread tails close to the fabric for a neat finish.
How to Lock an Embroidery?
You'd think locking embroidery is simple, right? Well, it's not just about stitching away!
Start by knotting your thread securely at both ends—this prevents that pesky unraveling. Leave a ½ inch tail for extra security, then weave the needle under stitches before snipping the thread for a neat finish.
Consider using fusible stabilizers for added support, and don't forget to check for loose stitches regularly. Your embroidery deserves all that attention!
Conclusion
To keep your embroidery looking sharp, choose the right fabric, invest in quality stabilizers, select the best needles and threads, master durable stitching techniques, and follow proper care instructions. By understanding these essential elements, you'll not only enhance the longevity of your designs but also elevate your overall embroidery experience. So, embrace the process, enjoy the creativity, and watch your garments transform into beautiful, lasting pieces that reflect your unique style!