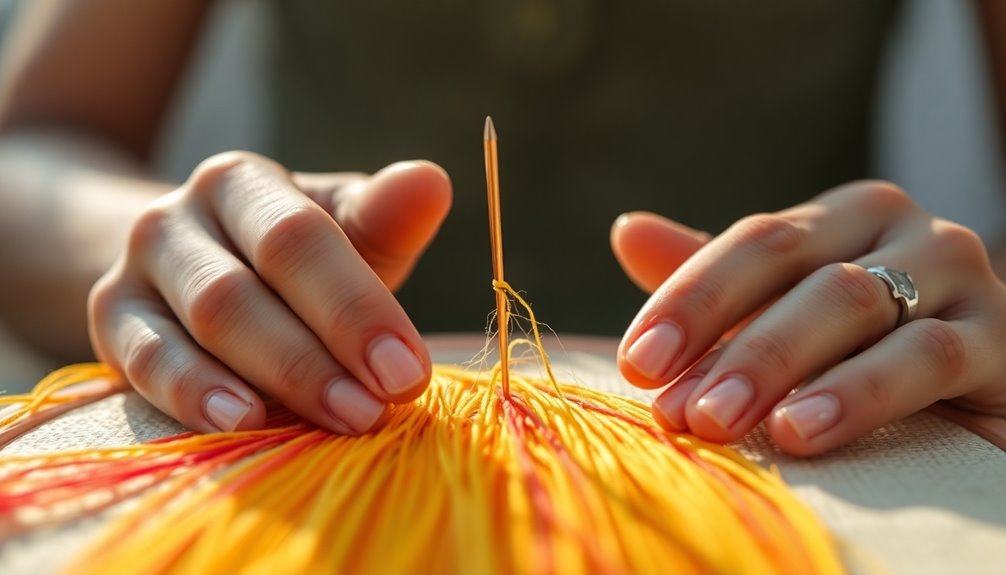

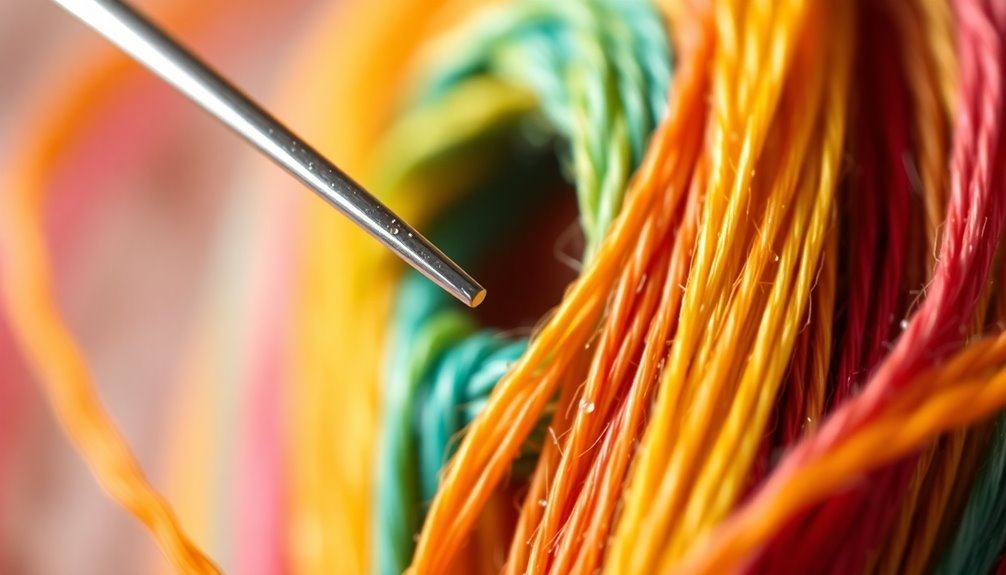
To thread an embroidery needle easily, start by flattening the thread and moisten it slightly to reduce fraying. Hold the thread with just the tip exposed and leave a 2-3 inch tail for stitching. Use the needle sliding method to align the needle's eye with the thread. Pinch the tail to prevent slipping and maintain consistent tension. By following these steps, you'll stitch with ease and confidence, and there's more to discover about enhancing your technique.
Key Takeaways
- Pinch and flatten the thread to reduce bulk, making it easier to pass through the needle's eye.
- Moisten the thread slightly to minimize fraying and enhance control during threading.
- Hold the thread with only a 2-3 inch tail exposed for better handling and stability.
- Use the needle sliding method, aligning the thread tip with the needle's eye for precise insertion.
- Maintain a firm grip on the tail while stitching to ensure consistent tension and avoid slipping.

30 Pieces Gourd Shaped Plastic Needle Threaders, Plastic Wire Loop DIY Needle Threader Hand Machine Sewing Tool for Sewing Crafting with Clear Box, 4 Colors Random
- Package Quantity: 30 pieces in total
- Material Quality: High-quality plastic and steel wire
- Elastic and Durable: Flexible, not easy to bend or break
As an affiliate, we earn on qualifying purchases.
As an affiliate, we earn on qualifying purchases.
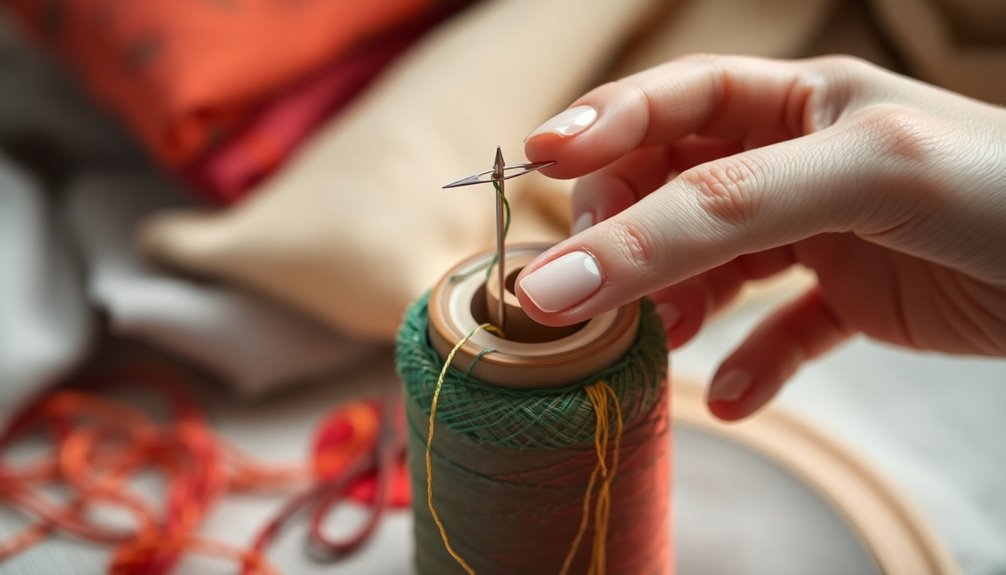
Preparing Your Thread for Easy Threading
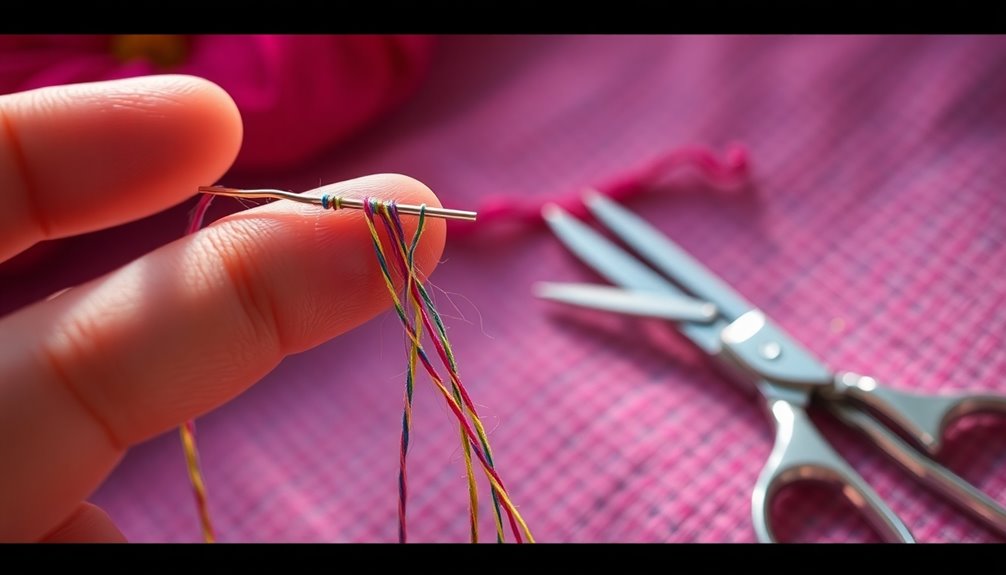
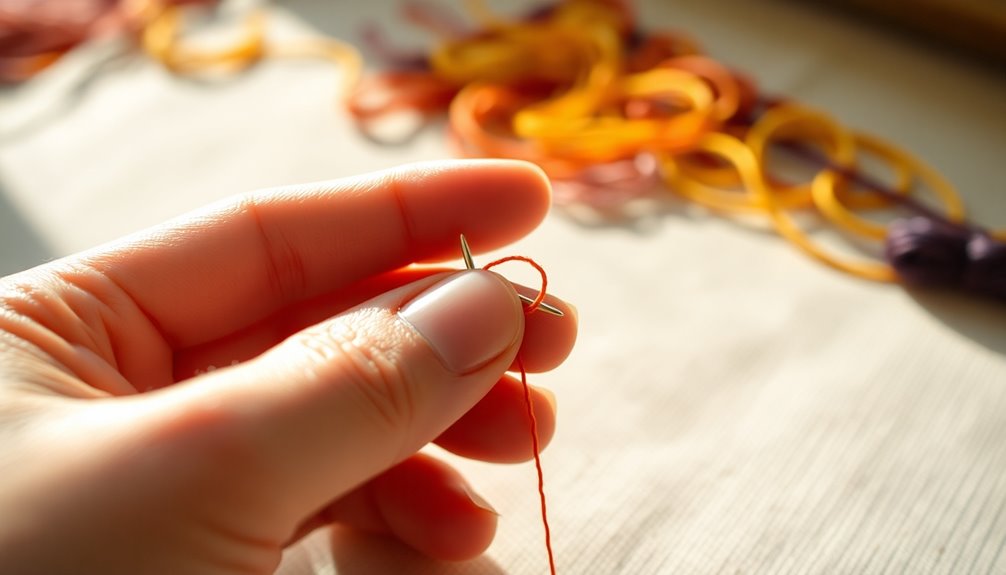
Preparing your thread for easy threading is essential for a smooth embroidery experience. To start, pinch the thread to flatten it, making it easier to slide through the needle's eye. You can also moisten the thread slightly; this helps with flattening and reduces fraying as you thread.
Hold the thread with just the tip exposed between your thumb and forefinger for better control. It's important to leave a tail of two to three inches, ensuring you have enough length for stitching without accidentally pulling it out of the needle.
Finally, always slide the needle onto the thread instead of moving the thread to the needle. This simple technique simplifies the threading process, making your embroidery journey more enjoyable.
The Importance of Flattening Your Thread
Flattening your thread is crucial for effortless threading and high-quality embroidery. When you flatten your thread, it reduces bulk, making it easier to pass through the needle's eye without splitting or fraying. A flat thread aligns better with the needle, increasing your chances of successful threading on the first attempt.
To maintain its flatness, pinch the thread while you thread the needle, enhancing control and precision during the process. This simple action helps you achieve a more even stitch appearance, which contributes to the overall quality of your embroidery work.
Moisten Your Thread for Better Control
Often, moistening your thread can greatly enhance your control during the threading process. A light dampening with water or saliva helps flatten the thread, making it easier to pass through the needle's eye.
This flattened thread reduces friction, allowing for smoother threading and minimizing the chance of fraying. When you moisten the thread, it becomes more pliable, aiding in aligning it accurately with the needle.
Additionally, dampening the thread can prevent tangling, giving you better control while threading. This simple step contributes to a more efficient and frustration-free embroidery experience, especially if you're just starting out.
Proper Needle Positioning Techniques
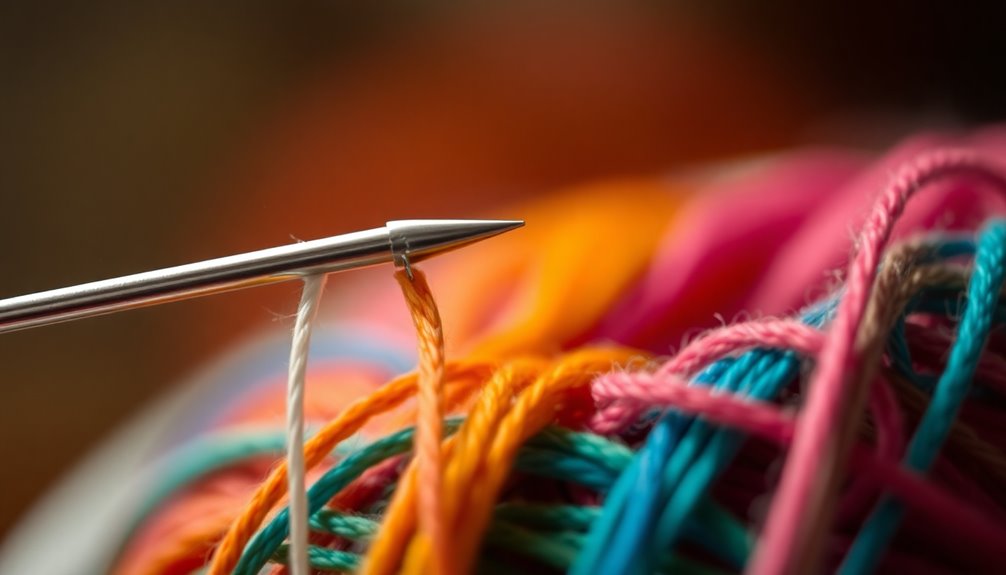
To thread your embroidery needle effectively, try the needle sliding method by moving the needle toward the thread instead of the other way around.
Use your hands as a pivot point to keep everything steady and maintain control during the process.
Finally, focus on aligning the tip of the thread with the needle's eye for a smoother threading experience.
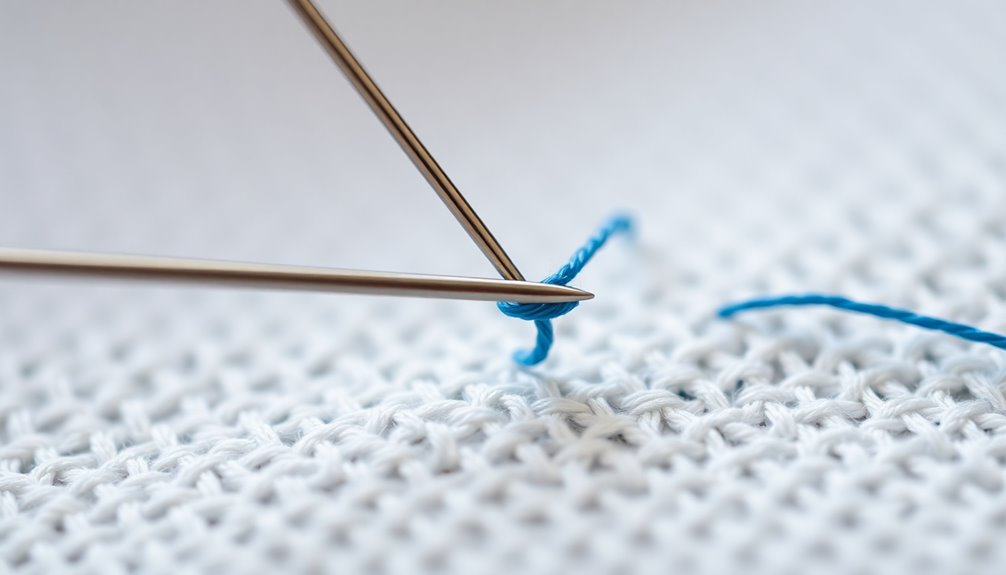
Needle Sliding Method
While you might think threading an embroidery needle is a simple task, using the needle sliding method can transform the experience into a more precise and controlled process. Instead of trying to maneuver the thread into the needle's eye, slide the needle onto the thread for better alignment.
Rest your hands together to create a stable pivot point, making it easier to guide the needle. Focus on the tip of the thread as you position the needle; this considerably increases your chances of success on the first try.
Moisten and flatten the thread before you start to prevent fraying. Use a gentle sliding motion with the needle for a smooth threading experience, avoiding unnecessary strain on both the thread and the needle.
Pivot Point Control
Achieving accurate needle positioning can greatly improve your threading experience. Instead of moving the thread towards the needle, slide the needle onto the thread for better control. Use a pivot point by resting your hands together, making it easier to align the needle with the thread. Focus on the tip of the thread while bringing the needle to it for enhanced accuracy.
| Technique | Benefits | Emotional Impact |
|---|---|---|
| Sliding Needle | Increases control | Reduces frustration |
| Pivot Point Stability | Maintains focus | Builds confidence |
| Moistened Thread | Eases threading process | Creates a sense of ease |
| Steady Hands | Guarantees precision | Fosters accomplishment |
| Accurate Alignment | Enhances overall threading success | Sparks joy in crafting |
With these techniques, your threading process will feel far more rewarding!
Thread Alignment Focus
Proper needle positioning is essential for a smooth threading experience, as it directly impacts your success. To simplify the process, slide the needle onto the thread instead of moving the thread to the needle.
Bring the needle to the thread, resting your hands together to create a pivot point; this enhances control over the sliding motion. Focus on the tip of the thread as you align it with the needle's eye for better precision.
Moisten the thread beforehand to flatten it, making it easier to fit through the needle's eye. Verify that only the thread's tip is visible between your thumb and forefinger to improve alignment and control while threading.
This approach makes threading efficient and hassle-free.
Sliding the Needle Onto the Thread
To slide the needle onto the thread effectively, hold the thread in one hand and the needle in the other, bringing the needle to the thread for better control.
Position the tip of the thread a few inches away from the needle's eye, which allows for a smooth sliding motion. If you moisten the thread slightly, it'll flatten, making it easier to guide through the needle's eye.
Keep your focus on the needle's eye while positioning it, ensuring you don't miss the target. This attention to detail will help you thread accurately and quickly.
Creating a Pivot Point for Stability
Creating a stable pivot point is essential for threading your needle effectively.
By positioning your hands correctly and keeping them steady, you enhance your control over the thread and needle.
This stability minimizes unnecessary movements, making the whole process smoother and more precise.
Importance of Stability
While threading an embroidery needle might seem straightforward, achieving stability is essential for success. By creating a pivot point with your hands, you gain better control and reduce the chances of misalignment. This stable positioning allows you to focus on the thread's tip, ensuring a smoother threading process. When you utilize this pivot point, sliding the needle onto the thread becomes easier, making the task quicker and more accurate. A steady hand position minimizes unnecessary movements, preventing frustration and errors. Ultimately, maintaining stability not only enhances your precision but also boosts your confidence, making threading feel less intimidating.
| Benefit | Description |
|---|---|
| Better Control | Achieves precision in threading |
| Smoother Process | Reduces misalignment and errors |
| Enhanced Confidence | Makes the task feel less intimidating |
| Quicker Threading | Facilitates faster and easier threading |
Hand Positioning Techniques
Often, proper hand positioning is the key to threading an embroidery needle with ease. Rest your hands together to create a pivot point, which allows for smoother, more controlled sliding of the needle onto the thread.
Keep the tip of the thread positioned between your thumb and forefinger, ensuring focus and alignment as you bring the needle to it. This pivot point stabilizes your hands, reducing unnecessary movement and enhancing threading accuracy.
Pinch the thread flat and moisten it to facilitate easier insertion into the needle's eye while using the pivot point for support. By managing the sliding motion of the needle with this technique, you can effectively control the threading process, minimizing the risk of misalignment.
Enhancing Thread Control
Establishing a solid pivot point can considerably enhance your control over threading an embroidery needle. To create this pivot, rest your hands together, which provides better stability.
Position the needle close to the thread, using your pivot point to slide the needle onto the thread easily, minimizing unnecessary movement. Focus on the tip of the thread and guide the needle toward it, ensuring accurate alignment for successful threading.
Moisten and flatten the thread beforehand to enhance control and prevent fraying, making it easier to guide through the needle's eye.
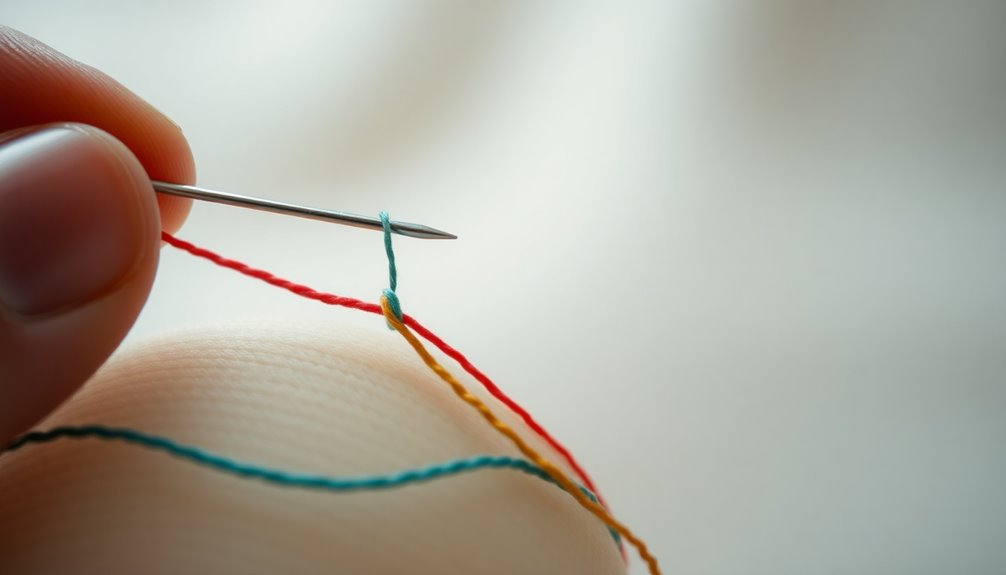
Ensuring a Secure Tail for Stitching
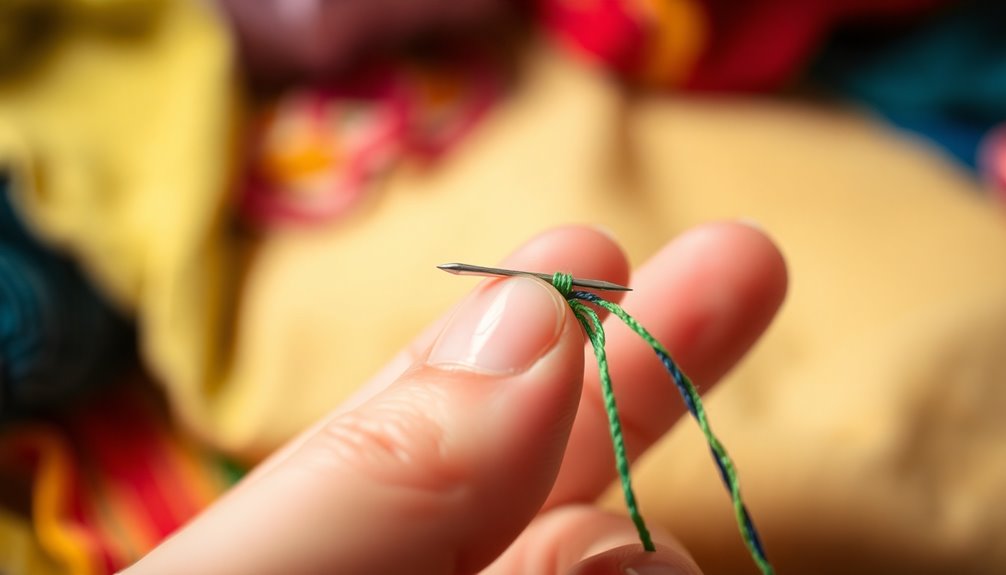
A secure tail is essential for successful stitching, so leave a tail of two to three inches after threading your needle. Before you start stitching, pinch the tail to prevent it from slipping out of the needle.
Make certain the tail is firmly held in place, as this helps maintain consistent tension throughout your work. If you feel it's necessary, tie a small knot at the end of the tail for added security, which can stop it from pulling through the fabric.
While you're stitching, regularly check the tail's length to make sure it remains long enough to continue without risking it coming loose. Keeping these tips in mind will set you up for a smoother stitching experience.
Starting Your Stitching With Confidence
To start your stitching with confidence, proper thread preparation is key.
Make sure you position the needle correctly and maintain a steady thread tension throughout the process.
These simple techniques can make your embroidery experience smoother and more enjoyable.
Proper Thread Preparation Techniques
Before you plunge into your embroidery project, ensuring your thread is properly prepared can make a world of difference in your stitching experience.
Start by pinching and moistening the thread to flatten it; this helps it slide easily through the needle's eye. Hold the thread with a two to three-inch tail to keep it secure while threading.
Instead of moving the thread towards the needle, slide the needle onto the thread for better control. Focus on the tip of the thread to align it properly, increasing your chances of success.
Finally, make sure the tail of the thread is secure before you begin stitching to prevent it from pulling out during your initial stitches.
Happy stitching!
Needle Positioning Tips
Getting your needle positioned correctly can greatly enhance your stitching experience. Here are some tips to help you start stitching with confidence:
- Slide the needle onto the moistened, flattened thread instead of maneuvering the thread to the needle for easier threading.
- Create a pivot point by resting your hands together, giving you better control while bringing the needle to the thread.
- Focus on the tip of the thread as you position it for threading to guarantee better alignment for passing through the needle's eye.
- Keep the thread tail at least two to three inches long for a secure grip while starting your stitching.
Maintaining Thread Tension
While you may be keen to start stitching, maintaining proper thread tension is essential for achieving even, professional-looking results.
First, securely hold the tail of the thread to prevent it from slipping out of the needle during your initial stitch. Keep a consistent grip on the thread; fluctuating pressure can create uneven results and loose stitches. Once you have established your initial stitch, it’s essential to maintain the same tension throughout the sewing process. If you’re looking for an innovative solution to achieve a polished appearance, consider techniques for tightening cuffs without sewing. These methods can provide a quick fix while ensuring that your fabric remains intact and creates a neat finish.
As you stitch, visually monitor the thread's tension and gently adjust your pull to avoid puckering or gaps in the fabric. If you feel resistance while pulling the thread, check for tangles or knots that could disrupt your tension.
Practicing on scrap fabric helps you develop an instinct for managing thread tension before tackling your final project.
Happy stitching!
Maintaining Even Tension While Stitching

Maintaining even tension while stitching is essential for achieving a polished look in your embroidery. Here are some tips to help you keep that tension just right:
- Pull with Consistency: Use the same amount of force for each stitch to avoid puckering.
- Keep Thread Length Uniform: Confirm your thread tail is consistent; too short or too long can create uneven tension.
- Relax Your Grip: Position your hands comfortably and keep your fingers relaxed, as tension can transfer from your grip to the thread.
- Check the Back: Regularly inspect the back of your work to verify even tension, adjusting as needed to prevent thread bunching.
With practice and attention to these details, you'll elevate your embroidery skills!
Additional Resources for Stitching Success
Achieving even tension in your stitching sets a solid foundation for your embroidery, but there's more to mastering the craft.
To elevate your skills, explore free patterns available for download. These projects let you practice and gain confidence in your stitching.
You'll also find a treasure trove of stitching techniques that introduce various styles and methods to enhance your embroidery game.
Don't forget to check out tutorials and tips that can guide you through tricky spots and help troubleshoot common issues.
Finally, immerse yourself in instructional videos and articles to deepen your understanding of embroidery techniques.
With these resources at your fingertips, you'll be well on your way to stitching success. Happy embroidering!
Frequently Asked Questions
What Is the Easiest Way to Thread an Embroidery Needle?
The easiest way to thread an embroidery needle involves a few simple steps.
First, pinch and moisten the thread to flatten it, making insertion smoother.
Next, slide the needle onto the thread instead of the other way around for better control.
Keep a tail of two to three inches to prevent pulling it out.
Focus on the thread's tip as you bring the needle to it, and rest your hands for easier manipulation.
What Is the Trick to Threading a Needle?
Threading a needle can feel like trying to find Wi-Fi in a dead zone!
One trick is to moisten and pinch the thread, flattening it for easier passage through the needle's eye. Instead of moving the thread, bring the needle to it for better control.
Keep your hands steady by creating a pivot point, and always leave a tail of two to three inches to prevent pulling out while stitching.
Happy sewing!
How to Thread 3 Strands Embroidery for Beginners?
To thread three strands of embroidery floss, start by pulling apart three strands from the six-strand bundle.
Moisten them slightly to help flatten the strands, making it easier to fit through the needle's eye.
Pinch the strands together, leaving a two to three-inch tail.
Bring the needle to the grouped strands for better alignment.
Once threaded, secure the tail to prevent it from slipping out while you stitch.
Enjoy your embroidery!
What to Use if You Don't Have a Needle Threader?
If you don't have a needle threader, don't worry! You can moisten and flatten the thread to help it slide through the needle's eye more easily.
Create a makeshift guide using a piece of paper with a small slit to hold the needle steady while you maneuver the thread.
Holding just a couple of inches of thread gives you better control, and using a bright light can improve visibility for better alignment.
Conclusion
Now that you know how to thread an embroidery needle with ease, you're ready to create your masterpiece. Think of threading that needle as weaving the first stitch in a tapestry of your creativity—each stitch connects to the next, forming a beautiful story. Just like a gardener nurtures a seed into a blooming flower, your patience and practice will bring your embroidery to life. Embrace the journey, and watch your artistic vision flourish!