
Backstitching is an essential technique that adds definition and depth to your cross stitch projects. By sewing backward through previous stitch holes, you create strong outlines around shapes and letters, making designs pop. It helps prevent your artwork from looking flat and emphasizes intricate details. Remember to maintain even tension and use a contrasting thread for the best results. Keep going, and you'll uncover more tips to elevate your cross stitching skills!
Key Takeaways
- Backstitching is a technique in cross stitching that adds definition and depth to designs by creating solid outlines around shapes and features.
- It enhances visibility and contrast against surrounding stitches, making elements like letters and motifs stand out.
- This technique involves sewing backward through previous stitch holes, resulting in a strong, continuous line.
- Backstitching prevents designs from appearing flat and emphasizes fine details, contributing to a polished finish.
- Using a single strand of embroidery floss is recommended for cleaner, more precise backstitch lines.

Friendship Bracelet String 50 Skeins Rainbow Color Embroidery Floss Cross Stitch Embroidery Thread Cotton Floss Bracelet Yarn, Craft Floss
- Color Variety: 50 rainbow colors including blue, green, red, and more
- Durable Material: Flexible, resistant to pilling and fraying
- Long-lasting Length: Each skein is approximately 8.75 yards
As an affiliate, we earn on qualifying purchases.
As an affiliate, we earn on qualifying purchases.
Understanding Backstitching

Backstitching is an essential technique in cross stitching that adds definition and depth to your designs. This embroidery stitch creates a strong, continuous line by sewing backward through previous stitch holes, giving your cross stitch pattern a polished look.
You'll typically outline elements like letters and shapes with backstitch to enhance their visibility and contrast against the surrounding stitches.
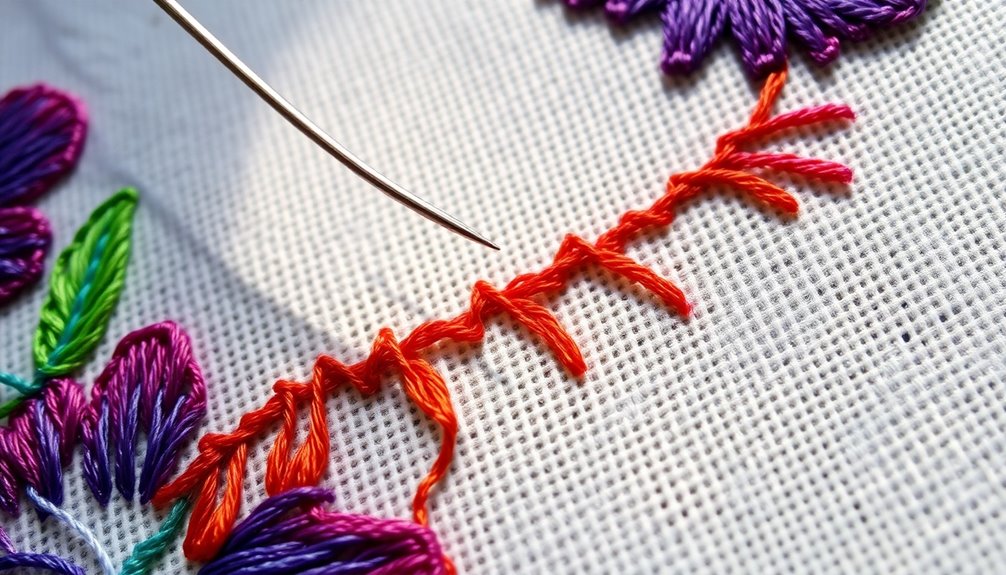
To execute backstitching, bring your needle up through the fabric, move it forward to create a stitch, and insert it back through the end of the previous stitch. Repeat this process to form a defined line.
Importance of Backstitching in Cross Stitch

While many stitchers focus on filling in their designs with colorful threads, the importance of backstitching can't be overstated.
Backstitch works wonders by adding definition and depth to your cross stitch projects. This technique creates a perfect outline stitch around shapes and features, preventing your designs from appearing flat. It enhances the overall visual impact, ensuring elements like letters and intricate patterns truly stand out.
Plus, backstitching is essential for emphasizing fine details, such as facial features in character designs or decorative motifs. With the choice of various colors, you can experiment and achieve unique effects that complement your stitches.
Ultimately, incorporating backstitching contributes greatly to a polished, professional finish that elevates your artwork.
Step-by-Step Guide to Backstitching

Before you start backstitching, gather your materials and tools to guarantee a smooth process.
It's also important to be aware of common mistakes that can lead to frustration.
Let's go over what you need and how to avoid these pitfalls for a successful backstitching experience.
Required Materials and Tools
To achieve beautiful backstitching, you'll need a few essential materials and tools. Start by gathering embroidery floss, a needle, fabric, and scissors for trimming threads.
For finer lines, use a single strand of embroidery floss, which will give your back stitch a stronger appearance. Make sure your fabric is taut by using an embroidery hoop or frame; this helps prevent puckering while stitching.
Before you begin, consult your pattern for stitch length and placement, ensuring you create a continuous line. To secure the end of your thread, create a knot at the beginning and run the tail under previous stitches at the end.
With these items, you're ready to create stunning backstitching!
Common Mistakes to Avoid
Backstitching can enhance your cross-stitch projects, but common mistakes can undermine your efforts.
First, avoid pulling the thread too tightly; this can cause the fabric to pucker, ruining your design. Stick to a single strand of embroidery floss for a cleaner, more precise single line, ensuring evenness in your stitches. Additionally, take your time when stitching to maintain a steady rhythm, which can greatly enhance the overall appearance of your work. Understanding how a sewing machine operates can also be beneficial, as it allows you to appreciate the precision needed for machine embroidery compared to hand stitching. Remember, practice is key; the more you stitch, the more you’ll develop your technique and confidence in creating beautiful designs.
Don't skip stitch holes, as this leads to uneven spacing and an unprofessional look. Always double-check your stitch placement by counting fabric threads to keep everything aligned.
After finishing a section, secure your thread tails by running them under existing stitches on the back.
Tips and Tricks for Effective Backstitching

To achieve stunning backstitch results, keep your thread tension even throughout your work.
Choosing contrasting thread colors can really make your designs pop, adding depth and detail.
Maintain Even Tension
Achieving even tension is essential for producing clean and polished backstitch lines. If your stitches are uneven, it can distort the fabric and ruin your design.
Here are some tips to help you maintain consistent tension:
- Use a single strand of embroidery floss for delicate lines, giving you better control over stitch tension.
- Keep your fabric taut in an embroidery hoop or frame to prevent puckering during the backstitching process.
- Practice on scrap fabric to get a feel for the right amount of tension needed for uniform stitches.
- Regularly check your stitches as you work, ensuring each one is even and consistent in length for the best possible appearance.
With these techniques, you'll master the art of backstitching!
Choose Contrasting Thread Colors
Choosing the right thread color can make a significant difference in your cross stitch design.
Using a contrasting color for backstitching enhances outlines and details, making your elements pop. Select shades that clearly differ from your surrounding cross stitches for a striking visual effect.
While patterns suggest specific colors, don't hesitate to experiment until you find what suits your style. Remember to reflect on the fabric color; lighter threads stand out on dark fabrics and vice versa.
Before you commit, test your chosen color on a scrap piece of fabric to verify it achieves the desired contrast.
If you have questions, feel free to reach out via email address for personalized advice on selecting the perfect backstitching color to elevate your cross design.
Common Uses of Backstitch in Embroidery

While many stitches can enhance your embroidery, backstitch stands out for its ability to define and detail designs effectively.
You can use backstitch to create a variety of visual impacts, such as:
- Outlining: It's perfect for outlining your designs, giving a clear definition to any line or shape.
- Fine Details: Add depth to features like facial expressions or intricate patterns.
- Text Creation: Use it for lettering, making it essential for projects that include words or phrases.
- Functional Repairs: Backstitch can also repair seams or reinforce fabric in high-stress areas.
With its versatility, backstitch can truly elevate your embroidery projects.
Enhancing Your Cross Stitch Projects With Backstitch

Backstitching takes your cross stitch projects to the next level by adding definition and depth that makes your designs pop. This technique outlines features, enhancing visibility and giving your work a polished finish. After completing your cross stitches, you can add backstitching using various floss colors for creative flair.
| Backstitching Benefits | Definition |
|---|---|
| Enhances Details | Makes letters and intricate patterns stand out |
| Provides Definition | Creates a clear outline around designs |
| Customizable Colors | Allows for personalized aesthetic options |
| Elevates Artwork | Transforms flat designs into engaging pieces |
Mastering backstitching greatly elevates your cross stitch artwork, ensuring your projects look professional and visually appealing.
Frequently Asked Questions
What Is Backstitching in Cross Stitching?
Backstitching in cross stitching is a technique you use to outline and define your designs. By stitching backwards through the previous stitch hole, you create a sharp, clean line that enhances the overall look of your piece.
This method's perfect for adding details like lettering or facial features, making your work stand out. You typically finish backstitching after completing the main cross stitches, ensuring your design has depth and dimension.
What Is the Point of Backstitching?
You might wonder why backstitching is so essential in cross stitching.
Well, it's the secret to bringing your designs to life. This technique adds definition and depth, preventing your piece from looking flat. It outlines shapes and highlights intricate details, making elements pop against the fabric.
What Is Reversible Cross Stitch?
Reversible cross stitch is a technique that lets you create designs that look great on both sides of the fabric.
You'll use a mix of cross stitches and backstitches to guarantee your pattern stays intact, no matter which side's up. It's perfect for projects like table runners where both sides are visible.
Just remember to maintain consistent tension while stitching to avoid puckering, which can mess up your neat appearance.
How to End Back Stitch Cross Stitch?
Imagine finishing a beautiful painting, only to find a brushstroke out of place.
Ending a backstitch in cross stitch is similar; you want it to look perfect. To secure your backstitch, run the thread under the lines on the back. Weave it through nearby stitches to anchor it, ensuring it won't unravel.
Trim any excess only after you're satisfied with your work. Following these steps will keep your masterpiece intact and beautiful!
Conclusion
So, as you immerse yourself in your next cross-stitch project, remember how backstitching can transform your work. It's like the secret ingredient that brings everything together, adding depth and detail you didn't know you needed. You might just find that the moment you pick up that needle, inspiration strikes. Coincidentally, the more you practice backstitching, the more your skills will shine. Embrace the journey, and watch your creations flourish with every stitch!