
Setting up a budget-friendly home screen printing station is easy with simple tools like a screen frame, squeegee, and basic light sources. Use a flat surface and good lighting in a clean, ventilated space—no need for a dedicated studio. Opt for water-based or plastisol inks based on your project, and learn to prepare your screen properly. With some practice, you’ll create professional-looking designs. Keep exploring to discover tips that will help you perfect your DIY setup.
Key Takeaways
- Use household items like cardboard, plastic frames, or repurposed window screens for affordable screen frames.
- Source inexpensive squeegees, spatulas, and light sources from craft stores or DIY options.
- Opt for water-based inks for easy cleanup and low-cost supplies suitable for beginners.
- Prepare your workspace with a flat surface, good lighting, and ventilation to ensure precise, safe printing.
- Cure prints with simple methods like air drying or using a household iron to save on specialized equipment.
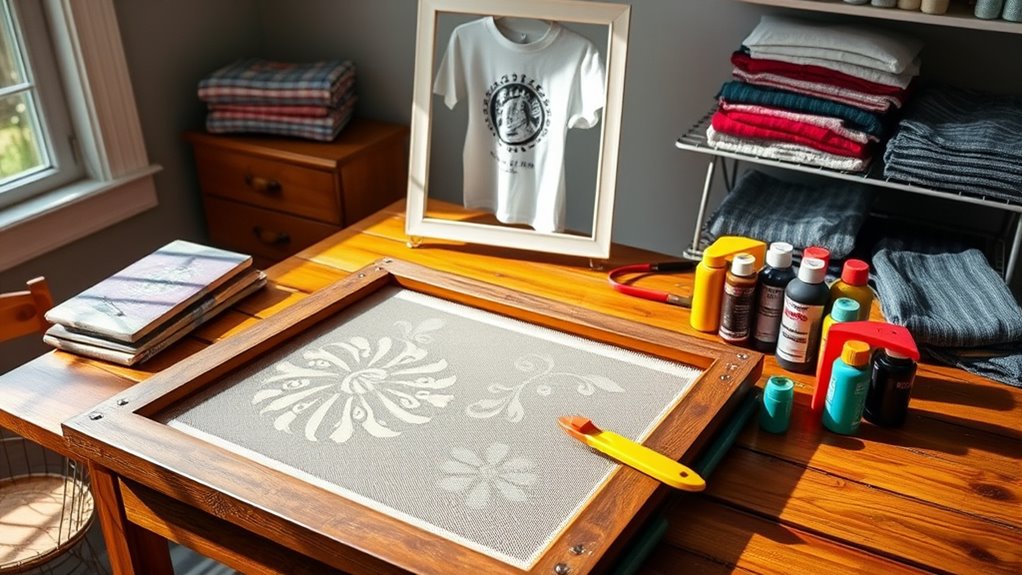
Screen printing at home offers a cost-effective and creative way to produce custom designs on t-shirts, posters, and more. Instead of relying on expensive equipment or outsourcing your projects, you can set up a simple, budget-friendly screen printing station using DIY equipment. Starting with basic tools like a screen frame, squeegee, and a light source, you can create professional-looking prints without breaking the bank. Many of these items are readily available at craft stores or can be repurposed from household items, making the process accessible and affordable. Setting up your workspace with a flat surface and good lighting is vital, as it guarantees precision during the printing process. You don’t need a dedicated studio—just a clean, well-ventilated area where you can work comfortably.
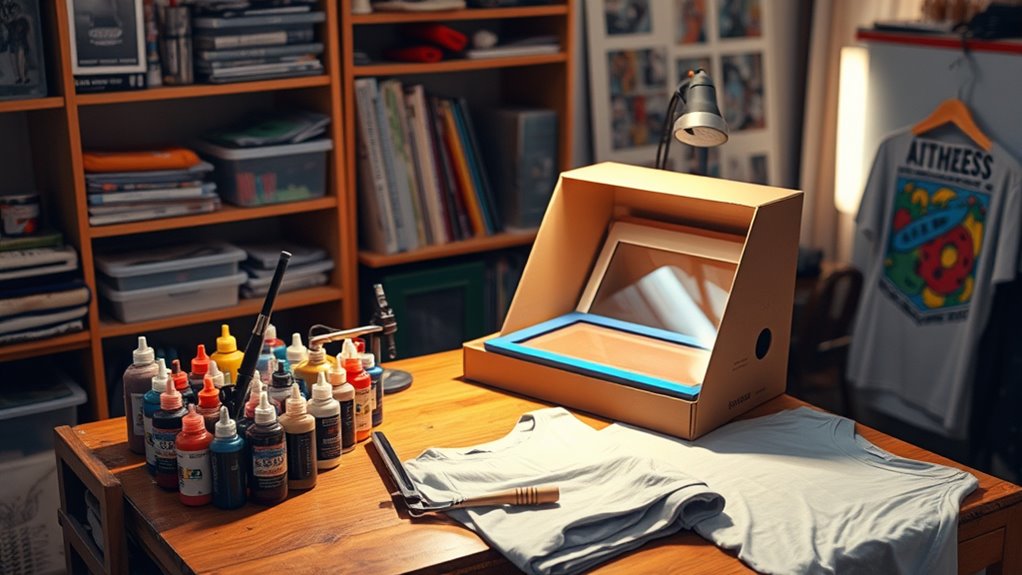
When it comes to ink types, your options vary depending on your project and budget. Water-based inks are popular among beginners because they’re easy to clean up, environmentally friendly, and produce soft, breathable prints. They work well on cotton fabrics and are perfect for detailed designs. Plastisol inks, on the other hand, require a heat source for curing but offer vibrant colors and durability. They’re a good choice if you want long-lasting prints on textiles, especially for items like t-shirts that will see frequent washing. Mixing and experimenting with different ink types can help you find the best fit for your projects, whether you’re aiming for a matte finish or a glossy effect. Keep in mind that some inks may require specific mesh screens or curing methods, so researching the compatibility of your DIY equipment with particular ink types is important.
Additionally, exploring professional techniques can elevate your DIY projects and help you achieve more refined results. To get started, you’ll need to prepare your screen by coating it with emulsion, exposing it to a light source, and washing out the unexposed areas. This process creates a stencil of your design that will hold ink during printing. Once your screen is ready, you’ll place it on your substrate, pour or spread ink over it, and use a squeegee to press the ink through the mesh. This step requires steady hands and consistent pressure, but with practice, you’ll achieve clean, sharp images. After printing, curing the ink either by air drying or using a heat source guarantees your design is set and durable. With patience and practice, your budget setup will allow you to produce high-quality, personalized prints at home, making screen printing an enjoyable and cost-efficient hobby.
Frequently Asked Questions
What Safety Precautions Should I Consider During Home Screen Printing?
When you’re screen printing at home, safety’s key. Make sure to wear protective gear like gloves and masks to avoid skin contact and inhaling fumes. Guarantee proper ventilation safety by working in a well-ventilated area or using fans and exhaust systems. Keep your workspace organized and clean to prevent accidents. Always follow safety instructions on materials and chemicals, and wash your hands thoroughly after completing your project.
How Do I Troubleshoot Common Screen Printing Mistakes?
Imagine you’re steering through a maze like a vintage arcade game. To troubleshoot common screen printing mistakes, check your ink for consistency to avoid smudging, and make certain your stencil is perfectly aligned before printing. If ink smudges, let it dry longer or adjust your squeegee pressure. For stencil misalignment, double-check your registration marks. Practice makes perfect—stay patient, and you’ll refine your process over time.
Can I Use Household Items as Substitutes for Professional Equipment?
You might wonder if household substitutes can replace professional screen printing equipment. DIY alternatives are possible, but they often come with limitations. For example, you can use a fine mesh from a laundry bag instead of a screen, and craft a squeegee from sturdy cardboard or plastic. While household substitutes can work in a pinch, they may not deliver the same precision or durability as dedicated tools. Expect some trial and error.
What Are the Best Materials for Eco-Friendly Screen Printing at Home?
Did you know that over 70% of consumers prefer eco-friendly products? For eco-friendly screen printing, choose eco friendly inks made from natural or recycled materials, and opt for biodegradable screens that break down without harming the environment. These materials are safe for home use, cost-effective, and help reduce your ecological footprint. Using eco-friendly inks and biodegradable screens makes your printing process sustainable without sacrificing quality or creativity.
How Long Does a Typical Home Screen Print Last Before Fading?
The ink durability and fading lifespan of your home screen print depend on factors like ink quality and surface preparation. Typically, a well-made print lasts 3 to 5 years before noticeable fading occurs, especially with proper care. To maximize lifespan, use high-quality inks designed for durability, wash prints gently, and avoid harsh sunlight. This way, your screen print stays vibrant and lasts longer.
Conclusion
Now that you know how to set up your home screen printing station on a budget, there’s no limit to your creativity. Did you know that the global screen printing market is expected to reach $9.4 billion by 2028? That shows just how much passion people have for personalized designs. So, get started today—your unique creations can make a real impact, all without breaking the bank. Happy printing!