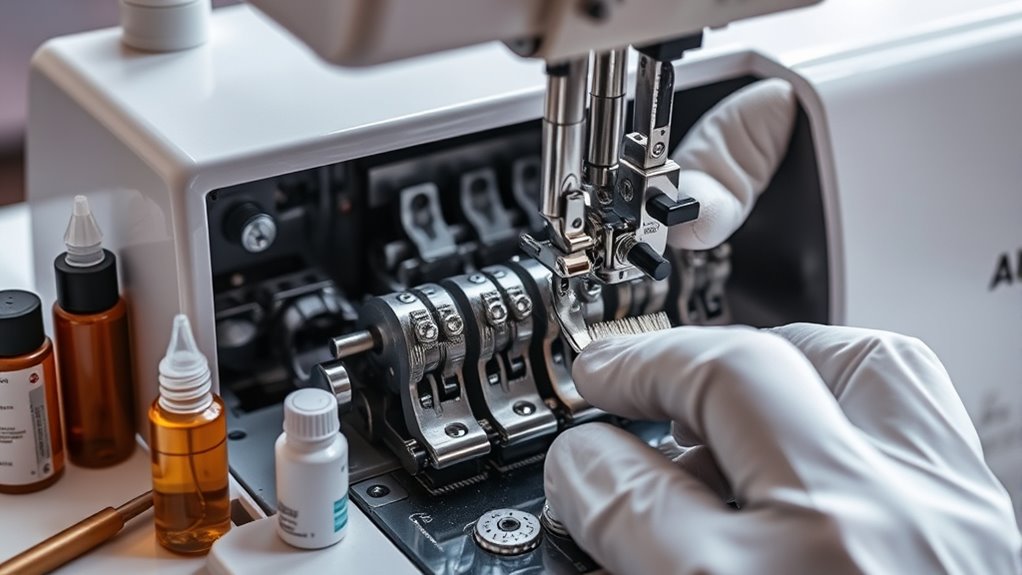

To maintain your serger, start by regularly cleaning dust, lint, and fabric fibers from the loopers and under the needle plate using a small brush or compressed air. Oil designated points as per your machine’s instructions, applying just a few drops and running it briefly to distribute the lubricant. Adjust tension dials to ensure balanced stitches, and double-check the needle is secure and properly aligned. Staying on top of these steps will keep your overlocker stitching perfectly—keep going to learn more about each process.
Key Takeaways
- Regularly clean lint, dust, and fabric debris from the looper area and under the needle plate using a brush or compressed air.
- Use the manufacturer-recommended oil to lubricate loopers and tension disks, applying a few drops and running the machine briefly.
- Check and adjust thread tension dials for balanced stitches, ensuring no loose loops or skipped stitches occur.
- Ensure the needle is properly seated, aligned, and securely tightened; replace bent or incorrect needles as needed.
- Perform routine maintenance, including cleaning and oiling, after each sewing session to keep the overlocker operating smoothly.
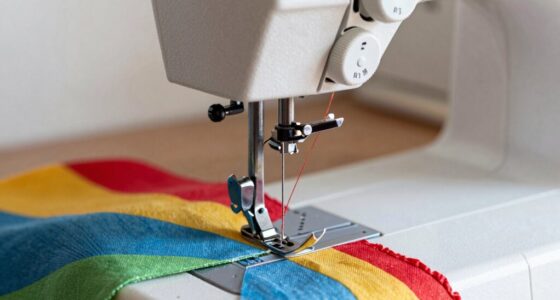
Ever wondered how to keep your serger running smoothly? Proper maintenance is vital to ensuring your overlocker performs at its best, and that starts with understanding how to manage thread tension and needle positioning. When your thread tension isn’t just right, your stitches can become loose, puckered, or uneven. To avoid these issues, regularly check and adjust the tension discs. Start by turning off your machine and raising the presser foot to release tension on the threads. Then, gently turn the tension dials to see how they respond—your goal is a balanced stitch with no loose loops or skipped stitches. Keep in mind, different fabrics and threads may require slight tension adjustments, so don’t hesitate to experiment until you find what works best. Proper needle positioning also plays a vital role in stitch quality. Make sure your needle is properly seated and inserted at the correct angle. If the needle is bent or incorrectly positioned, it can cause skipped stitches or fabric damage. Always double-check that the needle is pushed up all the way and aligned correctly in the needle clamp. When changing needles, select the right type and size for your project, and tighten the clamp securely to prevent any movement during sewing. Correct needle positioning ensures smooth fabric feeding and consistent stitches, so it’s worth taking the time to get it right. Regular maintenance also includes understanding how asset division principles can influence your approach to repairs and upgrades, especially in a workshop setting.
Beyond thread tension and needle positioning, cleaning your serger regularly is essential. Dust, lint, and fabric fibers can accumulate in the looper area and under the needle plate, causing jams or uneven stitches. Use a small brush or compressed air to remove debris from these hard-to-reach spots. Oiling your machine is equally important, but only use the oil recommended by your serger manufacturer. Apply a few drops to the designated points, usually around the moving parts like the loopers and tension disks. Avoid over-oiling, as excess oil can attract lint and dirt, leading to further issues. After cleaning and oiling, run the serger for a few minutes without fabric to distribute the lubricant and ensure everything moves smoothly. Always consult your machine’s manual for specific maintenance instructions, as each model may have unique requirements. When you keep up with these simple maintenance steps—adjusting thread tension, verifying needle positioning, cleaning, and oiling—you’ll extend the lifespan of your serger and keep your stitches professional-looking. Consistent care means fewer breakdowns and smoother sewing sessions, so make it a routine. Once you develop these habits, operating your serger becomes easier, and you’ll enjoy more reliable, high-quality results every time you sew.

Savina Cleaning Brush for Sewing Machine & Sergers – Sewing Tool, Wooden Lint Brush with a Built-in Hanging Strap. Brushing Lint Out of Sewing Machines.
An Excellent tool for sewing machine & sergers: Sewing machine cleaning brush is uniquely designed and comfortable -…
As an affiliate, we earn on qualifying purchases.
As an affiliate, we earn on qualifying purchases.
Frequently Asked Questions
How Often Should I Replace My Serger Blades?
You should replace your serger blades when they become dull or nicked, which affects stitch quality. Typically, blades need sharpening every few months, but if sharpening isn’t enough, blade replacement is necessary. Regularly check for uneven stitching or skipped stitches, indicating it’s time for a new blade. Proper maintenance, including blade sharpening and timely blade replacement, keeps your overlocker running smoothly and extends its lifespan.
Can I Use Household Oil for My Serger?
You shouldn’t use household oil on your serger, as it can damage the machine’s delicate parts. Instead, opt for sewing machine or serger-specific oil recommended for blade replacement and maintenance. Household oil may contain additives that harm your overlocker, leading to poor performance or corrosion. Always follow the manufacturer’s guidelines for oiling, and replace blades as needed to keep your serger running smoothly.
What Signs Indicate My Tension Needs Adjustment?
Did you know that improper thread tension causes up to 80% of sewing issues? If your stitches are uneven, looping, or puckering, it’s time to check your thread tension. Poor tension directly affects stitch quality, making seams look unprofessional. Adjust your tension settings gradually, and test on scrap fabric. Keep an eye out for loose or tight stitches, which signal you need to fine-tune your thread tension for best stitch quality.
Is It Necessary to Service My Serger Professionally?
You don’t always need professional servicing for your serger; DIY maintenance can often keep it running smoothly. Regularly cleaning, oiling, and checking tension help prevent issues. However, if you notice persistent problems like uneven stitches or mechanical noises, it’s wise to seek professional servicing. A trained technician can diagnose and fix complex issues that DIY maintenance might miss, ensuring your overlocker stays in top condition.
How Do I Troubleshoot Thread Bunching Issues?
To troubleshoot thread bunching, check your thread tension first; uneven tension often causes it. Make sure your threads are correctly threaded through all guides and tension disks. Also, verify your needle placement—ensure the needles are inserted correctly and not bent. Re-thread your serger from the beginning, and test on scrap fabric. Adjust the tension as needed, and keep the machine clean for smooth operation.

NetLea 3.4OZ+1oz Sewing Machine Lubricant with Oil Applicator, Commercial & Industrial Mineral Embroidery & Sewing Machine Oil for Lubricating Moving Parts of Textile Machinery
Transparent, Stain-Free Sewing Machine Oil: Its crystal-clear color makes this sewing machine oil the perfect lubricant for textile…
As an affiliate, we earn on qualifying purchases.
As an affiliate, we earn on qualifying purchases.
Conclusion
Now that you’ve mastered serger maintenance, you’re practically a sewing superstar—who knew that cleaning, oiling, and tensioning could be so thrilling? Just remember, a well-kept overlocker won’t judge your fabric choices or laugh at your uneven stitches. So go ahead, indulge in your newfound expertise. After all, nothing screams “professional seamstress” like a perfectly tensioned, smoothly running serger—because who needs a social life when your machine’s in tip-top shape?
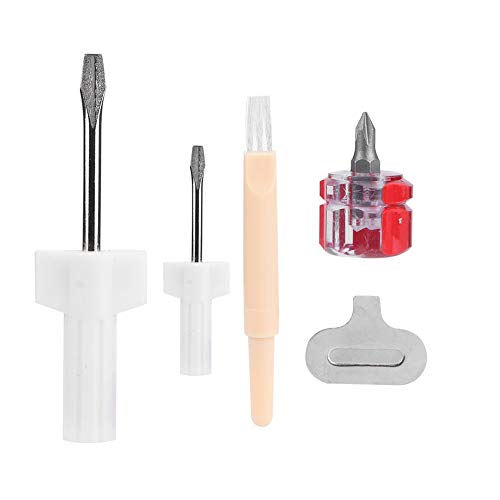
Sewing Machine Repair Kit 5 Pcs Sewing Machine Overlock & Serger Service/Repair Tool Include Screwdriver,Thread Removal,Slot Screwdriver and Cleaning Brush
PREMIUM MATERIAL: Sewing machine repair kit is made of high quality plastic and metal material, not easy to…
As an affiliate, we earn on qualifying purchases.
As an affiliate, we earn on qualifying purchases.

SINGER 10-Pack Serger Overlock Needles for Woven and Stretch Fabrics, Size 90/14
Perform Genuine
As an affiliate, we earn on qualifying purchases.
As an affiliate, we earn on qualifying purchases.