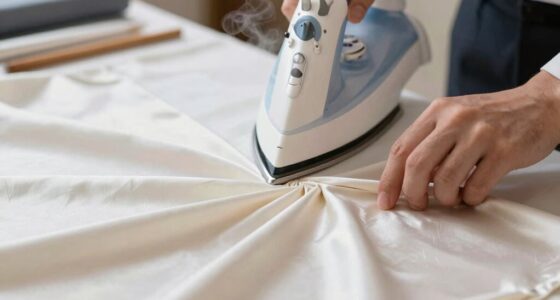
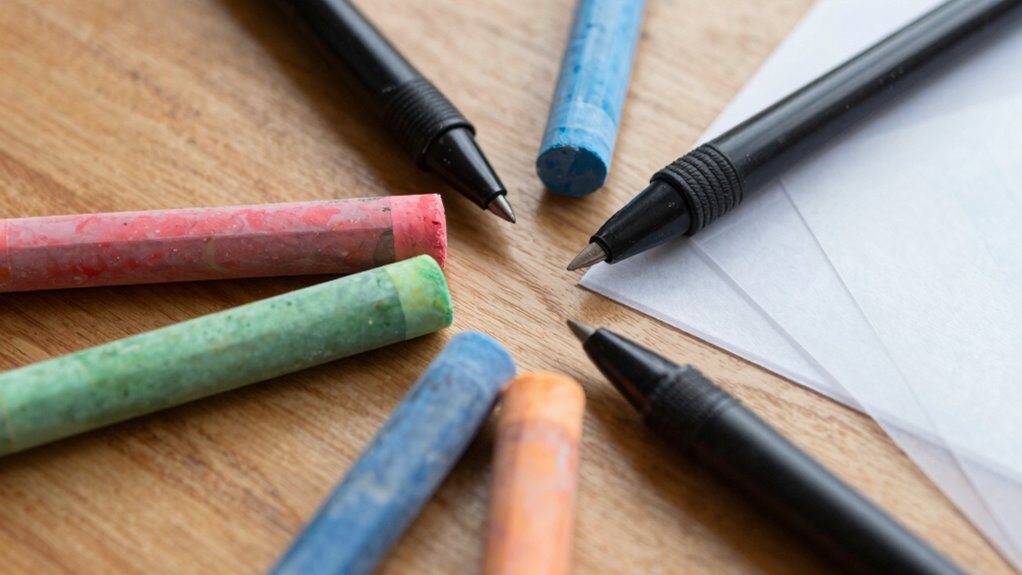
Choosing the right fabric marking tool depends on your fabric type and project needs. Chalk works best on natural, smooth fabrics like cotton and linen, but isn’t ideal for slick or synthetic materials. Pens offer precise, permanent marks suitable for tightly woven fabrics, while tracing paper helps transfer patterns on delicate or woven fabrics. To guarantee clean results and easy removal, consider fabric texture, durability, and whether you need temporary or lasting marks—more tips follow if you want to get it just right.
Key Takeaways
- Chalk is best for natural, woven fabrics like cotton and linen, providing temporary marks that are easy to remove.
- Fabric pens offer permanent, precise markings suitable for smooth, tightly woven fabrics such as silk or polyester.
- Tracing paper is ideal for delicate fabrics like silk or chiffon when transferring patterns, but requires testing to prevent damage.
- Chalk may smudge or fade on slick or synthetic fabrics, making pens a better choice for detailed or long-lasting marks.
- Use heat transfer or stylus methods with tracing paper on thicker fabrics like canvas, and always test on scrap fabric first.
How Do Chalk, Pens, and Tracing Paper Differ for Fabric Marking
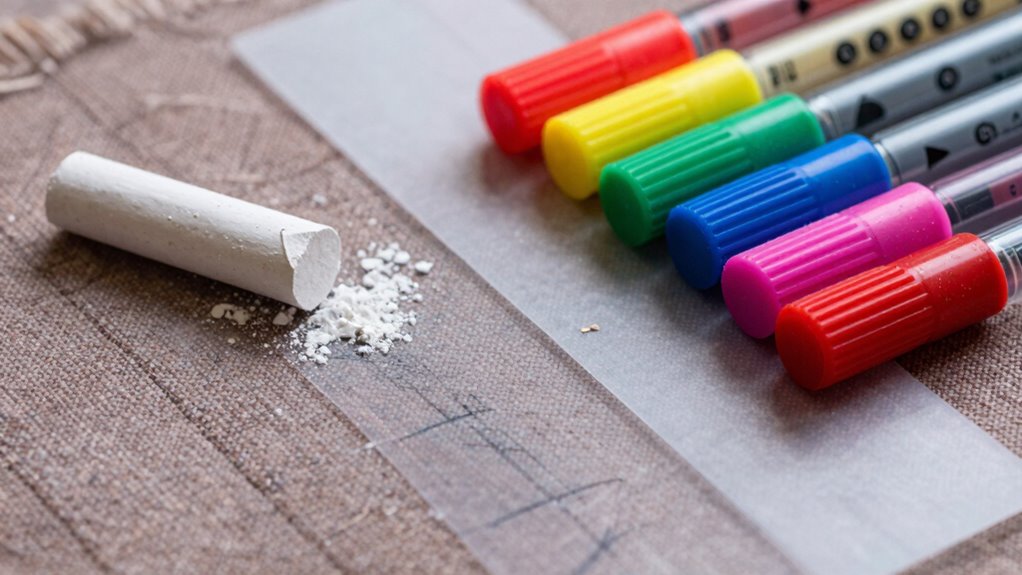
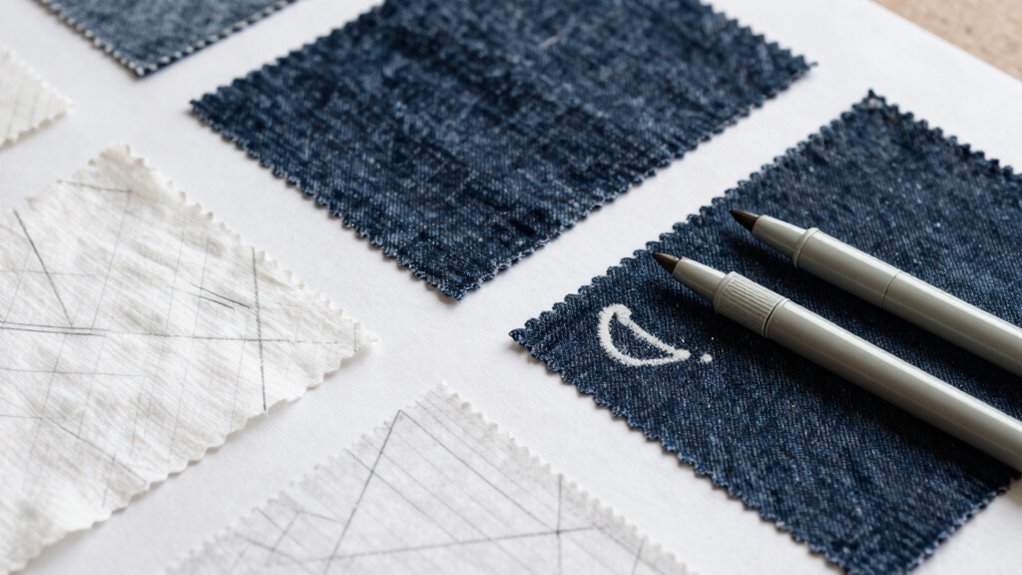
When choosing a marking tool for fabric, it’s important to understand how chalk, pens, and tracing paper differ in their application and removal. Chalk is ideal for marking delicate fabrics used in fabric dyeing and sewing patterns because it wipes away easily without residue. Pens, on the other hand, offer precision for detailed designs but may leave marks that need washing out or special removal methods. Tracing paper allows you to transfer patterns accurately; you place it on the fabric and trace the design, which then transfers onto the material. Each tool suits different fabric types and project needs. Knowing their differences helps you select the best option for your sewing projects, ensuring marks are visible during construction but removable afterward. Additionally, understanding free floating techniques can assist in achieving clean markings without damaging the fabric. Recognizing the contrast ratio of your marking tools can further influence visibility and ease of removal on various fabrics.
What’s the Best Fabric to Use With Chalk Marking?
Chalk markings work best on fabrics with smooth, even surfaces that prevent the chalk from smudging or fading. Natural fibers like cotton and linen are ideal because they hold the chalk well and are easy to erase. Keep in mind that textured or stretchy fabrics may make chalk lines harder to see or remove cleanly. For the best results, consider using fabrics with trusted reputation to ensure consistent performance. Additionally, choosing fabrics with sustainable qualities can enhance your commitment to eco-friendly practices. Selecting fabrics with appropriate fiber content can also help achieve more precise and lasting markings, especially when working with durable fabrics that maintain their surface integrity over time. Using fabrics with well-drained surfaces can further improve chalk visibility and ease of marking removal.
Fabric Types Ideal for Chalk
Choosing the right fabric for chalk marking guarantees your lines stay clear and easily removable. Fabrics with a smooth, firm surface work best, such as tightly woven cotton or linen, which resist smudging and allow precise lines. Natural fibers like those used in fabric dyeing procedures tend to hold chalk marks well without bleeding or fading. Avoid loosely woven or textured fabrics, as their uneven surfaces can cause chalk lines to appear blurry or to snag. Fabrics with a tight textile weaving provide a stable surface that preserves chalk marks during handling and cutting. Additionally, lightweight fabrics are easier to draw on without excessive pressure, making them ideal for detailed designs. Overall, choosing durable, tightly woven fabrics enhances your chalk marking experience and accuracy. Proper fabric selection ensures your markings remain clear and manageable throughout your project.
Surface Texture Considerations
Have you considered how surface texture impacts your chalk markings? Texture differences and surface smoothness play a vital role in how well chalk adheres to fabric. Smooth fabrics, like silk or satin, allow chalk to glide easily, creating clear, precise lines. In contrast, rougher textures such as burlap or canvas can make chalk lines appear uneven or faint, as the rough surface causes the chalk to scatter. If your fabric has a textured surface, you might need a softer chalk or consider alternative marking tools. Understanding these surface texture considerations guarantees you choose the best fabric for chalk marking, resulting in neat, accurate designs without frustration. Matching surface smoothness to your chalk type helps achieve professional results every time. Additionally, recognizing the surface texture of your fabric can help tailor your marking approach for optimal results.
When Should You Use Pens for Fabric Marking?

Pens are ideal for fabric marking when you need precise, permanent lines that won’t smudge or fade over time. They’re perfect for detailed work like fabric dyeing and when you require clear guides for sewing accessories. Use pens on smooth, tightly woven fabrics to guarantee the ink stays put throughout your project. They’re especially useful when working on intricate designs or when you want marks that won’t wash away or erase easily. However, avoid pens on delicate or loosely woven fabrics that might bleed or cause damage. Choose waterproof or fade-resistant ink pens for long-lasting marks, especially if your project involves multiple steps or washing. Overall, pens provide accuracy and permanence, making them a reliable choice for specific fabric marking needs. Additionally, selecting the right type of pen, such as those with waterproof ink, can enhance the durability of your marks in various conditions.
Is Tracing Paper Suitable for Delicate or Heavy Fabrics?

Tracing paper can be tricky to use on delicate fabrics because it may cause damage or leave unwanted marks. For heavy fabrics, it might not produce clear lines or stay visible through multiple handling. Consider how fabric sensitivity and marking durability will affect your choice before using tracing paper.
Fabric Sensitivity Considerations
When working with delicate fabrics, using tracing paper can sometimes cause damage or leave unwanted marks, making it less suitable for these materials. You need to take into account fabric dye compatibility, as tracing paper markings might not wash out easily on sensitive textiles. Heavy fabrics, on the other hand, often tolerate tracing paper better, but you must also think about textile elasticity considerations — some fabrics stretch or distort when marked, affecting fit and appearance. For delicate or stretchy fabrics, choose tools that won’t compromise fabric integrity, like chalk or water-soluble pens. Tracing paper might be too harsh or leave residual impressions, risking damage or distortion. Always test your marking tool on a hidden area first to ensure it won’t negatively impact the fabric’s appearance or performance.
Marking Durability on Textiles
Choosing the right marking tool depends heavily on how long the marks need to last and how well they stand up to handling, washing, or stretching. Tracing paper is generally not suitable for fabrics that undergo frequent washing or heavy use, as its marks tend to fade quickly. For delicate fabrics with fine textile weave, tracing paper may leave faint marks that are hard to see, especially after washing or stretching. Heavy fabrics or those treated with fabric dye require more durable markings, such as fabric pens or chalk, which are designed to withstand washing. Consider the fabric’s dye absorption and weave structure to determine whether tracing paper’s temporary marks will suffice or if a more permanent solution is necessary.
How to Choose the Right Fabric Marking Tool for Your Project
Selecting the right fabric marking tool is essential to guarantee your design transfers accurately without damaging your material. Consider the type of fabric you’re working with—delicate fabrics like silk may require erasable or water-soluble tools, while sturdier materials can handle more permanent marks. Think about your project’s purpose; if you’re doing fabric dyeing, opt for tools that won’t interfere with color absorption or washing out. For projects involving a sewing machine, choose marking tools that won’t harm your machine’s maintenance by leaving residue or causing fabric damage. If you need temporary marks, chalk or water-soluble pens work well. For permanent designs, fabric markers or tracing paper may be appropriate. Always test your chosen tool on a scrap piece first to ensure compatibility and ease of removal. Additionally, understanding the quality of your fabric can help determine the most suitable marking method to prevent damage or improper transfer.
Pros and Cons of Chalk Marking on Different Fabrics

Chalk marking is a popular choice for temporary fabric markings because it’s easy to apply and generally easy to remove. Fabric chalk works well on woven fabrics like cotton and linen, offering visible lines without leaving permanent marks. However, on slick or synthetic fabrics such as satin or polyester, chalk can be less effective, as it may not adhere well or may smudge easily. One advantage is that chalk lines often don’t stain, especially if you use high-quality fabric chalk. On the downside, some fabrics may absorb the chalk dye unevenly, causing faint or inconsistent marks. Additionally, if you’re working with dark fabrics, fabric dye from chalk may be less visible, requiring more frequent reapplication or alternative marking methods. Understanding the fabric composition can help you choose the most suitable marking tool for your project, especially considering the fabric’s texture and how it interacts with different marking materials.
Fabric Pens: Benefits and Drawbacks for Various Materials
Fabric pens offer long-lasting visibility on light fabrics, making your markings easy to see during sewing. However, on dark materials, these pens can bleed or fade, which might affect your project’s accuracy. Understanding these differences helps you choose the right pen for each fabric type. Additionally, considering designer look principles such as attention to detail can ensure your markings contribute to a polished finished product.
Long-lasting Visibility on Light Fabrics
When it comes to marking light fabrics, choosing the right fabric pen can make a significant difference in visibility and durability. For long-lasting markings, consider these options:
- Fabric dye markers – These provide vibrant, permanent colors that resist washing, ideal for marking with fabric dye-based techniques.
- Oil-based fabric pens – Known for their durability, they penetrate fibers deeply, ensuring marks stay visible over time.
- Acrylic fabric pens – Offer bright, opaque lines suitable for detailed marking but may require heat setting for longevity.
- Water-based fabric pens – While easy to use, they tend to fade faster unless sealed or set with heat.
Choosing the right pen depends on your fabric type and marking techniques, ensuring your marks remain visible on light fabrics without bleeding or fading.
Potential Bleeding on Dark Materials
Although fabric pens offer convenience and vibrant color options, they can pose challenges when used on dark materials due to potential bleeding. Fabric dye in these pens may seep into the fabric fibers, causing unwanted color bleeding that blurs your design. Dark fabrics are especially susceptible because the ink’s contrast can mask bleeding, making it harder to detect early. To minimize this issue, choose pens labeled as “lightfast” or designed specifically for dark fabrics. Testing on a small, inconspicuous area first can help you assess how much the dye might bleed. Keep in mind that some fabric dyes are more prone to spreading, so understanding the properties of your pen and fabric combo is essential for achieving clean, precise markings without bleeding through your dark material. Understanding fabric dye properties can help you select the best tools for your project.
Using Tracing Paper on Different Types of Fabric: What You Need to Know

Tracing paper is a versatile tool that can help you transfer your designs accurately onto various fabrics, but it’s important to select the right type and method for each material. Different fabrics respond differently to tracing methods, especially when it comes to fabric dyeing and sewing patterns. To get it right:
- Use lightweight tracing paper on delicate fabrics like silk or chiffon to prevent damage.
- Opt for waxed or carbon-backed tracing paper on woven fabrics to ensure clear lines.
- For thicker fabrics like canvas, consider using a stylus or heat transfer methods instead.
- Always test your tracing paper on a scrap piece to check for bleed or damage before working on your final fabric.
Choosing the correct tracing paper ensures precise markings without compromising your fabric’s integrity.
How to Remove Fabric Marks Without Damaging Your Material

Removing fabric marks without causing damage requires careful techniques that preserve your material’s integrity. To avoid affecting your fabric dyeing or sewing patterns, start by gently brushing off chalk or tracing paper residue with a soft brush or cloth. For markings that are more stubborn, dampen a clean cloth with water and lightly dab the area, testing first on a hidden spot to prevent color bleeding. For ink or pen marks, consider using a specialized fabric eraser or a mild solvent like alcohol, but always test first. Avoid harsh scrubbing or high heat, which can distort fibers or alter dyeing. Patience and gentle methods help ensure your fabric stays pristine while you remove unwanted marks, keeping your sewing project flawless. Understanding fabric types and their reactions to different cleaning methods is crucial for successful removal. Additionally, being aware of sustainable cleaning practices can help minimize environmental impact during your fabric care routine. Incorporating eco-friendly cleaning techniques aligns with a growing awareness of environmental sustainability in textile care. Being informed about ethical considerations in fabric treatment can also guide responsible cleaning choices. Carefully selecting gentle cleaning agents helps protect delicate fibers and maintain fabric quality over time.
Troubleshooting Common Marking Issues on Different Fabrics
Different fabrics respond uniquely to marking techniques, so it’s essential to troubleshoot issues promptly to prevent permanent damage. If your markings aren’t visible or are smudging, try these solutions:
Different fabrics need tailored marking techniques to avoid permanent damage and ensure clear, smudge-free results.
- Check your fabric type—some fabrics, like silk, may not hold fabric dyeing marks well, requiring a different pen.
- Test your marking tool on a scrap piece to ensure it works with your sewing pattern and won’t cause dye bleeding.
- Adjust pressure—pressing too hard can cause permanent marks or fabric dyeing issues, especially on delicate textiles.
- Use proper removal methods for your fabric type, such as heat, water, or solvents, to prevent residue or color transfer. Troubleshooting these common issues helps keep your sewing patterns crisp and your fabric dyeing clean.
Frequently Asked Questions
Can Chalk, Pens, and Tracing Paper Be Used Interchangeably on All Fabrics?
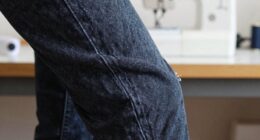
No, chalk, pens, and tracing paper aren’t interchangeable on all fabrics because of fabric compatibility and marking durability. You need to choose the right tool based on your fabric type; chalk works well on rough fabrics like denim, while pens suit smoother fabrics but may not be permanent. Tracing paper is best for transferring patterns, but it’s not suitable for all fabric types. Always test for durability and compatibility first.
Which Marking Tool Is Most Environmentally Friendly for Fabric Projects?
If you want the most eco-friendly option, biodegradable markers stand out as your best choice. They’re designed to break down naturally, reducing environmental impact, and often contain non-toxic, water-based inks. Eco-friendly options like plant-based chalk or refillable pens also minimize waste. By choosing biodegradable markers, you actively contribute to sustainability, making your fabric projects not only beautiful but also kind to the planet.
Are There Any Safety Concerns When Using Certain Fabric Marking Tools?
Yes, there are safety concerns when using certain fabric marking tools. You should be aware of chemical safety, especially with pens that contain dyes or solvents, as they might cause allergic reactions or skin irritation. Always read labels and test a small area first. Work in well-ventilated spaces, and wear gloves if you have sensitive skin or known allergies. Prioritizing safety helps prevent unwanted reactions and guarantees a smooth crafting experience.
How Long Do Fabric Marks Typically Last Before Fading or Washing Out?
On average, fabric marks last between a few days to several weeks, depending on the marking tool and fabric type. For example, chalk marks typically fade after washing or within 24 hours, while water-soluble pens can last several days. If you need longer-lasting marks, consider fade-resistant options like tailor’s chalk or specific fabric pens, which offer better fabric marking longevity and fade resistance, ensuring your sewing project stays accurate.
Do Specific Brands of Chalk, Pens, or Tracing Paper Perform Better on Certain Fabrics?
Certain brands excel in fabric compatibility and performance, making your choice easier. For delicate fabrics like silk, choose brands known for gentle, washable markings, such as tailor chalk or water-soluble pens. For heavy-duty textiles like denim, opt for brands offering durable, visible marks that resist washing out. Always check the brand’s performance reviews and fabric compatibility to guarantee your marking tool works effectively without damaging your fabric.
Conclusion
Choosing the right marking tool depends on your fabric and project needs. Whether you opt for chalk, pens, or tracing paper, always test first to avoid surprises. Remember, a little prep goes a long way—better safe than sorry. By understanding each tool’s strengths and limitations, you’ll save yourself from headaches down the road. Keep these tips in mind, and you’ll be sewing like a pro in no time—don’t let the grass grow under your feet!