To cut a v-neckline on your t-shirt without sewing, lay the shirt flat and fold it in half to find the center. Mark your desired depth with chalk, making sure it's symmetrical. Use sharp scissors to cut along the marked lines. Gently stretch the neckline to create a rolled edge for a polished look. Trim any uneven edges for a neat finish. Stick around to discover tips for ensuring a successful t-shirt modification!
Key Takeaways
- Lay the t-shirt flat and fold it in half to find the center of the neckline for accurate marking.
- Use a ruler to measure and mark the desired depth and width of the v-neck with seamstress chalk.
- Cut along the marked lines carefully using sharp scissors for a cleaner finish.
- Gently stretch the neckline after cutting to create a rolled edge for a polished look.
- Inspect the edges for any unevenness and trim excess fabric if necessary for a neat appearance.
Materials Needed for T-Shirt Modification
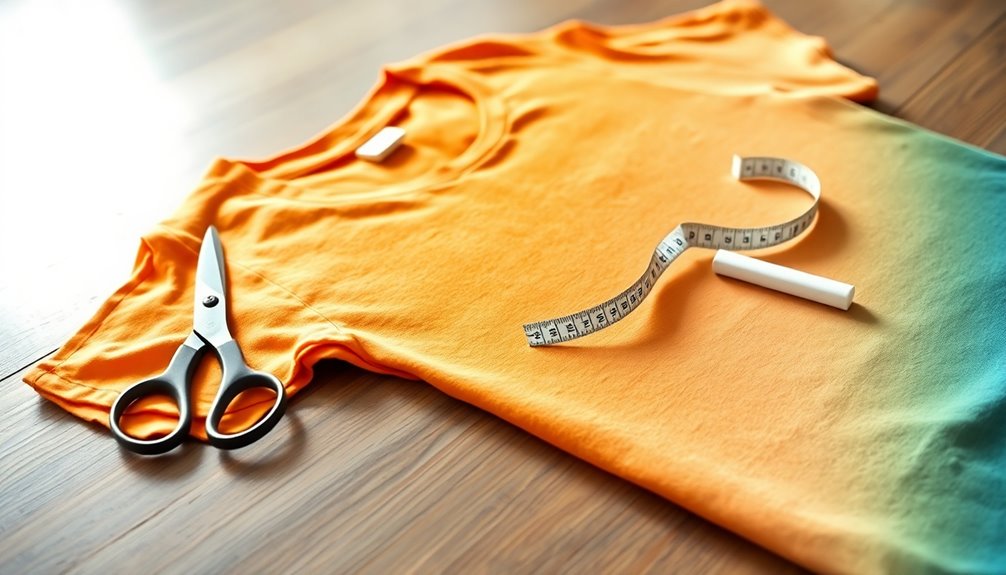
To transform your t-shirt into a stylish v-neck, you'll need a few essential materials. First, grab a ruler to measure the desired depth and shape of your v-neckline. This guarantees accurate cutting and a polished look.
Next, use seamstress chalk or a marking tool to create marked guidelines on the fabric. These guidelines help you stay precise while cutting. Make sure you have sharp scissors on hand; they'll provide cleaner cuts, especially with thicker fabrics.
Choose t-shirts made from thicker material, as they hold their shape better. Finally, prepare a flat surface to lay the t-shirt on, giving you easy access to both sides of the neckline while marking and cutting.
With these materials ready, you're set to start your modification!
Preparing the T-Shirt for Cutting
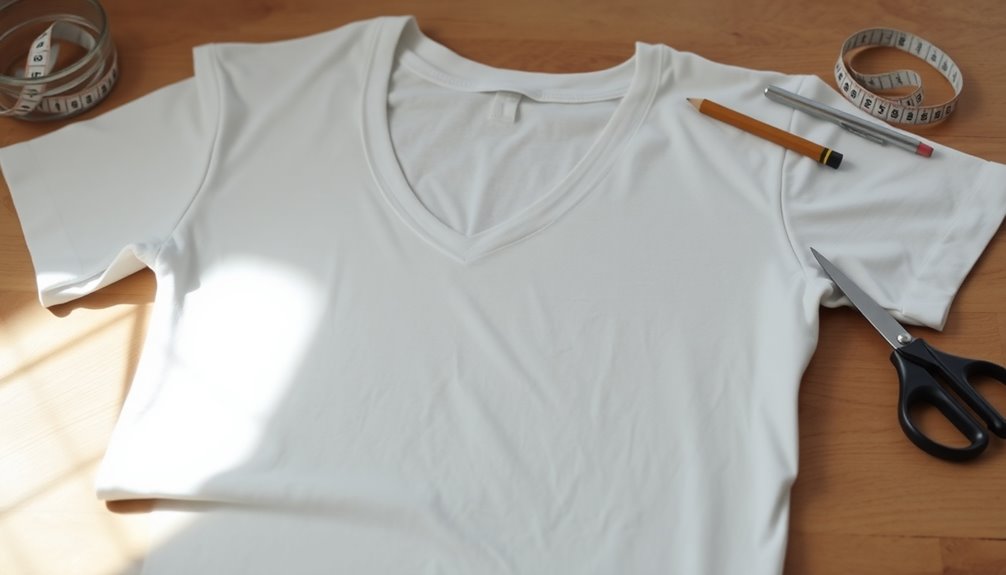
To prepare your t-shirt for cutting, start by laying it flat on a clean surface and folding it in half to find the center line.
Once you've located the center, use a ruler to mark the desired depth of your v-neck on the neckline.
This guarantees a symmetrical and balanced cut when you open the shirt back up for trimming.
Find Center Line
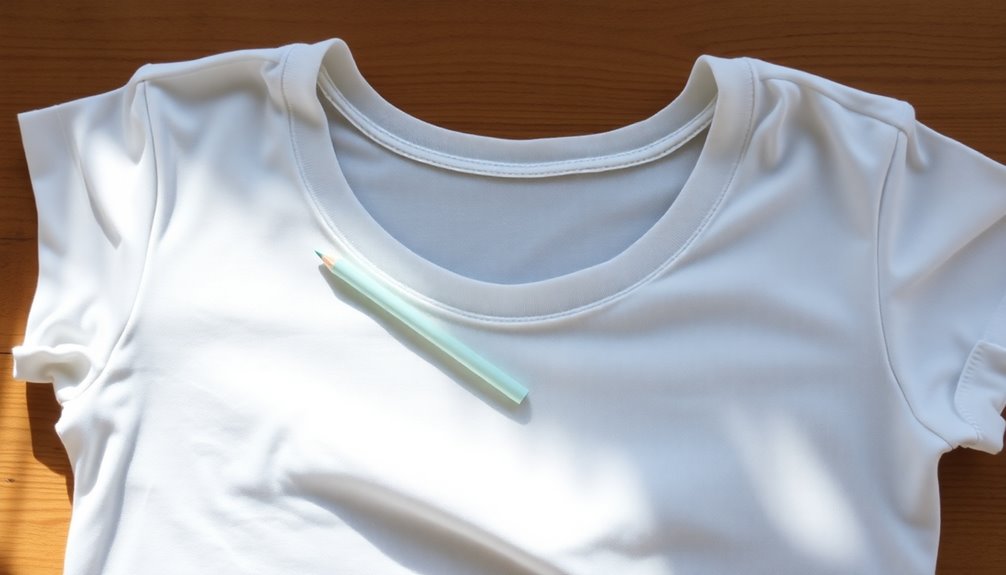
Before you start cutting, it's essential to find the center line of your t-shirt, as this will guide your v-neck creation.
Lay your t-shirt flat on a smooth surface, making sure it's wrinkle-free for accurate cutting. Fold the shirt in half lengthwise, aligning the seams and neckline to locate the center.
To make this super fast, grab a ruler and measure from the shoulder seam down to your desired v-neck depth, marking this point with seamstress chalk. Also, make a little bit of a mark at the center of the neckline to serve as a guide.
Finally, unfold the shirt and lay it flat again, ensuring the center mark is clearly visible for the cutting process.
Mark Neckline Guidelines
With the center line marked, you can now focus on creating clear guidelines for your v-neckline. Start by laying your t-shirt flat on a clean surface and folding it in half. Use a ruler to measure the desired depth and width of your neckline. Mark these measurements with seamstress chalk or a marking tool. Confirm the seams align as you make your marks to keep the shirt's shape intact. Make a distinct mark at the center, which will be your starting point for cutting. After marking, unfold the shirt and lay it flat again.
| Measurement | Depth | Width |
|---|---|---|
| V-Neckline | 4" | 6" |
| V-Neckline | 5" | 7" |
| V-Neckline | 6" | 8" |
Fold T-Shirt Symmetrically
Ensuring your t-shirt is folded symmetrically is essential for a clean v-neck cut. Start by laying your t-shirt flat on a clean surface, aligning the front and back along the side seams.
Then, fold it in half vertically, bringing the right side over to the left, ensuring the neckline and hem match up.
To prepare for cutting, follow these steps:
- Use a ruler to find and mark the center point of the neckline.
- Unfold the t-shirt to double-check that the neckline is centered.
- Smooth out any wrinkles to keep the fabric even.
- Make sure the side seams align perfectly.
- Confirm that both halves are symmetrical before cutting.
Now you're ready to cut your stylish v-neck!
Marking the V-Neckline
How do you achieve a perfectly marked v-neckline on your t-shirt? Start by laying your t-shirt flat and folding it in half to find the center of the neckline. This guarantees your markings are symmetrical.
Next, use a ruler to measure and mark the desired depth and width of the v-neck shape, keeping comfort and style in mind. Use seamstress chalk or a marking tool to make small, light marks outlining the v-neck. This lets you adjust the shape as needed.
After marking, unfold the shirt and lay it flat again to double-check that both sides are even. Keep those lines clear and visible; they'll guide your cutting process for accuracy.
Cutting the V-Neckline

Now that you've marked your v-neckline, it's time to cut it out.
Gather your tools, like scissors and a ruler, to guarantee a precise cut.
Follow this step-by-step guide to achieve a stylish and comfortable finish.
Tools Required for Cutting
To achieve a clean and stylish v-neckline on your t-shirt, you'll need a few essential tools.
These items will help guarantee precision and a polished finish during your cutting process:
- Ruler: For measuring and marking the desired depth and angle of the v-neckline accurately.
- Seamstress Chalk or Marking Tool: To create clear guidelines on the fabric for symmetry.
- Sharp Fabric Scissors: To achieve clean edges and prevent fraying, especially on thicker materials.
- Thicker Fabric: It holds its shape better, allowing for a more refined look after cutting.
- Flat Surface: Lay your t-shirt flat and folded in half to find the center point for an even neckline.
Gather these tools to make your cutting experience smooth and successful!
Step-by-Step Cutting Guide
Cutting a v-neckline on your t-shirt can be a straightforward process if you follow these steps carefully.
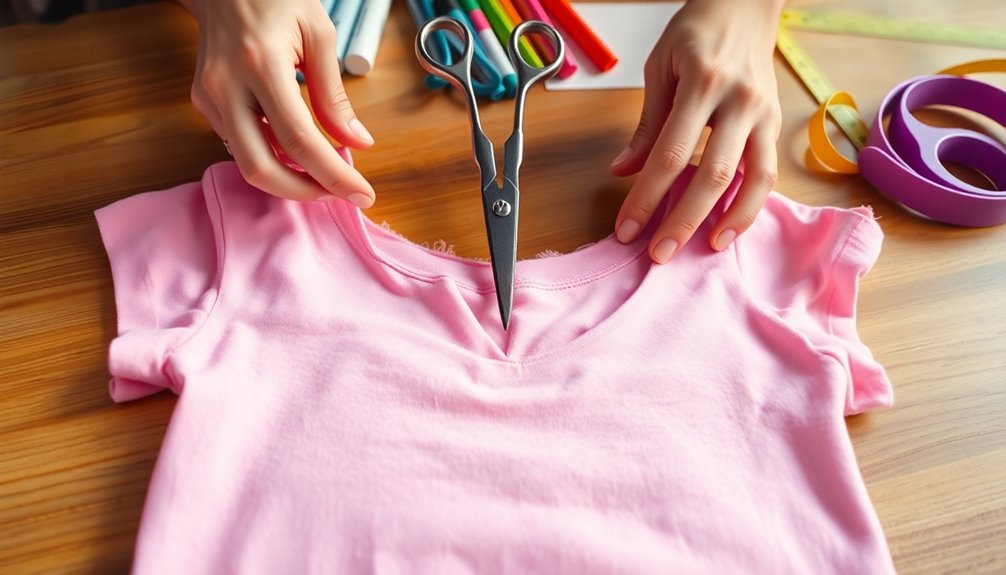
Start by laying your t-shirt flat and folding it in half to find the center neckline, ensuring the seams align for symmetry. Use seamstress chalk to mark the desired depth and shape of the v-neck, beginning at the center and extending toward the shoulders.
Grab a ruler to draw clean, straight lines for the v-neck shape, making sure both sides are evenly marked. Carefully cut along these lines, avoiding cutting too low, and repeat for the other side.
Once you've cut, gently stretch the new neckline to roll the edges, giving it a polished look and adjusting any uneven areas as needed.
Final Touches for a Polished Look
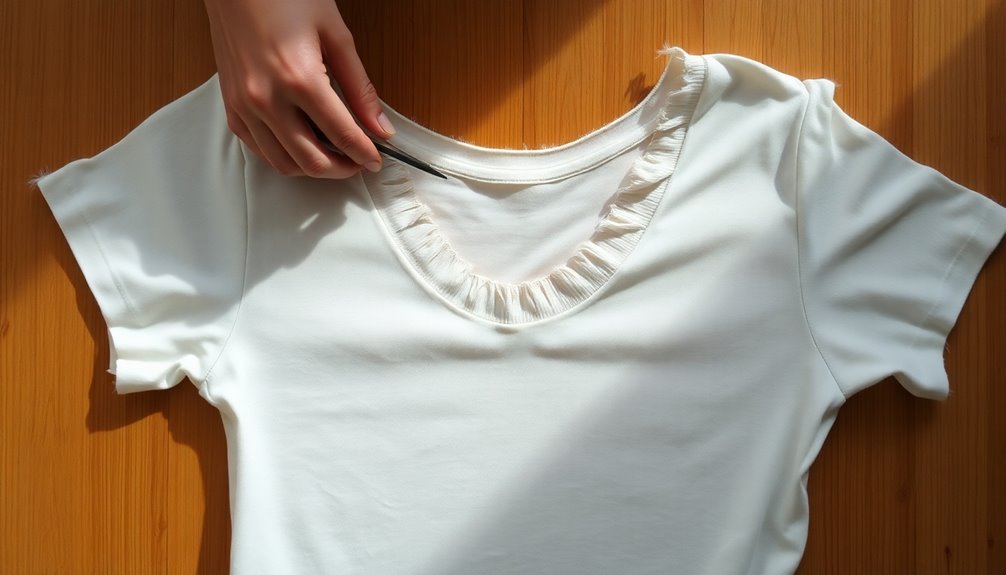
Once you've cut the v-neckline, gently stretching it can help the fabric roll slightly, giving it a polished and finished appearance.
Take a moment to inspect the edges for any unevenness, and trim any excess fabric to achieve a clean line. If your fabric frays easily, consider applying a fabric fray check solution to the edges for added durability.
To elevate the overall look, think about these final touches:
- Layered necklaces that complement the v-neck design
- A fitted jacket for a chic layered effect
- Adding a decorative brooch for flair
- Pairing with a scarf for added style
- Adjusting the neckline for maximum comfort
Finally, try on your t-shirt and make any small adjustments for a perfect fit!
Tips for a Successful Modification
When modifying your t-shirt for a v-neckline, it's crucial to plan your approach carefully to guarantee a successful outcome.
Start by measuring and marking the desired depth with a ruler and seamstress chalk to ensure even cuts on both sides. When cutting, maintain a steady hand and follow the marked lines closely, especially with thicker fabric to avoid jagged edges.
After cutting, gently stretch the neckline to roll the edges, which creates a clean, finished look without sewing. Always review your modifications in natural light to check for any uneven areas, making minor trims if necessary for a polished appearance. Additionally, keeping your workspace clean and organized can help you focus and reduce stress during the modification process.
Finally, practice on a less valuable t-shirt first to build confidence before altering your favorite pieces.
Frequently Asked Questions
How to Make T-Shirt V-Neck Without Sewing?
To make a t-shirt v-neck without sewing, start by laying your t-shirt flat and folding it in half to find the center.
Use a ruler and chalk to mark your desired v-neck shape. Carefully cut along the marked lines, ensuring you don't cut too deep.
After cutting, stretch the neckline to roll the edges, giving it a finished look.
Finally, check for comfort and trim any uneven edges if needed.
How to Cut Collar off T-Shirt Without Sewing?
To cut the collar off your t-shirt without sewing, start by laying it flat.
Fold the shirt in half to find the center of the collar, then use a ruler to mark where you want to cut.
Carefully cut along the marked line, avoiding any deep cuts that might compromise the shirt's shape.
Once you've cut the collar, stretch the fabric gently to create a clean, rolled edge for a polished look.
How to Cut a Tshirt Neck to Make It Cute?
To make your t-shirt neckline cute, start by laying it flat and folding it in half to find the center. Mark this spot with chalk, then decide how deep you want the cut.
Using a ruler, create a guideline for a symmetrical v-shape. Carefully cut along the lines, and after cutting, stretch the fabric to roll the edges for a polished look.
Check for comfort and style, trimming any uneven areas as needed.
How to Cut a V Slit in a Shirt?
Cutting a v-slit in a shirt is like crafting a doorway to your personal style.
Start by laying your shirt flat and folding it in half to find the neckline's center. Measure and mark your desired slit depth, usually 2 to 4 inches. Cut along the line, keeping both sides even.
Afterward, gently stretch the edges for a nice rolled finish. Finally, try it on to guarantee it reflects your vibe perfectly!
Conclusion
Now that you’ve transformed your t-shirt into a stylish V-neck, enjoy the versatility it brings to your wardrobe. Embrace the comfort of a personalized fit, celebrate the creativity of your handiwork, and showcase your unique style with every wear. Whether you’re dressing it up or keeping it casual, this no-sew modification proves that a little effort can lead to big results. So grab your scissors, release your creativity, and elevate your fashion game effortlessly! Additionally, consider using your newfound skills to explore other DIY fashion projects, such as sewing the armpit of a jacket to enhance its fit and comfort. With a few simple adjustments, you can breathe new life into older pieces, creating a cohesive look that reflects your individuality. Don’t be afraid to experiment and make bold choices—each project will not only expand your wardrobe but also boost your confidence in your creative abilities.