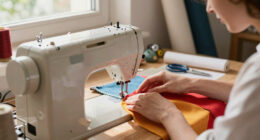
Welt pockets might seem impossible at first, but if you follow a precise, step-by-step order, they become much easier. Start by gathering the right tools and stabilizing your fabric to prevent puckering. Carefully mark and cut the pocket openings, then sew and attach the welt pieces with accuracy. Finish the pocket by topstitching and cleaning up the edges. Stick to this exact process, and you’ll soon master perfect, professional-looking welt pockets. Continue, and you’ll discover even more tips to perfect your technique.
Key Takeaways
- Break down the process into small, manageable steps like marking, sewing, clipping, and turning to simplify welt pocket creation.
- Use precise measurements and proper fabric stabilization to ensure accurate placement and clean edges.
- Carefully sew along marked lines and reinforce corners to maintain pocket shape and durability.
- Practice on scrap fabric to master technique and adapt based on fabric type and texture.
- Ensure correct alignment and seam allowances, and press thoroughly for a professional, polished finish.

LIBLAIN Mini Sewing Kit, Small Travel Sewing Kit with Big Eye Steel Needles for Adults and Beginners, Needle and Thread Kit for Hand Sewing (43Pcs)
【Threading in Seconds】With extra-large eyes, these premium stainless steel needles guide thread smoothly and resist bending or breaking.
As an affiliate, we earn on qualifying purchases.
As an affiliate, we earn on qualifying purchases.
Why Welt Pockets Can Seem More Difficult Than They Are

Welt pockets often seem more challenging than they really are because they involve multiple precise steps that can feel intimidating at first. The key to mastering them is understanding that careful buttonhole techniques and seam allowance adjustments make a big difference. When sewing welt pockets, you need to create neat buttonholes that hold the pocket securely while maintaining a professional look. Proper seam allowance adjustments ensure the pocket opening is clean and flush with your fabric’s surface. At first, this might seem complex, but breaking the process into manageable steps helps. Additionally, accurate measurements and careful marking are essential for a polished finish. Recognizing the importance of fabric stability can also prevent puckering and misalignment. With practice, you’ll see that the precision required isn’t as formidable as it appears. Once you get comfortable with these details, welt pockets become a straightforward sewing task.

OZXTYO Triangle Tailors Chalk 10Pcs,Sewing Fabric Chalk and Fabric Markers for Quilting,Sewing Supplies Accessories
Tailor's Chalk: 4 Colors Available (Blue, Red, White, Yellow)
As an affiliate, we earn on qualifying purchases.
As an affiliate, we earn on qualifying purchases.
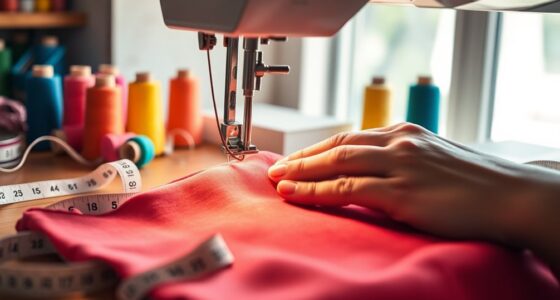
Essential Tools and Materials for Sewing Welt Pockets
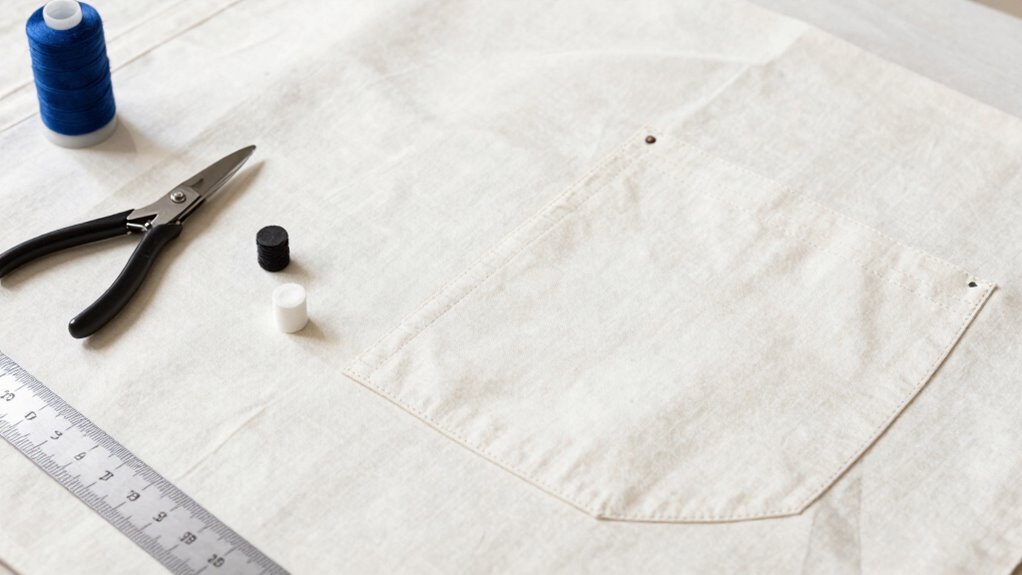
To sew welt pockets successfully, you need the right tools and materials. Make sure you have essential sewing tools, quality fabric and interfacing, and precise marking instruments. These essentials will help you achieve clean, professional results. Additionally, understanding the importance of proper knife skills can improve your overall sewing accuracy and efficiency. Developing precision in your cuts and stitch placement is crucial for achieving a polished finish. Mastering fabric selection also plays a vital role in ensuring your welt pockets look seamless and durable. Incorporating techniques from different sewing philosophies can further elevate your craftsmanship and ensure longevity of your tailored pieces. Being aware of project-specific requirements helps tailor your approach to each unique sewing challenge, improving your overall craftsmanship.
Essential Sewing Tools
Sewing welt pockets requires a specific set of tools and materials to guarantee precise and professional results. First, you’ll need sharp scissors or a rotary cutter for cleanly cutting fabric and seam allowances. A marking tool, like tailor’s chalk or a fabric pen, helps transfer pocket placements accurately. A ruler or tailor’s measure ensures correct seam allowances and pocket dimensions. Pins or clips secure fabric layers in place, preventing shifting during sewing. An awl or seam ripper is essential for fine-tuning pocket openings. Having a pressing tool, such as an iron with a pressing cloth, helps create crisp edges. Proper fabric selection influences ease of sewing and final appearance, while understanding seam allowances guides accurate pocket placement and stitching. Additionally, mastering precision sewing techniques is crucial for achieving a professional finish. Using the right airless paint sprayer can significantly improve the quality and speed of your painting projects, ensuring smooth and even coverage. Incorporating proper fabric handling techniques also plays a vital role in achieving consistent and polished welt pockets. Paying attention to fabric stability can help prevent puckering and distortion during sewing, which is vital for achieving a professional finish. Being aware of backstitching techniques can further enhance the durability of your pocket stitches. These tools are vital for achieving a professional finish.
Quality Fabric and Interfacing
Choosing the right fabric and interfacing sets the foundation for clean, durable welt pockets. Your fabric selection should be sturdy yet manageable, like medium-weight cotton or twill, to hold the pocket’s shape without sagging. Avoid overly slippery or thick fabrics that can make sewing imprecise. When it comes to interfacing choices, opt for a lightweight to medium-weight fusible interfacing that provides stability without adding bulk. The right interfacing will reinforce the fabric around the pocket opening, ensuring clean edges and a professional finish. Make sure the interfacing is compatible with your fabric type to prevent puckering or wrinkling. Proper fabric and interfacing choices are essential for creating welt pockets that look sharp and last through wear and washing. Additionally, understanding the horsepower of electric dirt bikes can help you appreciate the importance of choosing durable, high-quality materials for your sewing projects, ensuring your welt pockets withstand active use. Selecting fabrics with appropriate fiber content can further enhance the longevity and appearance of your finished project, especially when considering fabric durability for everyday wear. Using fabrics with good tensile strength contributes to the overall resilience of the finished garment, making your welt pockets more reliable over time. Considering material properties can help you select fabrics that resist stretching and maintain their shape after multiple washes.
Precision Marking Instruments
Have you ever struggled with accurately marking where your welt pockets should go? Precision marking instruments are essential for this task. Use fine tailor’s chalk, fabric pencils, or erasable pens to make clear, precise lines. These marking instruments help you visualize pocket placement without damaging the fabric. To guarantee your markings stay put during sewing, fabric stabilization is vital. Interfacing or lightweight fusible stabilizers can keep the fabric from shifting, providing a stable surface for marking. Accurate marks guide your pocket openings and welt placement, reducing errors. Investing in quality marking instruments and stabilizers makes the process smoother, ensuring your welt pockets look professional and precise. Proper marking is the foundation for a clean, polished finish.
Sewing Seam Ripper Tool,Stitch Remover and Thread Cutter with 2Big+2Small Seam Rippers,1 Pack Thread Snips,1Pack 5”Scissor
Seam Rippers,2 Different Sizes,Multifunction,Meet Different Requirements.small stitch unpicker is 3.5 inch long and large stitch unpicker is 5.5…
As an affiliate, we earn on qualifying purchases.
As an affiliate, we earn on qualifying purchases.
How to Mark and Prepare Your Fabric for Accurate Placement
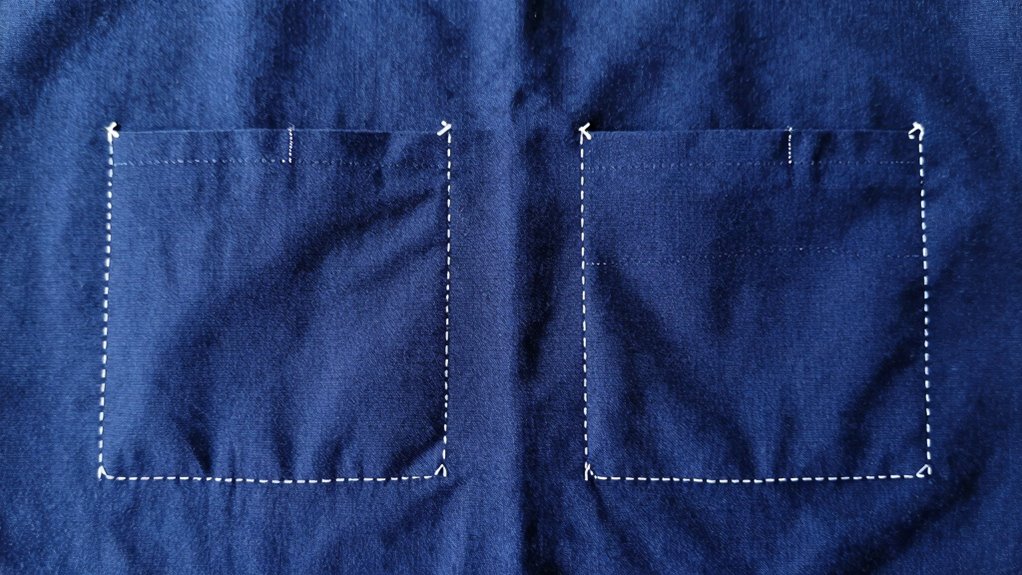
Before you start marking your fabric, it’s important to make certain the surface is flat and free of wrinkles, as these can distort your measurements. To guarantee accurate placement, align your fabric’s grain with your pattern lines. This keeps the fabric stable and prevents distortion during sewing. Use tailor’s chalk or a fabric marker to trace the pocket placement, paying attention to seam allowances. Think of your fabric as a grid:
| Fabric Grain | Seam Allowances | Pattern Lines |
|---|---|---|
| Runs parallel | Extra space | Marked precisely |
| Ensures stability | For sewing ease | Guides placement |
| Prevents distortion | Keeps edges aligned | Accurate sewing |
This careful preparation helps your welt pockets sit perfectly, making the process smoother and more precise. Additionally, understanding the importance of fabric stability can further improve your sewing accuracy. Ensuring your fabric is properly prepared not only enhances accuracy but also reduces fabric distortion during the sewing process. Being mindful of fabric grain alignment can significantly impact the overall neatness and durability of your finished project. Proper fabric preparation also supports astrological influences, as a harmonious setup can boost confidence and focus during sewing.

Aleene's Stiffen Quik Pump Spray Fabric Stiffener, Quick Drying, Nontoxic, for Stiffening, Draping, and Shaping Fabrics, 8 oz
CONTROLLED SPRAY APPLICATION Convenient pump spray delivers an even, controlled application to help minimize mess and prevent overuse….
As an affiliate, we earn on qualifying purchases.
As an affiliate, we earn on qualifying purchases.
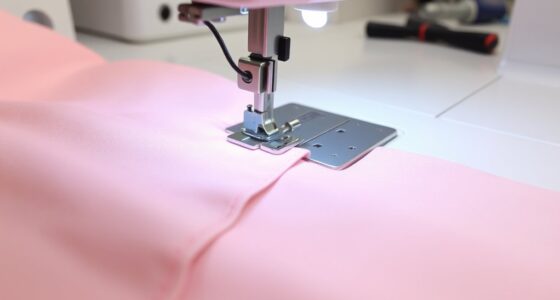
Sewing the Pocket Opening and Attaching the Welt Pieces
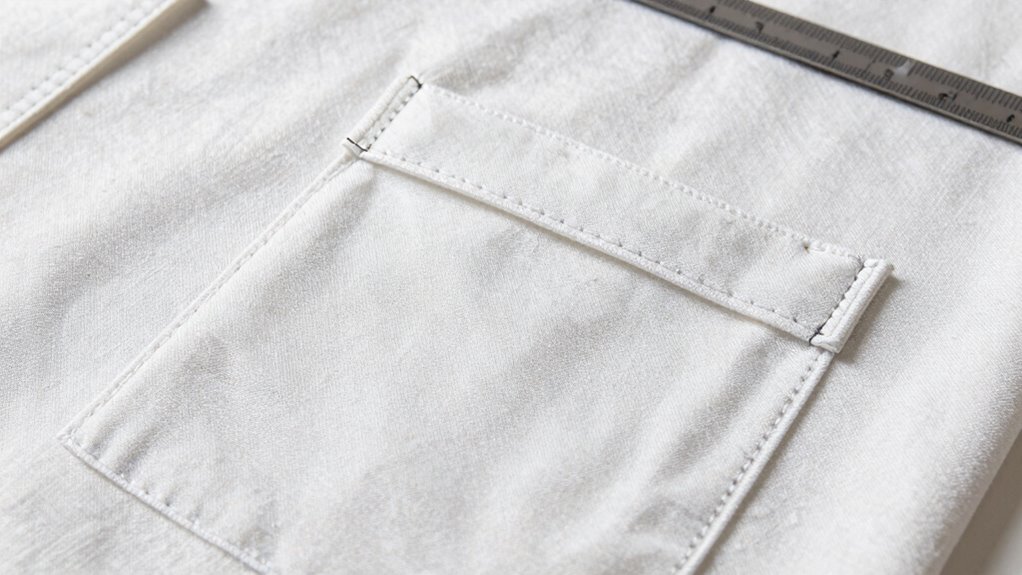
To begin sewing the pocket opening and attaching the welt pieces, carefully align the welt pieces with the marked placement lines on your fabric. Pin them in place to guarantee accuracy. Next, follow these steps:
- Sew along the marked lines to secure the welt pieces, creating a clean pocket opening.
- Reinforce the corners with backstitches to prevent fraying during use.
- Clip into the seam allowances at the corners to allow smooth turning without puckering.
- Take care to maintain even stitches throughout the process, as consistent stitching helps ensure a professional finish. Paying attention to sewing machine tension can also help achieve uniform stitches. Properly sewing the welt pieces also involves understanding the importance of fabric stability, which can be maintained with appropriate interfacing if necessary.
This process assures the welt attachment is secure and neat. Keep your stitches even and precise, as this foundation influences the final look. Properly sewing the pocket opening and welt pieces sets the stage for a professional finish, making your welt pockets look polished and well-constructed.
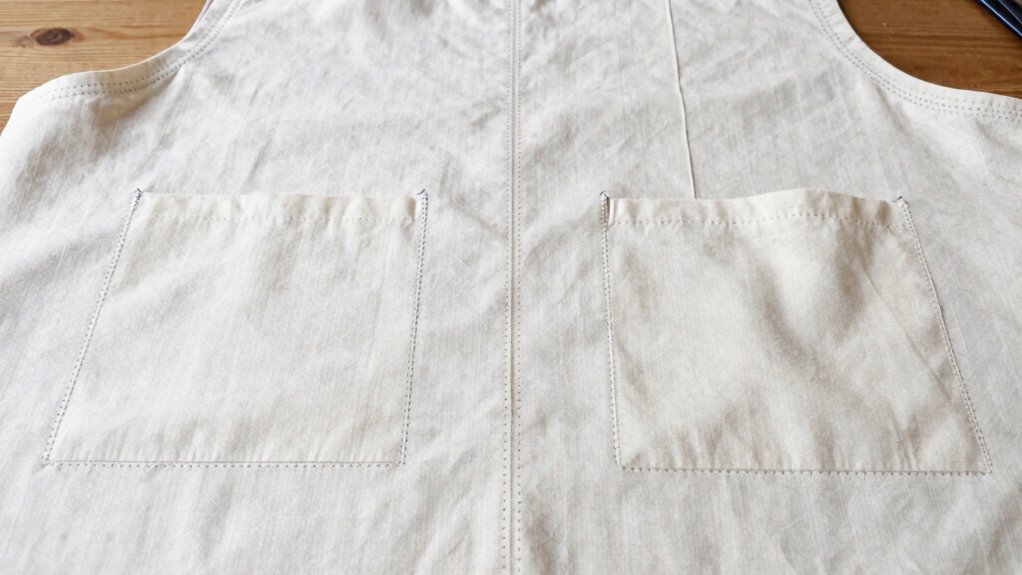
Assembling and Finishing the Pocket Bag for a Clean Look
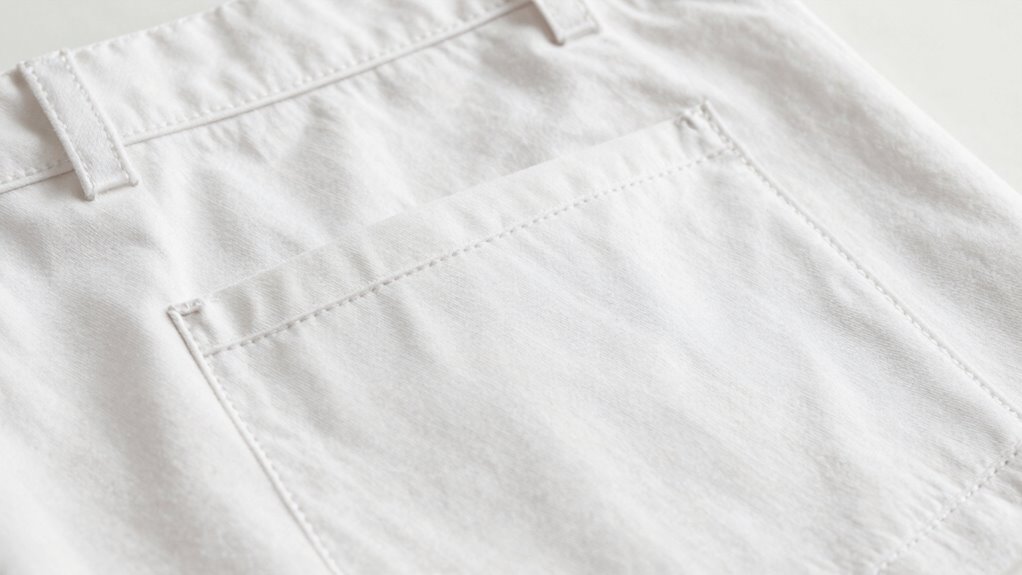
Once the welt pieces are securely attached and the pocket opening is neatly finished, you can begin assembling the pocket bag to achieve a clean, professional look. Turn the pocket interior right side out and press the edges flat. Carefully topstitch along the pocket opening for a polished finish, ensuring the decorative finishes are smooth and even. Fold the pocket bag so that the raw edges are enclosed, and baste or pin it in place inside the garment. Stitch the pocket bag to the pocket opening, maintaining consistent seam allowances for a seamless appearance. Press the seam allowances toward the pocket interior, then finish the raw edges with a clean finish like a zigzag or serging. This method guarantees your welt pocket looks sharp, with the pocket interior neatly concealed. Understanding seam allowances and their proper management is essential for a professional finish. Additionally, paying attention to fabric stability during assembly helps prevent puckering and ensures the pocket maintains a crisp, clean edge.
Common Mistakes to Watch Out for When Sewing Welt Pockets
When sewing welt pockets, pay close attention to placement, as incorrect positioning can ruin the overall look. Skipping stabilizing stitches might cause the fabric to shift or pucker, making the pocket less neat. Also, guarantee the pocket edges are precisely aligned to achieve a professional finish.
Incorrect Pocket Placement
Incorrect pocket placement is a common mistake that can ruin the overall look of your welt pockets. If you don’t pay attention to placement, your pockets may end up uneven or awkwardly positioned. To avoid this, consider these key points:
- Fabric selection: Use fabric that’s stable enough to hold the pocket’s shape and won’t distort easily.
- Pattern alignment: Ensure your pocket markings are correctly aligned with your garment’s grainline and seams for a professional finish.
- Placement accuracy: Mark the pocket openings carefully, making sure they’re symmetrical and positioned at the right height and distance from the waistband or side seams.
Skipping Stabilizing Stitches
Skipping stabilizing stitches is a mistake that can compromise the strength and appearance of your welt pockets. These stitches are essential for fabric stabilization, preventing the fabric from puckering or stretching as you sew. Without them, the pocket edges may become misshapen or loose over time. Always add stabilizing stitches along the pocket opening before proceeding with the final sewing steps. They help hold the fabric in place, ensuring clean, sharp edges. Skipping this step might seem minor, but it considerably affects the overall finish and durability of your welt pockets. Take the extra time to sew stabilizing stitches—they provide a sturdy foundation that makes sewing easier and results in a professional-looking pocket. Proper fabric stabilization is key to successful welt pocket construction.
Misaligning Pocket Edges
Misaligning the pocket edges is a common mistake that can ruin the clean, professional look of your welt pockets. To avoid this, focus on fabric alignment and pocket edge accuracy. First, ensure the pocket opening is precisely marked and the edges are aligned before sewing. Second, double-check that the fabric layers are flat and smooth, preventing shifting during stitching. Third, sew slowly, paying close attention to maintaining consistent seam allowances and keeping edges aligned. These steps help keep your pocket edges even and symmetrical. By maintaining proper fabric alignment and pocket edge accuracy throughout the process, you’ll achieve a polished, professional finish and avoid crooked or uneven welt pockets.
Tips for Sewing Welt Pockets on Different Fabrics

Sewing welt pockets on different fabrics requires adjusting your technique to guarantee clean, professional results. For fabrics with significant stretch, use a stabilizer or sew with a smaller seam allowance to prevent puckering and distortion. When working with delicate or lightweight materials, reduce stitch length and stay stitch around the pocket opening to maintain shape. For heavier fabrics, reinforce the pocket area with interfacing to handle the stress and avoid sagging. Consider decorative details like topstitching or contrasting thread to enhance visual appeal—just make certain your stitches are even and secure. Always test your techniques on scrap fabric first, especially when dealing with unique textures or finishes. Adapting your approach based on fabric type ensures your welt pockets look sharp and last through wear.
Troubleshooting and Refining Your Welt Pocket Technique
Even experienced sewists encounter issues with welt pockets, but identifying and correcting these problems can substantially improve your results. Common issues often stem from fabric choice or pattern adjustments. To troubleshoot:
- Check your fabric’s stability—if it’s too slippery or stretchy, consider interfacing or choosing a sturdier fabric.
- Review your pattern adjustments—ensure pocket placements and seam allowances are accurate.
- Refine your technique by practicing precise marking, clipping, and pressing to avoid puckering or uneven edges.
Frequently Asked Questions
Can I Sew Welt Pockets on Curved or Uneven Fabric Surfaces?
Yes, you can sew welt pockets on curved or uneven fabric surfaces. To guarantee fabric stability, starch or interface the area before sewing. Carefully mark your pocket placement, adjusting for curves to keep it aligned. Use a small, sharp needle and slow stitching to navigate uneven surfaces smoothly. Taking your time and reinforcing the fabric where needed helps achieve a clean, professional look, even on challenging surfaces.
What Are Alternative Methods if My Welt Pocket Doesn’T Lay Flat?
If your welt pocket doesn’t lay flat, try using fabric stabilizers to add support and prevent puckering. Additionally, make certain your pocket templates are accurately traced and pressed onto the fabric before sewing. These steps help create a smoother finish. You can also press the pocket edges carefully during construction, and if needed, use a tailor’s ham to shape curved areas. This approach improves the pocket’s appearance on uneven surfaces.
How Do I Repair a Welt Pocket That Has Come Undone?
To repair a welt pocket that’s come undone, start by reinforcing the pocket with new seam stabilization, ensuring it stays secure. Carefully sew the welt back into place, matching your original stitching. For added durability, consider pocket reinforcement, especially around high-stress areas. Use a fine needle and thread for neat, professional results. This approach restores your pocket’s functionality and prevents future unraveling.
Are There Specific Stitches Best Suited for Reinforcing Welt Pockets?
For reinforcing welt pockets, choose strong stitch techniques like backstitch or bartack stitches for durability, and match your fabric selection to guarantee a seamless look. These stitch techniques provide extra strength, preventing future tears, while selecting the right fabric ensures the stitches hold well without puckering. You want to focus on reinforcing the pocket edges, so use these stitches consistently to keep your welt pockets secure and looking professional.
Can I Add Welt Pockets to Stretchy or Delicate Fabrics?
Yes, you can add welt pockets to stretchy or delicate fabrics, but you need to prioritize fabric stability and pocket reinforcement. Use interfacing or a stabilizer to strengthen the area before cutting and sewing. Choose stitches that provide flexibility, like a stretch stitch or zigzag, to prevent tearing or puckering. Taking these precautions ensures your welt pockets stay secure and look professional, even on delicate or elastic fabrics.
Conclusion
Mastering welt pockets might seem mighty challenging, but with patience and practice, you’ll perfect your technique. Follow the focused steps, stay precise, and don’t fear setbacks—they’re just part of the process. With consistent care, your craftsmanship will shine, creating crisp, clean pockets that elevate your sewing skills. So, stay steady, sew smart, and soon you’ll be confidently creating beautiful, professional-looking welt pockets effortlessly!