
To sew piping into seams for a professional look, start by selecting matching or contrasting piping fabric and pin it along your seam line, making sure it’s evenly aligned. Use a zipper or piping foot for close sewing and sew slowly to maintain control. Tuck the raw edges of the piping inside the seam for a clean finish, and press the seams for a crisp appearance. Continuing your process will help you master a polished, high-quality result.
Key Takeaways
- Pin or clip piping along the seam line, ensuring even spacing and alignment before sewing.
- Use a zipper or piping foot for close, precise stitching near the piping cord.
- Sew slowly and steadily, maintaining consistent pressure to keep piping aligned with the seam.
- Tuck raw edges of piping neatly inside the seam for a clean, professional finish.
- Press seams carefully after sewing to flatten and set the piping into place, enhancing the overall look.
Have you ever wondered how to add a polished, professional touch to your sewing projects? One effective way is by sewing piping into your seams. It’s a detail that instantly elevates your finished piece, giving it a tailored, high-end look. To do this successfully, you need to pay close attention to your fabric selection and piping installation. These two elements are the foundation of a clean, professional result.
Adding piping elevates your sewing projects with a polished, tailored finish.
When choosing fabric for your project, select materials that complement the piping and the main fabric. Light to medium-weight fabrics work best because they handle piping installation with ease and maintain a smooth, even appearance. Avoid overly bulky or stretchy fabrics, as these can make piping installation more challenging and may cause puckering or uneven seams. Your piping should contrast or coordinate well with your main fabric, depending on the look you want. For a subtle effect, choose piping in a matching color; for more contrast, go for a bold hue or a patterned fabric.
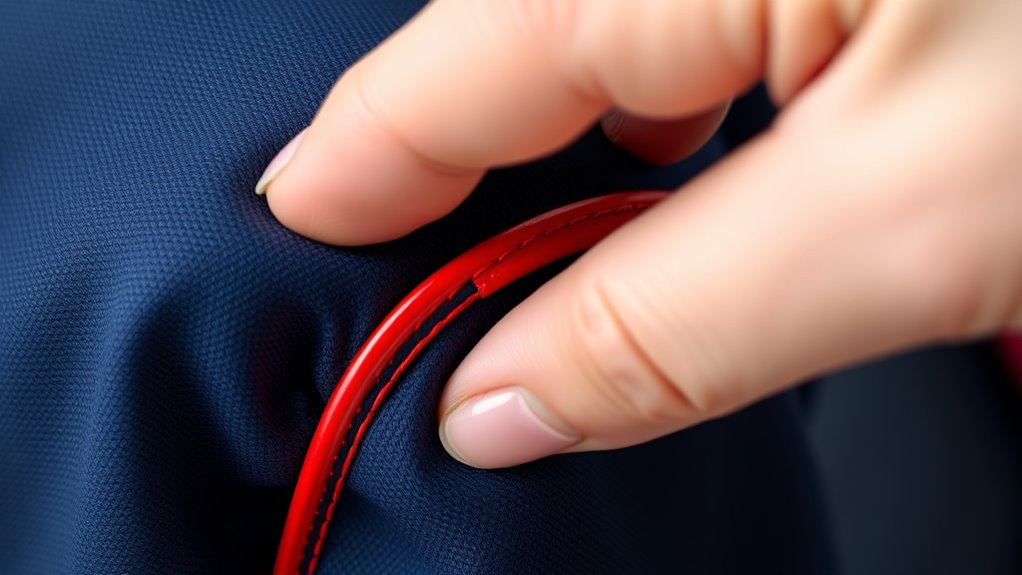
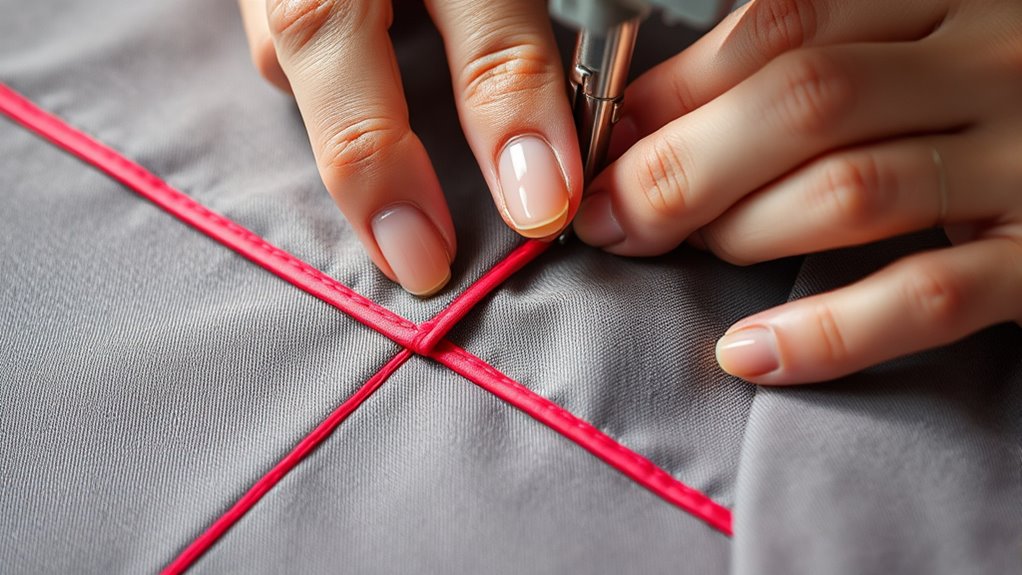
Now, focus on piping installation. Before you begin sewing, pin or clip the piping along the seam line, ensuring it’s evenly spaced and aligned. Use a zipper foot or piping foot on your sewing machine, which allows you to sew closer to the piping cord for a neat finish. When stitching, keep a steady pace and maintain consistent pressure on the fabric to prevent shifting. As you sew, take your time to keep the piping aligned with the seam and avoid any gaps or puckering. It helps to sew slowly and remove pins or clips as you go, so the piping stays in position.
You also want to make certain that your piping’s raw edges are tucked neatly inside the seam. This creates a clean finish and prevents fraying over time. Press your seams carefully after sewing, using an iron to flatten and set the piping into place. This step helps to smooth out any bumps and gives your project a professional edge. If necessary, topstitch along the piping for extra durability and a finished look, especially on projects like cushions or upholstery. Additionally, understanding space and organization can help you keep your sewing area tidy, making piping installation more efficient and less stressful.
Frequently Asked Questions
Can Piping Be Added to Curved Seams Easily?
Yes, you can add piping to curved seams easily by carefully shaping the piping to match the curve. Keep seam allowances consistent and pin the piping in place, adjusting the placement as needed. Slowly sew along the curve, taking your time to follow the seam allowance and ensuring the piping stays aligned. Using a zipper foot can help you navigate tight curves smoothly for a professional finish.
What Types of Fabric Are Best for Piping?
Imagine adding piping to your favorite cushion, making it stand out beautifully. For fabric choices, medium-weight cotton or linen work best because they hold piping well and provide a smooth finish. Consider piping styles like flat or corded for different effects. These fabrics and styles guarantee your piping stays crisp and professional, whether you’re sewing a pillow, garment, or upholstery project, giving your finished piece a polished look.
How Do I Prevent Puckering When Sewing Piping?
To prevent puckering when sewing piping, choose fabric that’s stable and avoid overly stretchy materials. Use the right piping techniques, like sewing with a zipper foot for better control and reducing tension on the fabric. Pin or clip the piping carefully, and sew slowly to maintain smooth, even stitches. Adjust your machine’s tension if needed, and press the seam gently afterward. These steps help achieve a polished, professional finish without puckering.
Is It Necessary to Use a Special Zipper Foot?
Yes, using a special zipper foot on your sewing machine is necessary when sewing piping into seams. The zipper foot allows you to get close to the piping, ensuring a neat, professional finish. It gives you better control and helps avoid puckering or crooked seams. Attach the zipper foot securely, then carefully guide your fabric and piping through, keeping a consistent seam allowance for a polished look.
Can Piping Be Removed if I Make a Mistake?
Yes, piping can be removed if you make a mistake. To do piping removal, carefully pry it out of the seam using a seam ripper or small scissors. This helps with seam correction, ensuring your project looks neat. Take your time to avoid damaging the fabric or seam. Once the piping is removed, you can resew it correctly, giving your finished piece a professional, polished appearance.
Conclusion
Now that you’ve mastered sewing piping into seams, you’ll find your projects look polished like a finely tailored suit. With a little practice, adding piping becomes second nature—like threading a needle through silk. Remember, the key is patience and attention to detail, transforming simple seams into eye-catching details. Keep experimenting and soon, your sewing room will be a garden of beautiful, professional finishes blooming with every project you complete.