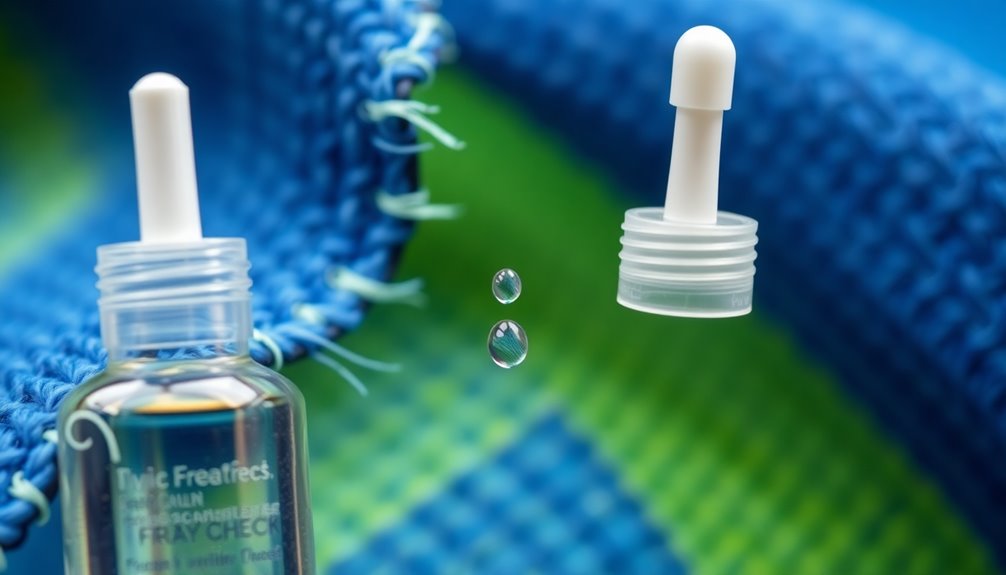
You can stop fabric fraying forever with Fray Check! This easy-to-use liquid seam sealant protects your fabric edges from unraveling, keeping your sewing projects looking sharp and professional. Just apply it to the edges, allow it to dry for about 15 minutes, and you're good to go. Plus, it's safe for most fabrics and washes well. Ready to learn more about its benefits and other fraying prevention methods? Stick around for the details!
Key Takeaways
- Apply Fray Check along fabric edges and thread ends to create a protective barrier against fraying.
- Ensure the fabric is clean and dry before applying Fray Check for optimal adhesion.
- Use a pin to puncture the tip for precise application and control over the amount used.
- Allow 5 to 10 minutes for initial drying, and 15 to 30 minutes for full drying before handling.
- Store Fray Check safely away from heat sources and out of reach of children for safe crafting.

Dritz Fray Check Liquid Seam Sealant 2-Pack – Permanent Clear Fabric Edge Protector to Prevent Fraying and Secure Thread Ends – 0.75 oz Bottles
- Prevents fabric fraying: Secures thread ends effectively
- Versatile use: Ideal for sewing, quilting, crafts
- Washable and dry cleanable: Maintains durability after cleaning
As an affiliate, we earn on qualifying purchases.
As an affiliate, we earn on qualifying purchases.
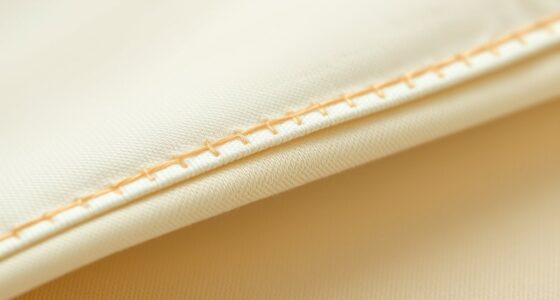
Understanding Fraying on Fabric

Fraying can be a real headache when working with fabric. This issue arises when the threads of fabric unravel at the edges, especially in sheer or lightweight materials. If you're dealing with fraying fabric, you know it can ruin the professional look of your projects.
While fraying might add character to denim, clean edges are essential for maintaining the longevity and aesthetic of your sewn items. To stop fabric from fraying, consider using techniques like zig-zag stitches or sergers. Fabric sealants also work wonders in preventing fraying before it starts.
What Is Fray Check?

When dealing with fabric edges that threaten to unravel, Fray Check offers a reliable solution. This liquid seam sealant is specifically designed to prevent fraying, ensuring your sewing projects last longer.
Fray Check is colorless and can endure washing and dry cleaning, making it perfect for different fabric types. To use it effectively, apply small amounts directly onto the fraying edges; this keeps the fabric flexible and prevents stiffness.
However, exercise caution, as Fray Check is flammable in its liquid form—always keep it away from heat sources. Priced around $5 at craft stores, Fray Check is an affordable and effective way to secure your fabric ends and maintain the quality of your creations.
How to Apply Fray Check Effectively

To apply Fray Check effectively, start by guaranteeing your fabric is clean and dry.
Gently squirt Fray Check along the fabric edge and on thread ends, making sure to achieve even coverage without excess. If you need only a small amount, use a pin to puncture the tip; for larger applications, cut off the tip.
Protect surrounding areas with cardboard or other materials to prevent accidental application on unintended surfaces.
Allow 5 to 10 minutes of drying time before handling, and give it 15 to 30 minutes to fully dry. This will help you prevent fraying and achieve the best results.
Following these steps guarantees that your fabric remains intact and looks great for longer.
Benefits of Using Fray Check

One of the biggest advantages of using Fray Check is its ability to maintain the integrity of your fabrics. This product effectively prevents fray, guaranteeing clean edges and extending the longevity of your garments and fabric items.
It's especially useful for achieving perfect seams and buttonholes, enhancing the overall appearance of your sewing projects. Plus, at around $5, it's affordable and accessible for both beginners and experienced sewists.
Fray Check can also mend small holes and reinforce edges, providing a versatile solution for various fabric care needs. Generally safe for most fabric types, including cotton and denim, it's wise to test on a small area first to verify compatibility with delicate materials.
Safety Precautions When Using Fray Check

While using Fray Check can greatly enhance your sewing projects, it's crucial to observe certain safety precautions to guarantee a safe crafting experience.
Since Fray Check is flammable in its liquid form, you should take extra care. Here are some key safety measures to keep in mind:
- Keep Fray Check away from heat sources and open flames.
- Avoid contact with your eyes; it can cause irritation.
- Read and follow the safety instructions on the product label.
- Store Fray Check out of reach of children to prevent accidental ingestion.
Troubleshooting Common Issues

When you encounter issues with Fray Check, addressing them promptly can save your project from frustration.
If you notice a stain on your fabric, use rubbing alcohol or acetone to treat the area, testing on an inconspicuous spot first.
For best results, apply Fray Check in small amounts to prevent stiffness and guarantee it penetrates the fibers thoroughly. If it doesn't fully dry, you might've applied too much; allow extra drying time or blot with a clean cloth.
Should fraying continue despite using Fray Check, consider adding techniques like zig-zag stitching or a serger for added security.
If the dried Fray Check feels stiff, soften the area gently with fabric conditioner or a steam iron.
Alternative Methods to Prevent Fraying
If you're looking for effective ways to keep your fabric edges from fraying, there are several alternative methods you can try.
These techniques not only act as a fray stop but also enhance the overall appearance of your projects. Here are some options to evaluate:
- Use pinking shears for a zig-zag cut that reduces fraying.
- Iron on fusible interfacing for added stability and a clean look.
- Apply fabric glue or sealants to create a waterproof barrier on raw edges.
- Employ a zig-zag stitch for both securing edges and adding a decorative touch.
These methods will help you keep your fabric from fraying, ensuring your sewing projects look polished and last longer.
Tips for Maintaining Fabric Edges

To maintain fabric edges effectively, you should regularly apply Fray Check or similar sealants, as this simple step can greatly extend the life of your projects.
For raw edges, consider using pinking shears to cut fabric. The zigzag pattern helps prevent threads from unraveling, reducing fraying.
Incorporating sewing techniques like French seams or zig-zag stitches creates clean finishes that further minimize fraying. Additionally, iron on fusible interfacing to lightweight fabrics for added stability, which helps prevent fraying in the long run.
Don't forget to store your fabric items properly—keep them clean and dry, as moisture and dirt can contribute to wear and fraying over time.
Taking these steps will help keep your projects looking fresh and durable.
User Experiences and Community Feedback

Many users have shared their positive experiences with Fray Check, noting its effectiveness in preventing fraying on various fabrics, especially cotton and denim.
They appreciate how it quickly mends small holes and reinforces fabric edges, extending the life of their garments.
Here's what the community is saying about Fray Check:
- It's a quick and affordable solution for fabric care.
- Testing on a small area is vital, especially for delicate fabrics like satin.
- Some users successfully remove Fray Check stains using a seam ripper and alcohol.
- Alternative methods, like Witch Hazel, have also been suggested for fray prevention.
- Many tiny house dwellers have found multifunctional furniture to be a great way to optimize their space while also keeping their fabrics in pristine condition.
Additional Resources for Fabric Care

While fabric care might seem straightforward, having the right resources at your disposal can make a significant difference in maintaining the quality and longevity of your textiles.
Regularly inspect your fabrics for signs of fraying, and address issues promptly. Use Dritz Fray Check on edges to prevent fraying and keep your projects looking polished.
For delicate fabrics, applying fusible interfacing can give extra stability against small holes. Consider using pinking shears to cut fabric edges, as the zigzag pattern helps reduce fraying while ensuring neatness. Additionally, incorporating protective styles in your sewing projects can enhance durability and prevent wear.
Finally, store your fabrics properly, away from moisture and direct sunlight, to minimize wear and tear.
With these tips and tools, you can effectively care for your textiles and extend their lifespan.
Frequently Asked Questions
How Do You Finish Edges of Fabric so It Doesn't Fray?
To finish the edges of fabric and prevent fraying, you can use several techniques.
Try a zig-zag stitch on the raw edges, or use a serger for a clean finish.
If you're working with lightweight fabric, a French seam encloses the raw edges nicely.
You can also apply bias tape for a polished look, or cut the edges with pinking shears to create a zig-zag pattern that reduces unraveling.
How to Apply Fray Check on Fabric?
To apply Fray Check on fabric, first, trim the ends of your fabric neatly.
Then, use a small amount of Fray Check and apply it directly onto the seam and seam allowance, adding more if needed for full coverage. Be sure to let the Fray Check dry completely before proceeding with your project to ensure that the fabric remains secure and fray-free. If you’re working with older or worn-out tools, it’s also a good practice to learn how to sharpen a seam ripper, as a sharp tool will make your sewing tasks much easier and more precise. By taking these steps, you can achieve a cleaner finish and prolong the life of your sewing materials.
Make sure to place cardboard or a protective surface underneath to catch any excess.
Allow it to dry for 5 to 10 minutes before handling, and wait 15 to 30 minutes for complete drying.
What Is the Best Product to Stop Fabric From Fraying?
Imagine your favorite garment, a brave knight battling the villain of fraying edges.
To protect it, you need a trusty sword—Dritz Fray Check. This powerful, clear liquid seals fabric edges, ensuring your knight remains unscathed.
It's easy to apply; just dab it on and let it dry. Ideal for various fabrics, it's an affordable ally at around $5.
With Fray Check, your fabric will stand strong against the fraying forces!
Does Fray Check Wash Off?
Fray Check doesn't wash off easily, but it can lose effectiveness over time with repeated washing or harsh detergents.
Once it dries, it forms a flexible film that adheres well to fabric, offering durability during laundering.
To get the best results, apply it sparingly and let it dry completely.
Always test it on a small, hidden area first to verify it works well with your specific fabric before applying it more broadly.
Conclusion
By using Fray Check, you can put an end to fabric fraying once and for all. It's a simple solution that saves you time and frustration, letting you enjoy your sewing projects without worry. Remember, a stitch in time saves nine, so don't wait until your fabric's edges become a problem. With a little care and the right techniques, your fabrics will stay looking fresh and intact for years to come. Happy crafting!