
To make continuous bias tape from a fat quarter, start by washing and ironing the fabric to pre-shrink it. Cut the fabric at a 45-degree angle to the selvage, creating bias strips about 2 inches wide. Fold each strip in half lengthwise, then fold raw edges toward the center and fold again to form a narrow double-fold bias tape. Use tools like a bias tape maker or safety pin to thread and sew it smoothly, ensuring neat, professional results throughout the process.
Key Takeaways
- Cut the fat quarter diagonally at a 45-degree angle to the selvage to create bias strips.
- Measure and cut strips approximately 2 inches wide along the bias to ensure proper stretch.
- Sew the strips end-to-end with a diagonal seam to form a continuous length of bias fabric.
- Fold and press the strip in a double-fold bias tape method for neatness and flexibility.
- Use a bias tape maker or safety pin to thread the tape through your sewing machine for finishing.
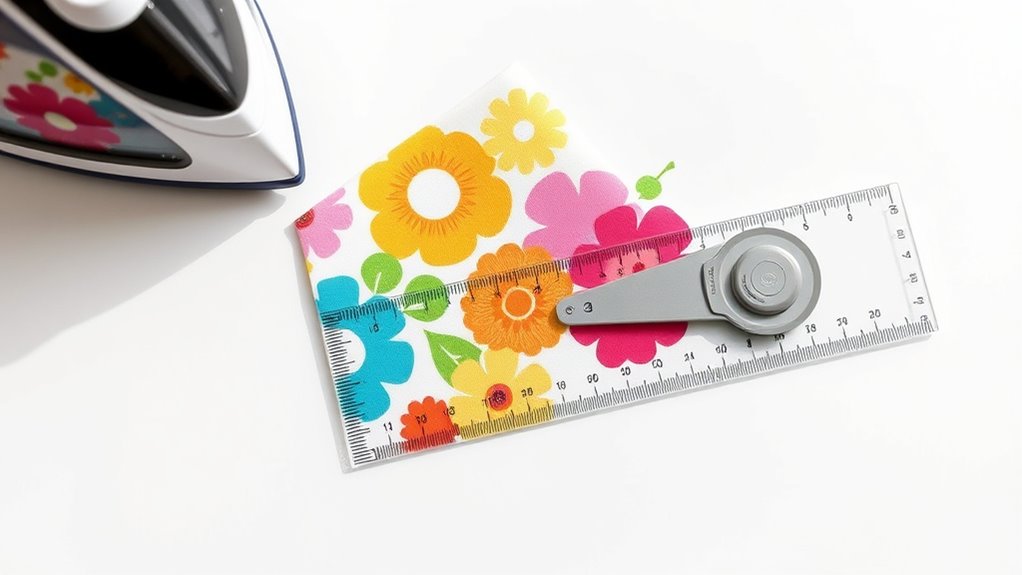
Ever wondered how to create seamless bias tape for your sewing projects? It all begins with choosing the right fabric. When selecting your fabric, opt for something lightweight and woven, like cotton, because these materials fold and press more smoothly, which is essential for creating neat, professional-looking bias tape. Avoid bulky or stretchy fabrics, as they can be difficult to work with and may not fold evenly. A fat quarter is perfect for this task, offering enough material to cut multiple strips without waste. Once you’ve picked your fabric, wash and iron it to pre-shrink and remove any wrinkles, ensuring your bias tape will stay flat and true after sewing.
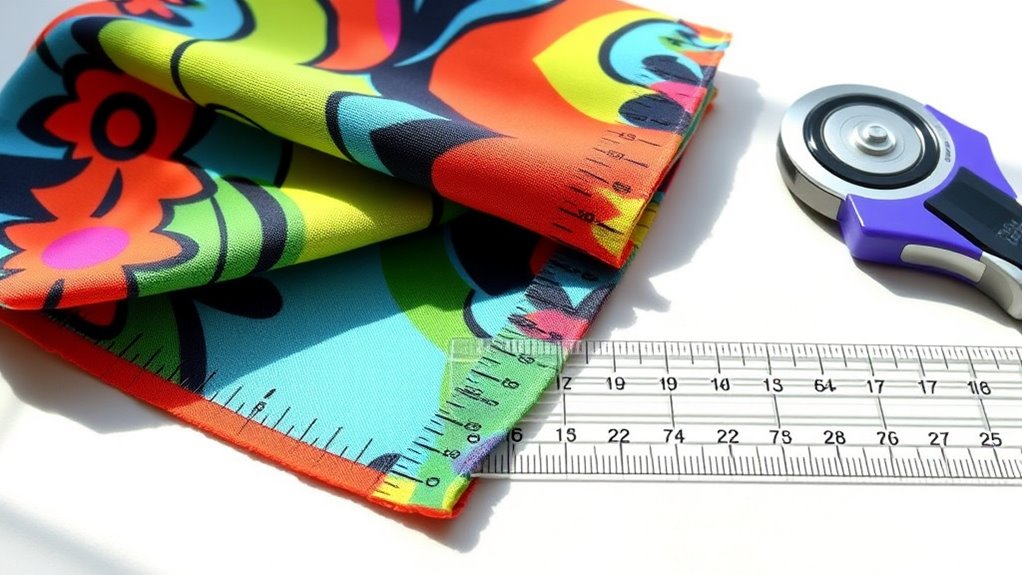
Next, focus on your folding techniques. To make continuous bias tape, you need to cut your fabric at a 45-degree angle to the selvage, creating bias strips. Use a ruler and rotary cutter or sharp scissors to cut along the diagonal, making sure your cuts are straight and accurate. The width of your strips depends on how wide you want your finished bias tape to be, but a common width is around 2 inches before folding. After cutting, fold the strips in half lengthwise, with right sides together, and press to create a crisp fold. Then, fold each raw edge toward the center fold line, meeting at the middle, and press again. This folding technique helps you achieve a narrow, double-fold bias tape that’s easy to sew onto your project.
As you fold and press, keep the fabric smooth and flat, avoiding puckers or misalignments. Using a bias tape maker or a safety pin to thread the tape onto your sewing machine’s presser foot can make the process smoother. When sewing, start from one end and sew along the open edge, ensuring the folds stay in place. Make sure your stitches are close to the edge for a clean finish. As you sew, you can also double-check the width of your bias tape and adjust your stitching if needed. Once you’ve sewn the entire length, press the finished bias tape again to set the folds and make it easier to handle when attaching it to your project. Additionally, understanding the importance of color accuracy in project materials can help ensure your finished bias tape matches your fabric’s palette perfectly.
Frequently Asked Questions
Can I Use Pre-Cut Fat Quarters for Bias Tape?
You can definitely use pre-cut fat quarters for bias tape, making your sewing projects more convenient. Just cut your fat quarter into strips and follow your bias tape-making process. Keep in mind, fabric dyeing can improve your fabric’s color if needed. Also, maintaining your sewing machine ensures smooth sewing, especially when working with multiple strips. Using pre-cut fabrics saves time and helps you focus on sewing and creating beautiful bias tape.
What Types of Fabric Are Best for Bias Tape?
Think of bias tape as the ribbon that ties your project together. You’ll want fabrics with good fabric durability and colorfast options to keep your work looking fresh over time. Cotton and quilting cottons are excellent choices—they’re sturdy and hold color well. Avoid stretchy or delicate fabrics, as they can warp or fade. Choosing the right fabric guarantees your bias tape remains vibrant and durable, adding a polished touch to your finished piece.
How Do I Choose the Right Bias Tape Width?
When choosing the right bias tape width, consider your project’s fabric stretch and color coordination. Narrower tape (about 1/4 inch) works well for delicate details, while wider tape (up to 1 inch) provides more durability and a bold look. Match the width to your fabric’s stretch to prevent puckering, and pick a tape width that complements your fabric’s color for a seamless finish.
Can I Make Bias Tape in Different Colors or Patterns?
Creating colorful, patterned bias tape is a perfect way to play with fabric matching and color coordination. You can cut your fat quarter into strips, then dye or choose fabrics with different hues and prints. This allows you to craft bias tape in diverse colors and patterns, adding personality and pizzazz to your projects. Experimenting with various fabrics helps you tailor tape that complements your design, creating a cohesive, customized look.
How Do I Finish the Edges of Homemade Bias Tape?
To finish the edges of homemade bias tape, you can fold and press the edges for a clean look or sew a narrow hem. Adjust your sewing machine settings for a neat stitch, and consider using a straight stitch or zigzag for durability. Store your bias tape properly to prevent wrinkles, and keep it rolled or folded to maintain its shape. This guarantees your finished bias tape looks professional and lasts longer.
Conclusion
Now that you know how to make your own continuous bias tape from a fat quarter, you can add a polished touch to any sewing project. Isn’t it satisfying to create something so useful from just a small piece of fabric? With a little practice, you’ll find it quick and easy to produce perfect, professional-looking bias tape whenever you need it. Why settle for store-bought when you can craft your own custom finishing touches?