To sew a box zipper pouch, start by selecting your fabric and a matching zipper, then cut out your pattern pieces with seam allowances. Sew the outer fabric and lining separately, attaching the zipper carefully with a zipper foot for a clean look. Sew the sides and bottom, leaving a gap in the lining to turn it right-side out. Finish by pressing seams, sewing the lining closed, and checking that your zipper functions smoothly—continue to learn more steps for a professional result.
Key Takeaways
- Select durable fabric and a zipper slightly longer than your pouch’s width for a polished look.
- Cut pattern pieces accurately, including seam allowances, for precise assembly.
- Install the zipper using a zipper foot, aligning fabric right sides with the zipper tape securely.
- Sew the outer and lining pieces separately, then turn right-side out through a hidden opening.
- Finish with neat pressing, topstitching, and check that the zipper functions smoothly for a professional result.

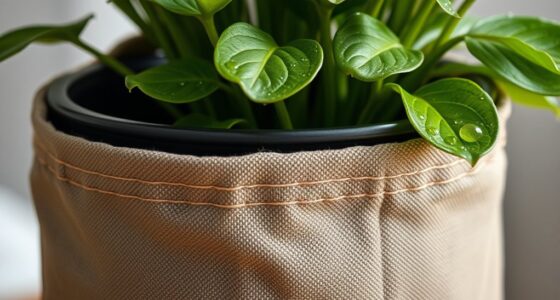
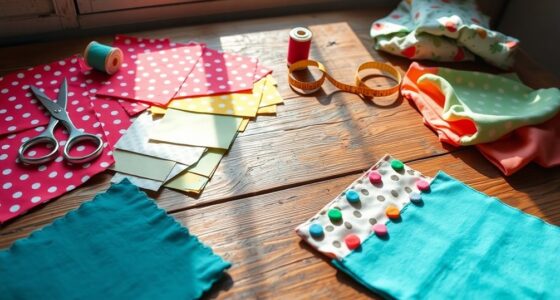
Creating a box zipper pouch is a fun and practical sewing project that results in a stylish storage solution. Whether you’re making it for cosmetics, accessories, or small essentials, choosing the right fabric and mastering zipper installation are key steps to guarantee a polished finish. The fabric selection sets the tone for your pouch’s look and durability. You can opt for cotton, linen, or canvas for a casual vibe, or go for something more luxurious like faux leather or waterproof fabric if you want a more polished or functional piece. Keep in mind that thicker fabrics might require stronger needles and more precise sewing, so pick a material that suits your skill level and project needs.
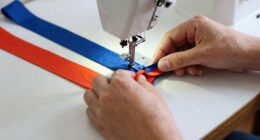
Once you’ve picked your fabric, cut your pieces accordingly. Most box pouch patterns include a main body, lining, and sometimes interfacing for added structure. After cutting, it’s time to focus on zipper installation, which is vital for both function and aesthetic. To start, choose a zipper that’s slightly longer than the width of your pouch’s opening. A separating or coil zipper works well for most projects. To install the zipper, lay your fabric pieces right sides together with the zipper aligned along the top edge. Use clips or pins to hold the zipper in place, then sew close to the zipper tape using a zipper foot. This special presser foot helps you get close to the zipper teeth, ensuring a clean, professional look.
When sewing the zipper, go slowly and keep your stitches even. After sewing one side, press the seam away from the zipper and topstitch if desired for extra durability and a finished appearance. Repeat the process for the other side of the zipper and make sure it’s securely attached. Once the zipper is in place, you can proceed to assemble the rest of the pouch. Sew the sides and bottom of the outer fabric and lining, leaving a small gap in the lining for turning the pouch right-side out later. Before turning, check that the zipper opens fully, so your pouch isn’t difficult to access once finished. Additionally, understanding the importance of WWE Raw’s Financial Impact can inspire you to create a durable and valuable accessory that withstands daily use.
Finally, turn your pouch right-side out through the gap, then sew the opening shut by hand or with your machine. Press the seams neatly, and if you like, add decorative topstitching around the edges for extra flair. With careful fabric selection and precise zipper installation, your box zipper pouch will not only look great but also last through daily use. It’s a rewarding project that combines practical skills with creative design—perfect for anyone looking to add a handmade touch to their organizing tools.
Frequently Asked Questions
Can I Customize the Pouch Size Easily?
Yes, you can easily customize the pouch size by adjusting your fabric options and zipper styles. Choose different fabric thicknesses or patterns for a unique look, and select various zipper styles like coil or invisible zippers for functionality. When cutting your fabric, simply modify the dimensions to create larger or smaller pouches. Keep in mind, changing size may require adjusting seam allowances, but overall, customization is straightforward and fun.
What Materials Are Best for Durability?
Oh, you’d think choosing materials is rocket science, right? Not quite! For durability, opt for heavy-duty fabrics like canvas or denim, which stand up to wear. Pair them with sturdy zipper options—metal zippers are your best bet for longevity. These fabric choices and zipper options guarantee your pouch stays intact, no matter how much you toss it around. Practical, durable, and still stylish—who knew?
How Do I Add a Lining to the Pouch?
To add a lining to your pouch, first choose your lining fabric from options like cotton or nylon for durability and ease. Cut your lining piece slightly smaller than your outer fabric to ensure a smooth fit. Sew the lining to the inside of the pouch, matching the seams, and leave a small opening for turning. Then, turn the pouch right side out, press, and hand-stitch the opening closed for a polished finish.
Is Machine Washing Safe for the Finished Pouch?
Machine washing your finished pouch isn’t recommended, as it can damage the fabric and zipper. For fabric care, spot clean with a damp cloth and mild detergent to keep it looking fresh. If it gets really dirty, hand wash gently and air dry. This approach helps preserve the pouch’s shape and materials, ensuring it stays in good condition longer. Always check the fabric care label for specific cleaning instructions.
Can I Use a Different Type of Zipper?
Think of your pouch’s zipper as its heartbeat—sure, you can replace it with a different type, symbolizing renewal. For zipper replacement, choose a style that matches your pouch’s personality and consider fabric alternatives for a unique touch. Just guarantee the new zipper fits securely and complements the fabric, making your creation truly yours. So, yes, go ahead and experiment with different zippers; your pouch’s story is yours to tell.
Conclusion
Now that you’ve sewn your box zipper pouch, it’s ready to hold your favorite makeup treasures. Think of it as a tiny treasure chest, keeping your essentials safe and stylish. With a little patience and your newfound skills, you’ve created something both beautiful and functional. So go ahead, fill it up and carry your personal gems wherever you go—your handmade pouch is now a shining star in your everyday routine!