
To sew a knit headband in just 15 minutes without a serger, start by choosing a stretchy, comfortable fabric like jersey or spandex. Measure your head accurately, add a seam allowance, then cut your fabric accordingly. Sew the long edges together with a stretch stitch, using a ballpoint needle to prevent snags. Finish the raw edges to prevent fraying and add your personal touch with colors or embellishments. Keep going to discover simple tips for a professional finish and unique styles.
Key Takeaways
- Select a stretchy, durable knit fabric and measure your head accurately, adding a 1/4 inch seam allowance for a snug fit.
- Cut a rectangular piece approximately 20-22 inches long and 4-5 inches wide, depending on desired headband size.
- Sew the short edges together with a stretch stitch or zigzag, then fold the seam allowance inward and topstitch for a polished finish.
- Add personal touches like decorative stitches, contrasting bands, or small embellishments for customization.
- Finish by hand washing, reshaping, and laying flat to dry, ensuring the headband maintains its stretch and shape.
Gather Your Sewing Supplies for a Quick Knit Headband

Before you begin sewing your knit headband, gather all the necessary supplies to guarantee a smooth process. Start with your fabric—choose a durable knit material that will hold its shape and last through frequent wear. Select sewing tools like sharp scissors, a ruler or measuring tape, and pins to keep your fabric in place. A sewing machine or even a simple hand sewing needle works well; just ensure you have the right needle type for knit fabric to prevent skipped stitches. Having quality sewing tools will make your project easier and help achieve a professional finish. Don’t forget to prepare your work surface, keep everything within reach, and double-check that your supplies are complete before you start sewing. This prep sets you up for success. Additionally, choosing the right sewing techniques can make your project more efficient and polished, especially when working with stretchy knit fabrics that require stretch stitches for durability. For best results, familiarize yourself with fabric care to maintain your headband’s appearance over time.
Choose the Best Stretch Fabric for Comfort and Style

Choosing the right stretch fabric is key to making a comfortable and stylish headband. Consider options like spandex, jersey, or lycra for their flexibility and durability. Also, look for breathable fabrics that keep you comfortable all day long. Incorporating curiosity about different fabric properties can help you discover new materials that enhance your sewing projects and expand your creative skills. Understanding fabric elasticity can guide you in selecting fabrics that maintain their shape and stretch evenly, ensuring a perfect fit every time. Additionally, knowing how stretch fabric recovery works can help you choose materials that return to their original shape after stretching. Being aware of fabric care instructions can also extend the life of your headbands and keep them looking new. Exploring the benefits of natural fibers may lead you to even more comfortable and sustainable options for your sew-in projects.
Stretch Fabric Options for Headbands
When selecting fabric for your headband, the key is finding a material that offers both stretch and comfort. Look for fabrics like jersey knit, spandex blends, or stretch velvet—they move easily with your head and feel soft against your skin. Fabric patterns can add personality, from simple solids to bold prints, so choose what matches your style. Before sewing, gather your sewing tools, including sharp scissors and stretch needles, to ensure clean, even stitches. Avoid fabrics that are too thick or stiff, as they can be uncomfortable or hard to sew. Opt for lightweight, stretchy textiles that maintain their shape and resilience after washing. Using a high-quality air purifier in your sewing space can help reduce dust and allergens, resulting in a cleaner environment while you craft. Selecting the right stretch fabric also helps your headband retain its shape and durability over time. Understanding the importance of fabric elasticity can guide you to choose materials that stretch and recover well, ensuring your headband stays comfortable and supportive. Additionally, choosing fabrics with appropriate fiber content can influence the headband’s breathability and moisture-wicking properties, making it more comfortable for extended wear. Considering the essential oils for skin health can also be beneficial if you want to incorporate natural scents or therapeutic benefits into your headband material. With the right fabric choice, your headband will be both comfortable and stylish, perfect for everyday wear.
Breathability and Comfort Factors
Selecting the right fabric for your headband isn’t just about stretch and style; breathability and comfort play a big role in how it feels during wear. Breathability benefits help keep your forehead cool and dry, especially during workouts or warm days. Fabrics like lightweight knits or moisture-wicking blends allow air to circulate, reducing sweat buildup. Comfort considerations include choosing fabrics that are soft against your skin and have enough stretch to move with you without feeling tight. Avoid heavy or non-breathable materials that trap heat and moisture, causing discomfort. The best stretch fabric balances durability, flexibility, and breathability, ensuring you stay comfortable while looking stylish. Prioritizing these factors makes your headband a practical and enjoyable accessory. Additionally, selecting stretch fabrics with proper breathability can significantly enhance overall comfort during extended wear. Incorporating fabrics with superior moisture management properties can further improve comfort during active use.
Measure Your Head and Cut Fabric for a Perfect Fit
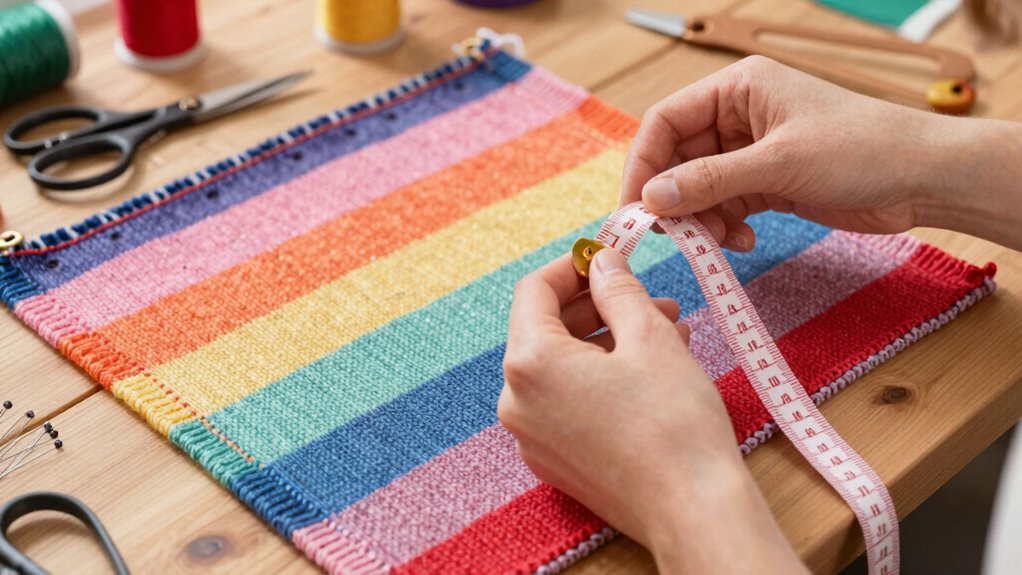
Have you measured your head recently? Getting an accurate head measurement is key to fabric cutting that results in a perfect fit. To make certain your headband feels comfortable and snug, follow these tips:
Measuring your head accurately ensures a comfortable, snug-fitting headband.
- Use a flexible measuring tape and wrap it around your head just above your ears and eyebrows.
- Record your head measurement in inches or centimeters for precise fabric cutting.
- Add a small seam allowance, about 1/4 inch, to your measurement for seam sewing.
- For the best results, understand time zones to schedule your sewing project at a convenient time.
- Remember that support breakfast options are available nearby if you want to take a break and enjoy a quick meal during your sewing session.
- Ensuring proper piercing aftercare can help prevent infections and ensure quick healing if you’ve recently gotten a piercing.
- Incorporating healthy eating habits into your routine can boost your overall well-being, even during busy sewing days.
- Keep in mind that fabric selection plays a crucial role in the comfort and appearance of your finished headband.
Sew the Seam of Your Knit Headband : No Serger Needed

When sewing your headband seam, use a stretch stitch to keep it flexible and durable. Be sure to finish the edges neatly to prevent fraying and give it a professional look. This simple step guarantees your headband stays comfortable and lasts through repeated wear. Additionally, proper edge finishing helps maintain the integrity of the fabric and ensures a polished appearance. Understanding fabric care can also help you select the best techniques for finishing your project. Incorporating sustainable sewing practices can further enhance the longevity and eco-friendliness of your handmade headband. Being mindful of sewing techniques can improve your overall results and help you create a more professional finish.
Use Stretch Stitching
Wondering how to guarantee your knit headband stays flexible and durable? Use stretch stitching to give your seams the elasticity they need. This sewing technique is perfect for knit fabric textures, ensuring your headband moves comfortably with your head. To get the best results, keep these tips in mind:
- Select a stretch stitch on your sewing machine to allow for fabric flexibility.
- Use appropriate sewing tools, like ballpoint needles, to prevent snags.
- Sew slowly and steadily to maintain even stitches and avoid puckering.
- Remember that proper stitch selection is key to maintaining the stretchability of your seams. Additionally, choosing the right sewing techniques ensures your project remains durable and functional.
Finish Edges Neatly
Looking to give your knit headband a polished finish without a serger? Edge finishing is key to achieving a professional look. After sewing your seam, carefully press it flat with an iron to set the stitches. To guarantee seam neatness, you can use a zigzag stitch or a stretch stitch along the raw edges. This helps prevent fraying and keeps the edges tidy over time. Alternatively, fold the raw edges under and stitch close to the fold for a clean, finished look. Take your time to trim any loose threads and press the seams flat. With these simple edge finishing techniques, your headband will have a sleek, smooth appearance that lasts, all without needing a serger.
Finish Your Headband Seam for a Neat, Professional Look
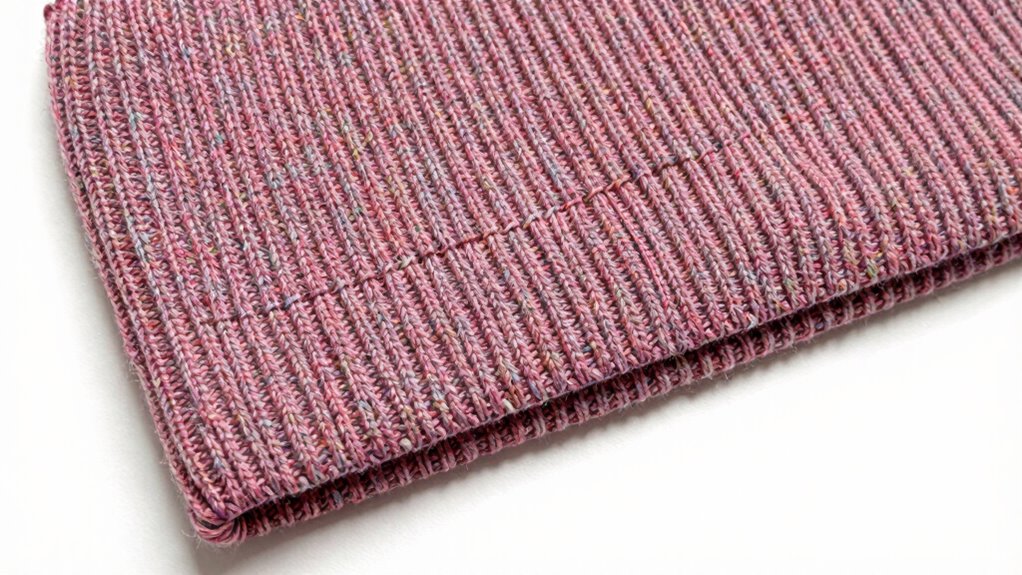
To achieve a polished finish, carefully sew the seam of your headband using a straight stitch or a zigzag stitch, depending on your fabric type. Proper seam finishing guarantees your headband looks neat and professional. For a clean, durable seam, consider these tips:
Sew with a straight or zigzag stitch, press seams, and topstitch for a flawless, professional finish.
- Use a zigzag stitch to prevent fraying and add flexibility.
- Press the seam allowances flat for a smooth finish.
- Topstitch close to the seam for extra durability and a polished appearance.
Personalize Your Headband With Colors, Patterns, and Embellishments
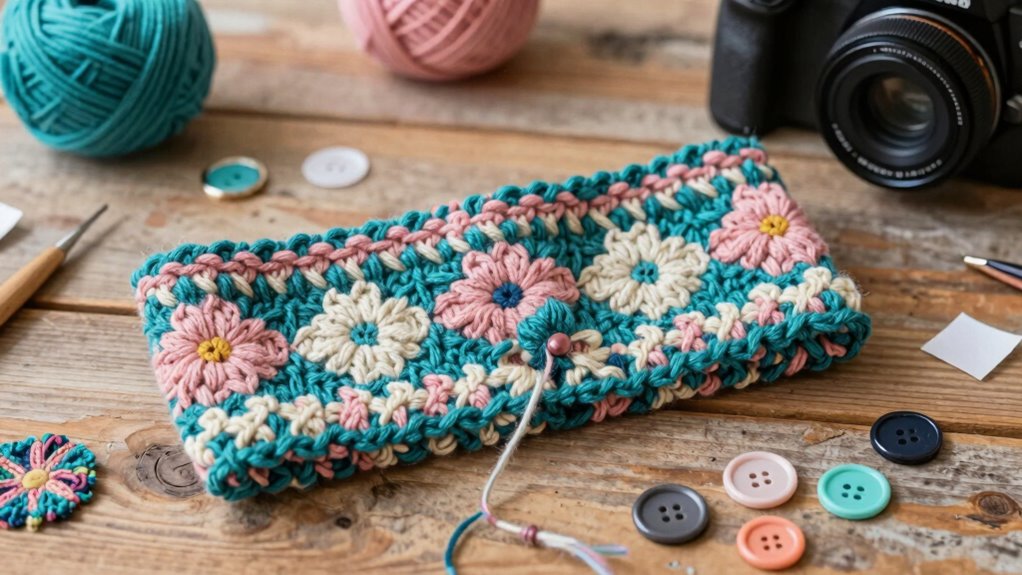
Adding colors, patterns, and embellishments allows you to create a headband that truly reflects your style. Start with your fabric selection—choose vibrant knits or patterned fabrics to make your headband stand out. You can opt for bold solids, playful prints, or subtle textures, depending on your look. Embellishment ideas include adding buttons, embroidery, or fabric flowers to give your headband a unique touch. Consider contrasting stitches or decorative trims for extra flair. Personalizing with colors and patterns not only makes your headband more fun but also guarantees it complements your wardrobe. Mix and match different fabrics or add small decorative elements to make it one-of-a-kind. The possibilities are endless, so have fun experimenting to craft a headband that’s uniquely you.
Troubleshoot Common Knit Sewing Challenges

Sewing with knit fabrics can present unique challenges, but understanding common issues helps you troubleshoot effectively. Knits are stretchy and delicate, so fabric care is key. If your stitches skip or pucker, try these sewing tips:
Knits are delicate; use proper needles, adjust tension, and handle fabric gently for best results.
- Use a stretch or ballpoint needle to prevent snags.
- Adjust your stitch length to slightly longer for better flexibility.
- Test your tension settings on scrap fabric before sewing the main piece.
Other problems, like fabric curling or uneven seams, often stem from improper handling or tension issues. Keep the fabric flat and avoid stretching it as you sew. Proper fabric care and adjusting your sewing technique can make all the difference, ensuring your knit projects come out smooth and professional.
Quick Variations to Customize Your Headband Style
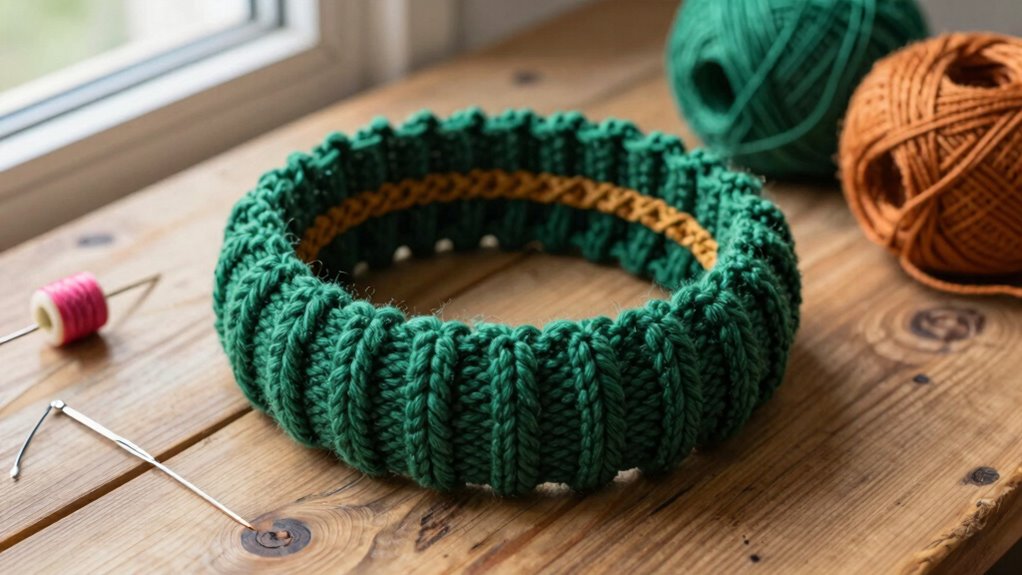
Once you’ve mastered sewing a basic knit headband, you can easily personalize it with quick variations to suit your style. Start by experimenting with different fabric selection—try soft jersey, textured knit, or even contrasting colors for a bold look. You can also add embellishment options like bows, buttons, or decorative stitches to make your headband unique. For a simple variation, fold the fabric differently or sew a contrasting band along the edge. Using patterned or textured fabrics creates visual interest without extra effort. These quick tweaks allow you to craft headbands that match your outfits or mood, all while keeping the sewing process straightforward and fun. Personalizing your headband is a great way to showcase your style with minimal time and effort.
Care for Your Handmade Knit Headband to Keep It Looking Great
To keep your handmade knit headband looking its best, proper care is essential. Follow these fabric care and storage tips to maintain its shape and softness:
- Wash gently: Hand wash in cold water with mild detergent to prevent stretching or damage.
- Dry flat: Reshape and lay flat to dry, avoiding hanging or tumble drying, which can distort the fabric.
- Store properly: Keep your headband in a drawer or on a hook, avoiding overcrowding that could cause wrinkles or misshaping.
Frequently Asked Questions
Can I Use Non-Knit Fabrics for This Headband Project?
You can use non-knit fabrics for this headband project, but fabric compatibility is key. Choose stretchy, soft materials like jersey or spandex blends for comfort and flexibility. Alternative materials such as cotton jersey or lycra work well, but avoid stiff fabrics like woven cotton or linen, which may be less comfortable and less elastic. Keep in mind that using suitable fabrics guarantees the headband stays snug and comfortable during wear.
What’s the Best Way to Prevent Stretching During Sewing?
To prevent stretching, you’d think fabric stabilization was optional, right? Nope. Use interfacing or stay-stitch along the edges to keep the fabric from elongating out. Reinforce your seams with backstitching or zigzag stitches for extra hold. These little tricks ensure your headband keeps its shape while you sew, making it look professional and preventing that dreaded stretch-out—because nobody wants a floppy headband, even in a hurry.
How Do I Add a Decorative Element Without Sewing Skills?
To add a decorative element without sewing skills, try using embellishment ideas like iron-on patches or fabric paint. You can also use decorative techniques such as hot glue or adhesive rhinestones to attach bows, flowers, or other embellishments. These methods are simple, quick, and don’t require sewing experience. Just make sure the surface is clean and dry, and carefully follow the product instructions for the best results.
Can This Headband Be Made in Different Sizes for Children?
Did you know that adjustable headbands fit a wide range of ages? Yes, you can easily make this headband in different sizes for children by adding a bit of elastic or using a longer length of knit fabric. This creates an adjustable fit, ensuring the headband stays comfortably in place for all ages. Just measure the child’s head and customize the size options accordingly for a perfect, snug fit every time.
How Do I Wash and Care for My Finished Knit Headband?
To wash your knit headband, use gentle fabric softening and cold water to keep it soft and maintain its shape. Avoid bleach, and lay it flat to dry to prevent stretching. For storage tips, fold it neatly or roll it up and store it in a drawer or on a shelf. This helps preserve the fabric’s elasticity and keeps your headband looking fresh and new.
Conclusion
Now that you’ve crafted your knit headband in just 15 minutes, you’re ready to conquer any chilly day with style and ease—no need for a time machine, just your trusty sewing skills. With a little creativity, your headband can become a signature piece, just like a fine Renaissance painting, timeless and unique. Keep experimenting with colors and embellishments, and soon you’ll be making headbands faster than a knight can draw his sword. Happy sewing!