To fix your textiles with DIY fabric repairs, gather essential materials like needles and thread that match your wardrobe colors, scissors, and a seam ripper. A well-equipped mending kit should also include pins, a thimble, and a liquid fray preventer. Select the right needles and threads for the job—consider sashiko threads for durable mending. Preparing your fabrics properly is key, and soon you'll discover techniques for tackling various fabric types effectively.
Key Takeaways
- Assemble a mending kit with needles, thread in wardrobe colors, scissors, and measuring tools for effective repairs.
- Use a variety of needles, including sashiko for denim and darning needles for different fabric types.
- Choose high-quality threads like embroidery or perle cotton for stronger, more durable repairs.
- Inspect and clean fabrics before repairs, ensuring they are dry and flat for optimal results.
- Include patching materials like cotton patches and fusible webbing for larger holes and damage.

COCONIX Fabric & Carpet Repair Kit | Fix Tears, Holes, and Burns on Fabric and Carpet Upholstery, Rugs, and Clothing | Easy Application with Customizable Colors
- Customizable Color Mixing: Create matching colors for fabrics and carpets
- Flexible Finish: Maintains flexibility after repair and drying
- Ideal for Small Repairs: Suitable for tears, holes, and burns on fabric and carpet
As an affiliate, we earn on qualifying purchases.
As an affiliate, we earn on qualifying purchases.
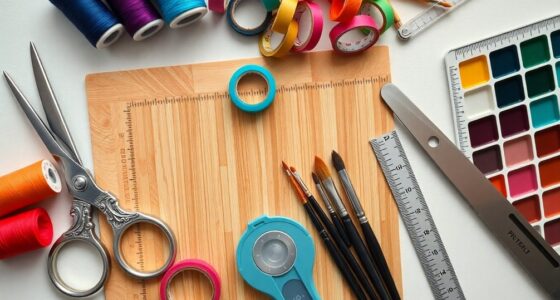
Essential Materials for DIY Fabric Repairs

When tackling DIY fabric repairs, having the right materials at your fingertips makes all the difference.
Start with essential materials for DIY fabric repairs like needles and thread in your wardrobe's main colors. Scissors, pins, and a seam ripper will help you tackle various fabric issues seamlessly. Don't forget a safety pin for quick fixes when you're in a bind.
For larger holes, patching materials such as cotton patches or fusible webbing are vital. Accurate measurement tools like a tape measure and tailor's chalk guarantee precise marking and cutting.
Finally, keep mild detergent handy for cleaning your fabric pre- and post-repair, making sure your repairs last longer and look professional.
With these materials, you're well-equipped to mend any fabric problem.
The Importance of a Well-Equipped Mending Kit

A well-equipped mending kit is your secret weapon for tackling fabric repairs with confidence. Having essential items like scissors, hand needles, and thread in your wardrobe colors makes repairs easier and more efficient.
Remember to include dressmaker pins and a seam ripper to assist with various tasks. A thimble protects your fingers while pushing needles through tougher fabrics, and a needle threader speeds up the threading process, especially for smaller needle eyes.
Adding a liquid fray preventer helps control fraying edges, which prolongs the life of your textiles.
Don't forget to incorporate patching materials and specialized tools like darning needles and fusible webbing to tackle a range of fabric repair challenges effectively. Your mending kit is key to successful fixes!
Must-Have Tools for Effective Repairs

Having the right tools can make all the difference in your fabric repair journey. Investing in must-have tools guarantees you can tackle various repairs with ease and efficiency. Here's a quick overview of essential tools you'll need:
| Tool | Purpose |
|---|---|
| Needles | For sewing and mending tears |
| Threads | To match and secure fabric repairs |
| Scissors | For cutting fabric and threads |
| Measuring Tape | To guarantee accurate measurements |
| Pins | To hold fabric pieces together |
Additionally, consider specialized tools like darning needles and patch kits for specific damages. Don't forget cleaning supplies, like mild detergent, to prep your fabric before repairs. With these must-have tools, your mending process will be smoother and more enjoyable! Remember that proper installation and maintenance of your tools can enhance their longevity and effectiveness in fabric repairs.
Choosing the Right Needles and Threads

Choosing the right needles and threads can greatly impact the success of your fabric repairs.
Using the appropriate tools guarantees durability and enhances the overall look of your mended items.
Here are some key considerations:
- Sashiko needles for denim repairs
- Darning, embroidery, or regular sharp needles for various sewing needs
- Sashiko thread for strong, visible mending
- Perle cotton for a shiny, durable finish
- Higher quality threads like crochet cotton or embroidery thread for better results
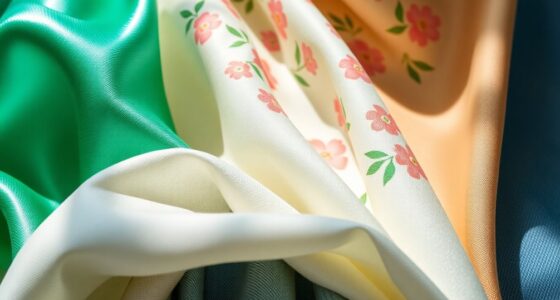
Patching Techniques for Various Fabrics

Patching techniques can greatly enhance the longevity of your garments, especially when tailored to the specific fabric type. For cotton, use patches of a similar weight to guarantee a seamless repair.
Denim, on the other hand, benefits from thicker, durable fabric scraps and Sashiko thread, which adds strength and style. If you're dealing with larger holes, try the "woven patch" technique to create a seamless appearance while reinforcing the area.
For small holes in knitted fabrics, darning is particularly effective; it weaves new thread into the fabric, revitalizing its structure.
Always pre-wash and iron your patches before application to guarantee they adhere properly and maintain a smooth finish after the repair is complete. Additionally, regular inspections can help you identify areas needing repair before they worsen.
Preparing Fabrics for Repair

Before you start any repairs, take a good look at the fabric to assess any damage.
Make certain to clean and prep the fabric properly, as this sets the foundation for a successful fix.
Finally, choose the right patches to match the fabric type and guarantee a seamless repair.
Assessing Fabric Damage
When you're ready to tackle fabric repairs, the first step is to evaluate the damage closely.
Start by inspecting for tears, holes, fraying, and stains, as these indicators will help you determine the necessary repairs.
Here's what to focus on while evaluating fabric damage:
- Identify the fabric type and weight for appropriate repair techniques.
- Measure the size of the damaged area with a ruler or measuring tape.
- Document any unique characteristics, like stretch or weave pattern.
- Note any stains or dirt that might need attention before repairs.
- Consider the overall condition of the fabric to guide your repair choices.
Cleaning and Prepping Fabric
Cleaning and prepping your fabric is essential for ensuring a successful repair. Start by washing your fabric with a mild detergent to remove any dirt, oils, or stains that could interfere with the mending process.
For cotton fabrics, use cool water to prevent shrinkage and keep the fibers intact. Once washed, inspect your fabric thoroughly for any additional damage or weak spots that need attention.
Let the fabric dry completely, avoiding high-heat drying methods, as excessive heat can weaken fibers. Finally, gently iron the fabric to smooth out wrinkles, creating a flat surface for stitching. Additionally, ensuring a clean environment can further promote cleanliness and hygiene, making the repair process more effective. When working on fabric repairs, it’s important to consider the drying times of any additional materials you might use, such as fabric paint. If you’re curious about how long does fabric paint take to dry, it typically ranges from a few hours to a full day, depending on the type and thickness of the application. Allowing ample time for each layer to set ensures a long-lasting finish that withstands the test of time.
Choosing Appropriate Patches
Selecting the right patches is essential for a successful fabric repair, as it directly affects the garment's functionality and appearance.
You should consider several factors when choosing appropriate patches:
- Match the patch material to the original fabric's fiber content.
- Confirm the weight and stretch are similar for a seamless repair.
- Use cotton patches or fusible webbing for durability.
- Pre-wash and iron patch fabrics to prevent shrinkage.
- Utilize washable transfer templates for consistent stitching patterns.
Tips for Successful DIY Mending Projects

To achieve successful DIY mending projects, it's important to start with a well-equipped mending kit. Include essentials like scissors, needles, thread in various colors, pins, and a seam ripper to help push your repair skills forward.
Familiarize yourself with fundamental stitches, such as the straight stitch and whipstitch, to guarantee effective, durable repairs. When selecting patches, use fabric scraps that match the weight and fiber content of your garment for a functional yet aesthetically pleasing result.
Dedicate short, consistent moments each week to mending tasks, integrating them into your routine to build your skills. Additionally, regularly declutter your fabric stash to ensure you have only the materials you truly need, which can enhance your mending experience.
Finally, engage with online resources like video tutorials and sewing forums to gain confidence and learn new techniques that can inspire creativity in your mending projects.
Frequently Asked Questions
What Are the Five Techniques in Repairing Fabric Damages?
When you're looking to repair fabric damages, you've got several effective techniques at your disposal.
Sashiko stitching adds both reinforcement and beauty, while darning helps weave new thread into small holes.
Patching covers larger tears with fabric, and whipstitching secures edges to prevent further unraveling.
If you need a quick fix, iron-on patches adhere easily with heat, making them perfect for high-stress areas.
Each method brings its own unique benefits!
What to Put in a Sewing Repair Kit?
When you're putting together a sewing repair kit, start with scissors and a variety of hand needles, including those for darning and embroidery.
Add high-quality threads in colors you often wear. Don't forget pins, a seam ripper, and a thimble.
You'll also want a needle threader, liquid fray preventer, and a selection of fasteners like buttons and snaps.
Finally, include measurement tools and specialized items like fusible web for versatile repairs.
How to Do Fabric Patching?
Imagine your favorite garden, flourishing but with a few wilted flowers. To rejuvenate it, you need to patch those spots.
For fabric patching, select a patch that mirrors the original's weight and stretch. Cut it larger than the damage, pin it down, and sew it in place.
If you're short on time, use fabric adhesive. After your work's done, wash gently in cool water to keep everything blooming beautifully.
What Are Some Pieces of Sewing Equipment and Products That Can Be Used When Mending?
When mending, you'll need a few essential pieces of sewing equipment.
Start with a good pair of scissors and a variety of hand needles for different fabrics. Quality thread in your wardrobe colors is vital for blending.
Don't forget measuring tools like a tape measure and tailor's chalk for accuracy. A thimble can make pushing needles easier, and having fusible web or a basic patch kit on hand can simplify larger repairs.
Conclusion
With your mending kit in hand, you're ready to weave new life into your beloved textiles. Each stitch becomes a bridge, connecting memories and functionality, transforming frayed edges into stories of resilience. Embrace the art of repair, where every patch tells a tale, and every thread binds you closer to your cherished items. So roll up your sleeves, let creativity flow, and watch as your fabric becomes a canvas of renewal, stitched together with love and care.