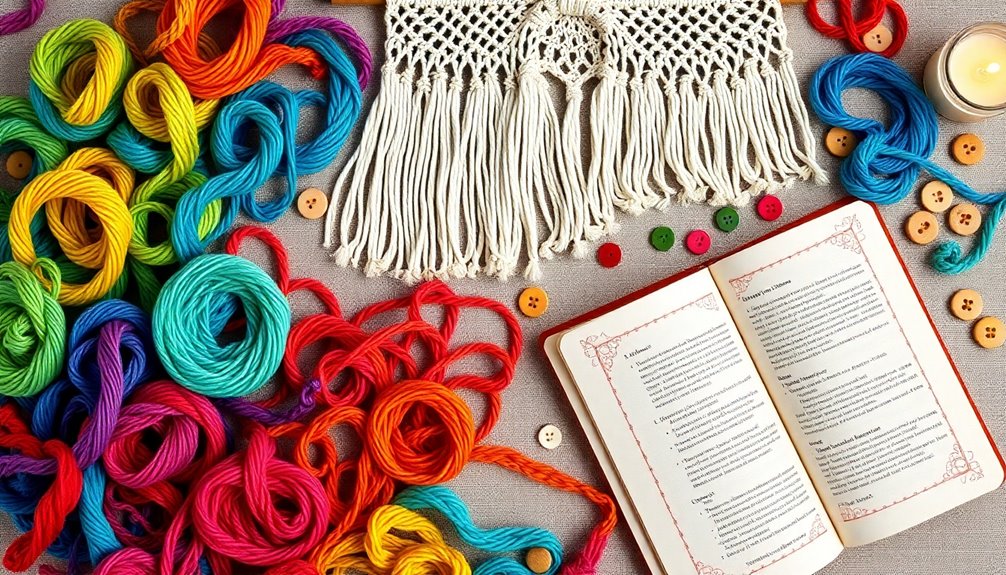
You can transform embroidery floss into colorful wall art, unique jewelry, and vibrant home decor. Try your hand at making friendship bracelets, custom bookmarks, or threaded plant hangers. Embellish old clothes with creative patches or wrap furniture for a pop of color. Engage in community craft events or collaborate on artistic projects that showcase your skills. There's so much more you can create, and many exciting ideas await you!
Key Takeaways
- Create stunning wall art by using embroidery floss to weave intricate designs, combining colors for vibrant gradients and patterns.
- Craft trendy plant hangers utilizing various knot techniques, enhancing them with beads and decorative finishes for added visual interest.
- Personalize old clothing with patches, experimenting with different types and placements for a unique, eclectic style.
- Design customized bookmarks and keychains using embroidery techniques, adding beads or charms for a personal touch.
- Organize community workshops to teach embroidery techniques, fostering creativity and engagement while sharing the joy of crafting with others.
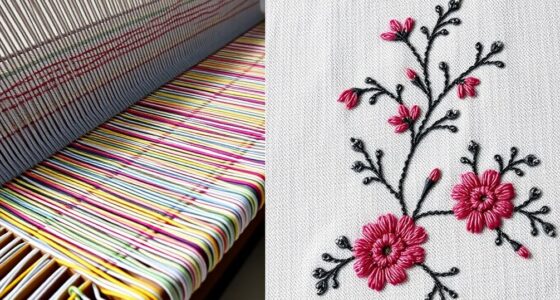
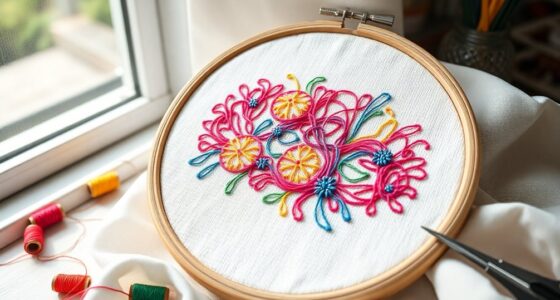
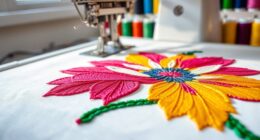
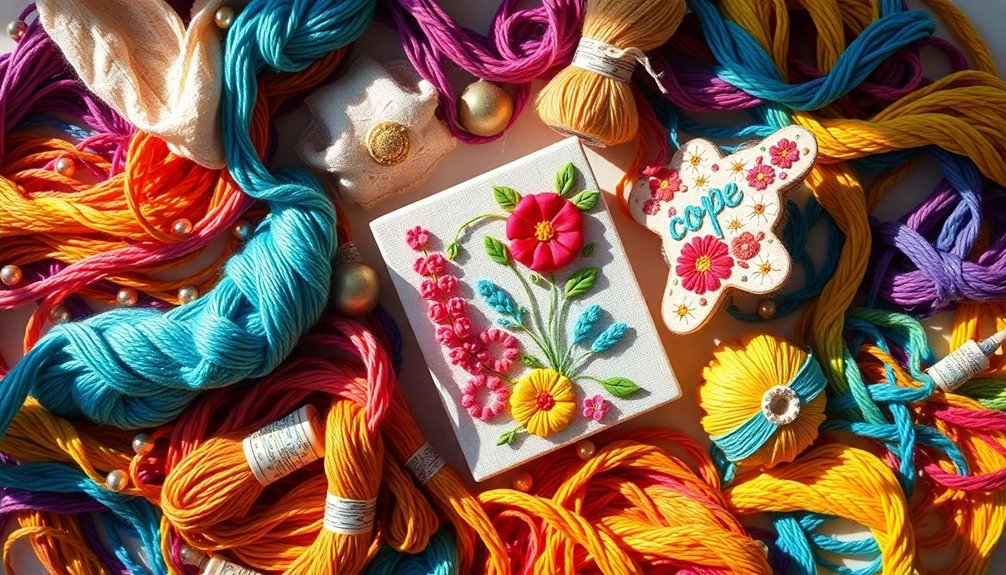
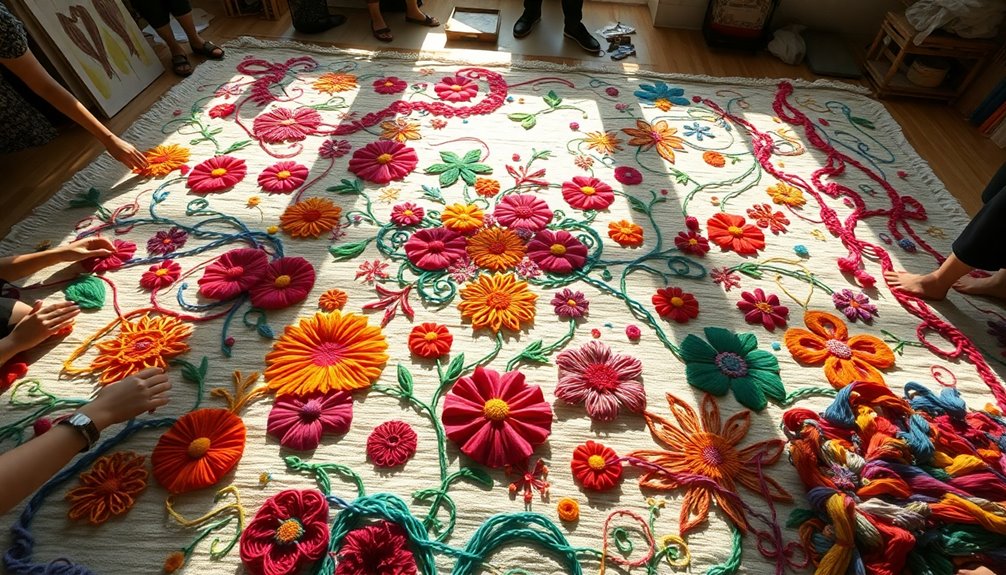
Weaving Colorful Wall Art
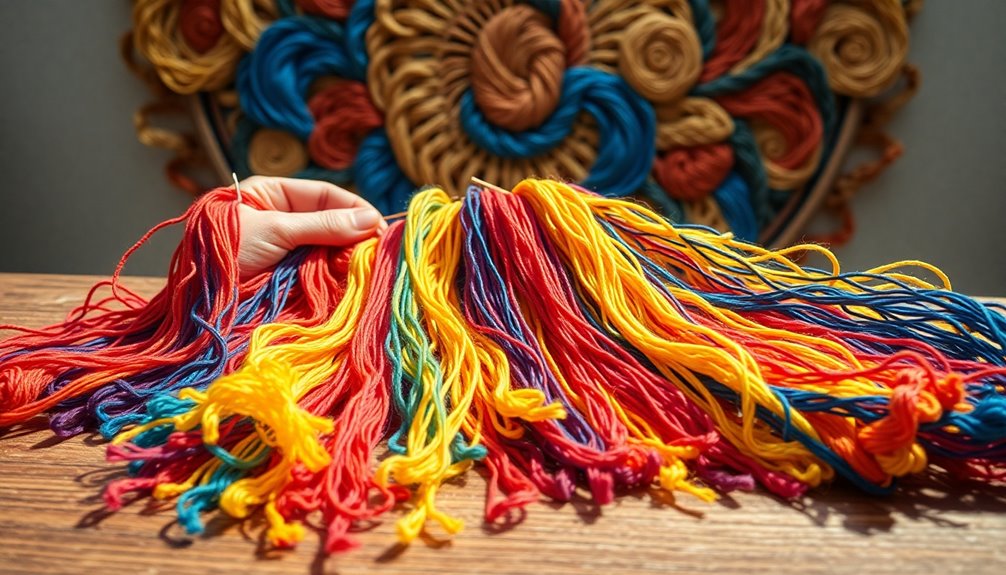
When you immerse yourself in weaving colorful wall art, you'll discover how embroidery floss can transform simple threads into stunning designs.
Using various thicknesses, you can create intricate patterns on a loom or explore freehand techniques. By combining different colors, you'll craft vibrant designs that pop. Experimenting with gradients and contrasting hues enhances the overall aesthetic, making your artwork truly eye-catching.
I'm going to suggest trying macramé or tapestry weaving to make the most of your leftover threads. The lightweight nature of embroidery floss allows for easy hanging without weighing down your display.
For an extra touch, consider adding beads or sequins to elevate your pieces, making them dynamic and visually appealing. Immerse yourself and let your creativity flow!
Embellishing Old Clothing With Patches
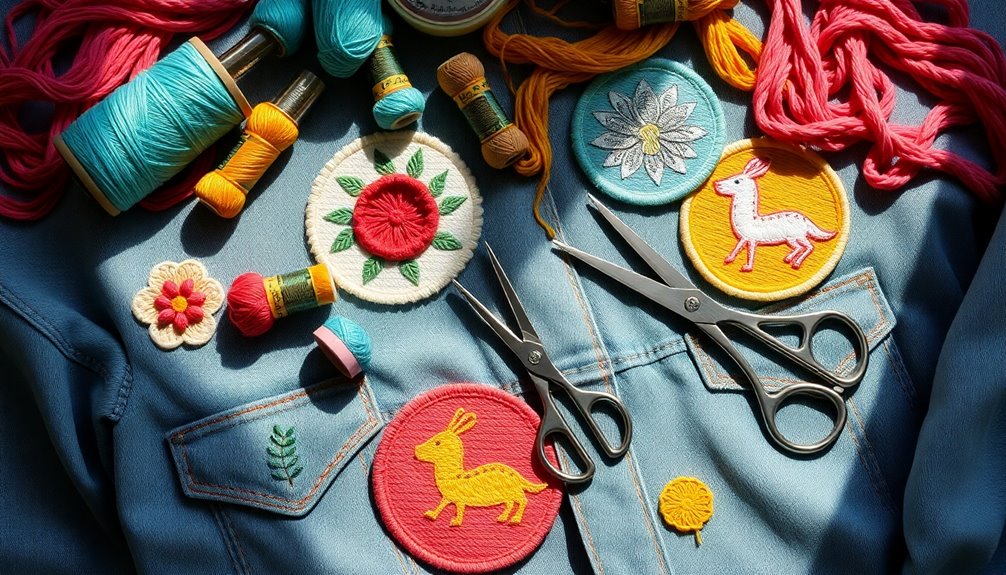
When you think about embellishing old clothing, choosing the right patch designs can make all the difference.
You can explore various stitching techniques to bring your vision to life, adding personal flair to your garments.
Let's get creative and learn how to personalize your wardrobe with vibrant patches!
Choosing Patch Designs
How can you make your old clothing feel fresh and personalized? Choosing the right patch designs is key.
Start by selecting themes that resonate with your interests, like nature, music, or pop culture. This creates a unique aesthetic that tells your story.
Here are some ideas to contemplate:
- Explore embroidered, woven, or iron-on patches for texture.
- Look for thrifted or vintage patches to promote sustainability.
- Experiment with patch placement for a cohesive or eclectic look.
- Mix different sizes and shapes for dynamic visual contrast.
Additionally, consider incorporating vintage accessories to enhance the overall style of your patched clothing.
Stitching Techniques Overview
Mastering a few key stitching techniques can transform your patchwork projects into stunning statements on your clothing.
To securely attach patches, try using backstitch for strong edges, satin stitch for filling larger areas, or blanket stitch for a decorative finish.
When choosing embroidery floss, opt for multiple strands to achieve a bolder look, while single strands work best for finer details.
Don't hesitate to experiment with techniques like chain stitch, French knots, and appliqué to add texture and visual interest.
Mixing thrifted and new threads not only enhances the color palette but also creates a unique aesthetic that reflects your personal style.
Revitalize your old garments sustainably while expressing your creativity through these techniques.
Personalizing Your Clothing
Transforming your old clothing with patches not only allows you to showcase your unique style but also breathes new life into garments that might otherwise go unnoticed.
By using embroidery floss, you can stitch custom patches that reflect your personality. Here are some ideas to get started:
- Create floral designs that brighten up your denim jacket.
- Use animal motifs to express your love for nature.
- Experiment with geometric shapes for a modern touch.
- Combine different stitching techniques, like satin stitch and appliqué, for added texture.
Remember to secure your patches with a mix of machine and hand stitching to guarantee durability and detail. Additionally, consider creating a mood board to visualize your design ideas before you start stitching.
Not only will you personalize your wardrobe, but you'll also promote sustainability by upcycling!
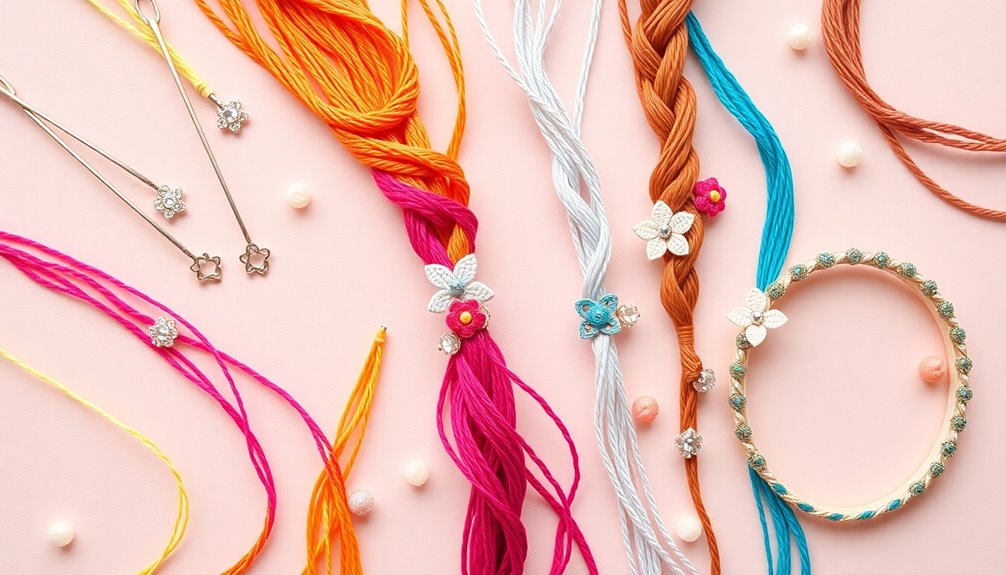
Creating Intricate Friendship Bracelets
While creating intricate friendship bracelets may seem intimidating at first, it's a rewarding craft that allows you to express your creativity.
Start by cutting lengths of embroidery floss to about 24 inches, using at least four strands for a fuller look. Master basic knotting techniques like the forward and backward knots, which enable you to form beautiful patterns.
Explore various stitch styles, such as chevrons or diamonds, and find tutorials online for step-by-step guidance. Personalize your bracelets by adding beads or charms, making them unique gifts for friends.
Don't hesitate to experiment with different floss thicknesses or combine materials like leather or hemp for innovative designs. Your imagination is your only limit!
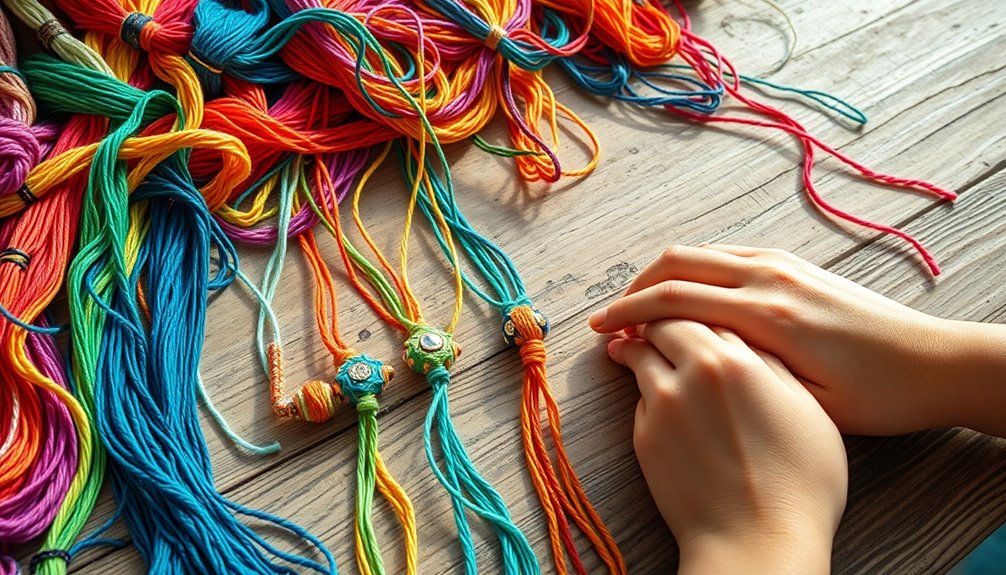
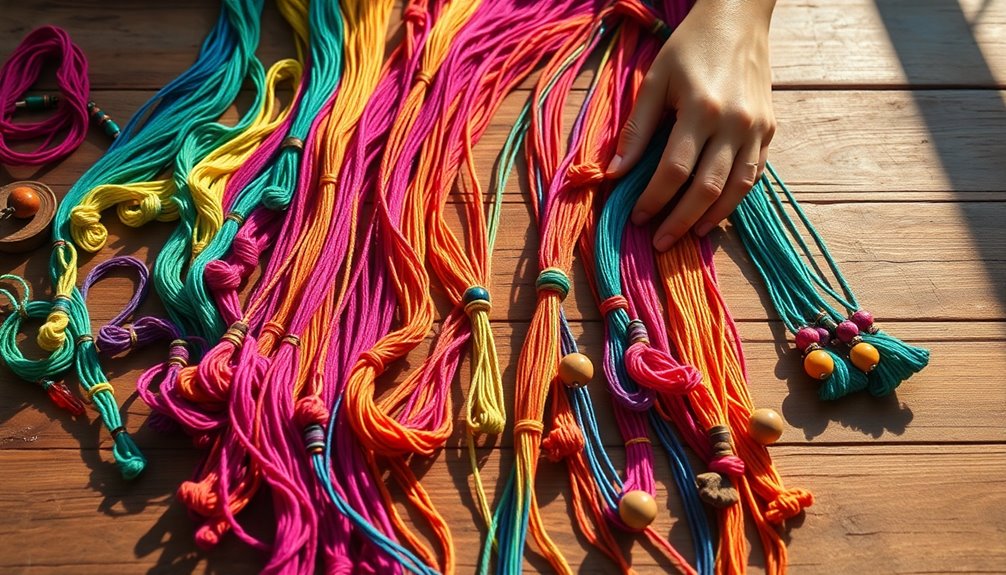
Designing Woven Necklaces
When designing woven necklaces, you'll want to gather your materials first, like embroidery floss, a sturdy base, and any beads or charms you wish to include.
Next, explore different knotting techniques to add texture and shape to your piece.
Finally, let your creativity flow by drawing inspiration from various design patterns to make your necklace truly unique.
Materials Needed Overview
To design woven necklaces using embroidery floss, you'll need a few essential materials. Start by gathering everything you need to guarantee a smooth crafting experience:
- Various colors of embroidery floss
- A sturdy base, like a wooden or cardboard disc
- A loom or simple frame for maintaining tension
- Scissors for cutting the threads
You might also want to incorporate beads or charms for added texture and interest. These can be strung along with the floss as you weave.
Experimenting with different techniques, such as the over-under method or braiding styles, will help you create unique designs.
Finally, secure the ends with strong adhesive or by tying off the threads to keep your necklace intact and looking great.
Knotting Techniques Explained
Knotting techniques play an essential role in designing woven necklaces, as they not only secure the threads but also create intricate patterns that elevate your piece. Mastering techniques like the square knot and lark's head knot helps you achieve a polished look. Experimenting with different knot sizes and colors can bring your designs to life.
| Knot Type | Purpose | Visual Impact |
|---|---|---|
| Square Knot | Strong hold for threads | Clean, uniform finish |
| Lark's Head Knot | Attaching to focal points | Adds dimension |
| Decorative Knot | Textural variation | Unique, artistic flair |
With practice, you'll find the right tension and placement to create stunning woven jewelry that showcases your creativity.
Design Pattern Inspirations
Mastering knotting techniques lays a strong foundation for exploring design pattern inspirations in woven necklaces.
Start by selecting colors that reflect your style. Use simple braiding or knotting to create intricate patterns, like a sturdy square knot base. Incorporate beads or charms for added texture and visual interest.
Experiment with various techniques to enhance creativity.
Here are some design ideas to inspire you:
- Color Themes: Choose complementary hues or seasonal palettes.
- Knot Styles: Use square knots, spiral knots, or more complex weaves.
- Bead Incorporation: Add beads that match your chosen colors.
- Closure Options: Finish with clasps or adjustable knots for durability.
Get creative and let your unique style shine through!
Exploring Mixed Media Projects
While exploring mixed media projects, you'll find that incorporating embroidery floss can add a vibrant touch, enhancing both texture and color. You can combine the floss with materials like paper, fabric, and found objects to create unique collages that showcase intricate stitching patterns.
Try using embroidery floss over watercolor backgrounds for striking contrasts between thread and pigment. For 3D projects, consider weaving or wrapping objects with the floss to produce visually striking sculptures that emphasize fiber art.
Additionally, experiment with layered pieces by stitching elements alongside digital prints or photographs, giving your work a contemporary twist. The possibilities are endless, and you'll discover new dimensions in your art with each creative endeavor.
Crafting Unique Hair Accessories
You can easily elevate your hair game by crafting unique accessories with embroidery floss.
From colorful hair ties to thread-wrapped headbands and embellished hair clips, the possibilities are endless.
Get creative and personalize your look with vibrant colors and fun designs that reflect your style!
Embroidered Hair Clips
Embroidered hair clips offer a delightful way to express your creativity and add a personalized touch to your accessories. You can create stunning designs by stitching intricate patterns onto fabric pieces, then attaching them to plain hair clips.
Here are some ideas to get you started:
- Use various embroidery techniques like satin stitch and back stitch for unique designs.
- Incorporate thrifted or leftover embroidery floss for vibrant colors and textures.
- Experiment with different shapes, motifs, and embellishments like beads or sequins.
- Secure your embroidered fabric with strong adhesive or by sewing it in place for durability.
With these tips, your hair clips will become one-of-a-kind accessories that showcase your individual style!
Thread-Wrapped Headbands
Creating thread-wrapped headbands is a fun way to personalize your hair accessories, transforming a simple band into a vibrant statement piece.
To start, secure embroidery floss to a plain headband with a hot glue gun. Wrap the floss tightly from one end to the other, overlapping slightly to guarantee complete coverage.
Experiment with different color combinations and patterns, like ombre or stripes, by alternating strands of floss as you go. For a unique touch, add beads or charms threaded onto the floss before wrapping.
Once you finish, protect your creation from wear and tear by applying a clear sealant spray. This helps maintain the integrity of your beautiful, handcrafted headband, making it a lasting accessory.
Colorful Hair Ties
Crafting colorful hair ties with embroidery floss is a delightful way to express your style and keep your hair in check. You can easily create unique textures and patterns by braiding or knotting multiple strands together.
Plus, adding beads or charms makes your accessories even more personal and stylish.
Here are some ideas to inspire your creations:
- Use varying colors for vibrant, eye-catching designs.
- Experiment with different braiding techniques for unique looks.
- Incorporate charms that reflect your personality or interests.
- Gift your finished ties as thoughtful, handmade presents.
With minimal tools required, this project is accessible for crafters of all skill levels.
Enjoy making hair ties that are both functional and a fun showcase of your creativity!
Making Decorative Keychains
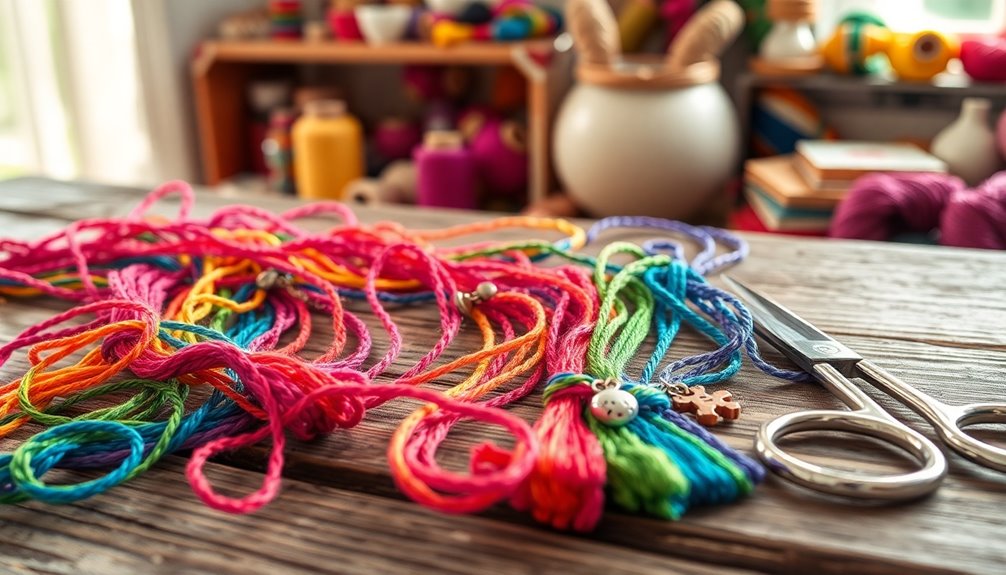
If you're looking to add a personal touch to your keys, making decorative keychains with embroidery floss is a fun and creative way to do it.
Start by selecting a variety of colors and cutting lengths of floss to 12-24 inches, depending on your keychain's size. You can use knots or braiding techniques to combine different strands, creating unique patterns and textures.
Incorporate beads or charms to enhance the visual appeal and personalization of your design. A simple macramé technique works wonders—just knot the floss to form intricate designs, ensuring durability.
Finally, attach your creation to a keyring or lobster clasp, making sure all knots are secure for everyday use. Enjoy your stylish, custom keychain!
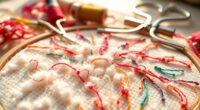
Stitching Personalized Greeting Cards
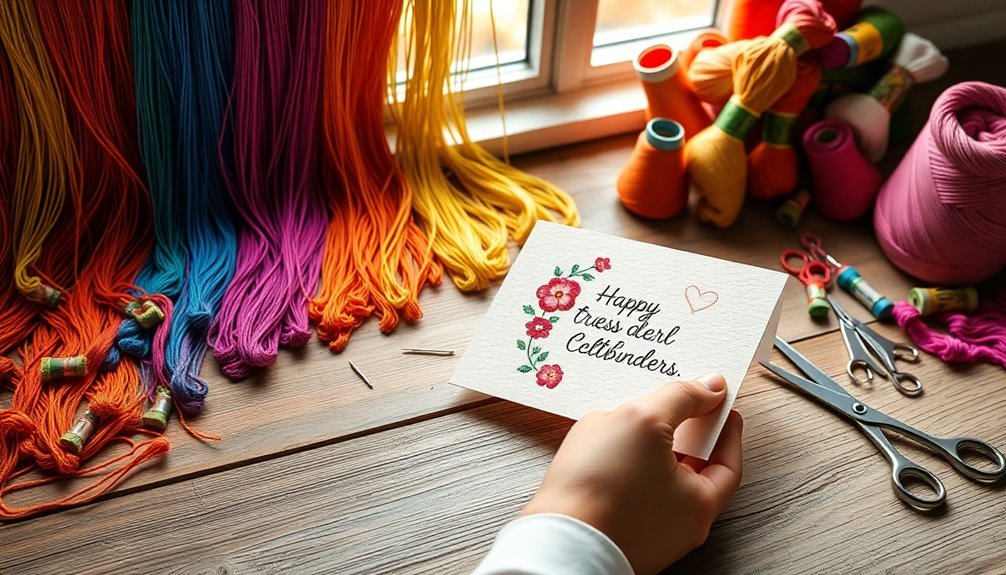
Personalized greeting cards can brighten anyone's day, and stitching them with embroidery floss adds a unique, handmade touch. Start by choosing sturdy card stock and cutting it to about 5×7 inches.
Use a needle and embroidery floss to poke holes for stitching simple designs like flowers or hearts. Experiment with various stitches, such as backstitch or satin stitch, to enhance texture. Consider adding layered elements for depth.
Here are some ideas to get you started:
- Stitch a monogram for a personal touch.
- Attach small fabric pieces behind your stitching.
- Embellish with sequins or beads.
- Write a heartfelt message inside.
These thoughtful cards will surely bring joy to your loved ones!
Building Floss-based Home Decor

Creating a warm and inviting atmosphere in your home can be as simple as incorporating embroidery floss into your decor. You can craft stunning wall hangings by weaving floss through a wooden frame or hoop, utilizing various knots to enhance texture.
For chic accents, make colorful tassels by wrapping floss around cardboard, cutting the ends, and securing them with more floss. Design a unique garland by braiding or knotting strands together, adding beads for a personalized touch.
Try your hand at macrame to create vibrant coasters or placemats. Finally, embroider simple designs onto fabric panels for custom cushion covers or table runners, adding that handmade charm your space deserves. Additionally, consider using large plant options to complement your floss creations, bringing a touch of nature into your home decor.
Let your creativity shine!
Hosting Community Crafting Events
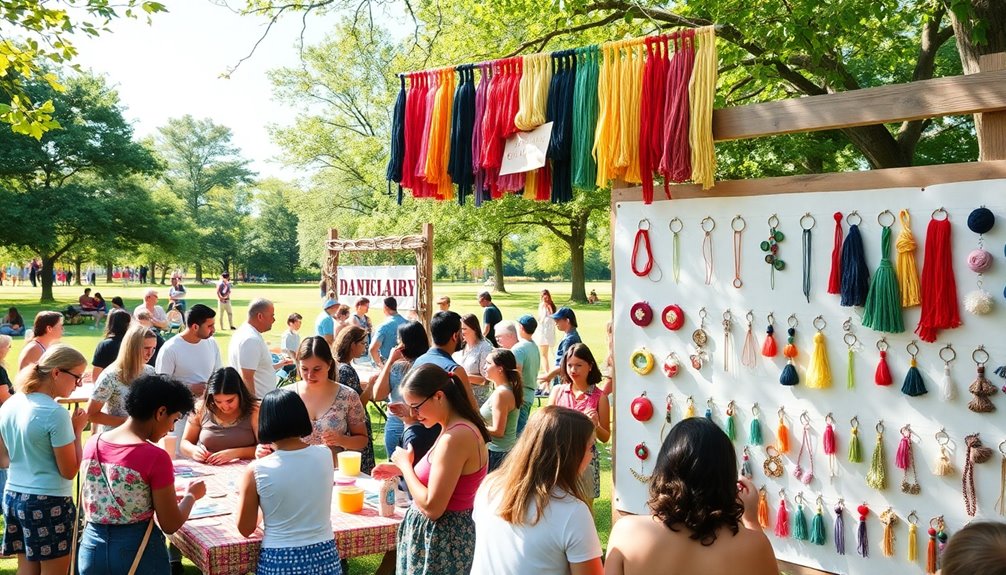
When you host community crafting events, you not only spark creativity but also build connections among participants.
These gatherings allow everyone to share techniques and ideas while exploring different ways to use embroidery floss.
Consider these ideas for your next event:
- Offer workshops on specific crafts, like binding pouches or unique embroidery techniques.
- Organize themed nights, such as "Floss and Friends" or "Stitching Circle," where participants can bring their own projects.
- Utilize social media and local boards to promote your events and attract attendees.
- Collaborate with local craft stores or community centers for supplies and tools, making it easier for participants to engage in exciting projects.
These strategies can create a welcoming atmosphere that encourages creativity and collaboration!
Creating Floss-based Plant Hangers
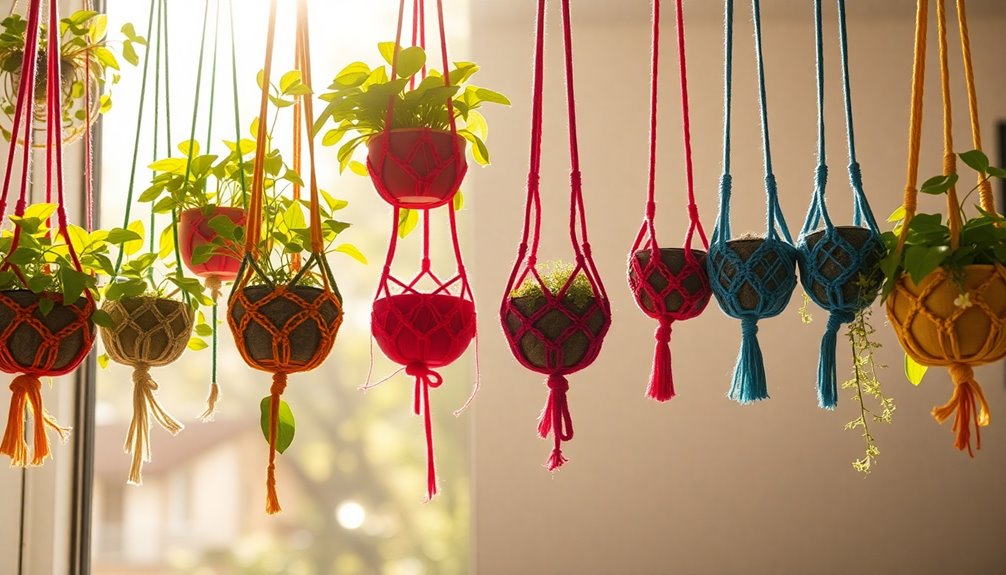
When creating your floss-based plant hanger, you'll want to choose suitable plants that complement your design.
Experiment with different knots and macramé techniques to enhance both the strength and style of your hanger.
Don't forget to customize your color patterns to match your decor and add a personal touch!
Choosing Suitable Plants
Choosing the right plants is essential for crafting effective floss-based plant hangers, as some varieties are better suited for this decorative method than others.
Sturdy plants that thrive in various light conditions work best, guaranteeing your hangers remain secure and visually appealing.
Consider these options:
- Pothos: Ideal for trailing growth and versatile light needs.
- Spider plants: Durable and adapt well to indoor conditions.
- String of pearls: Adds unique texture and visual interest.
- Philodendron: Offers lush foliage for a vibrant display.
When selecting, verify the hanger length accommodates the plant's growth and test the weight capacity gradually.
This way, you'll create a stunning display that lasts!
Knots and Macramé Techniques
Creating beautiful plant hangers with embroidery floss involves mastering a few key knots and macramé techniques.
Start by cutting several lengths of floss, ideally between 3 to 6 feet, depending on how low you want your plant to hang. Tie a large knot at one end of the lengths to anchor the pot securely.
As you progress, use square knots and lark's head knots to form decorative patterns and hold the pot in place. For added visual interest, incorporate beads or different colors of embroidery floss into your knots.
Finally, finish your plant hanger by tying off the ends in a decorative knot or fringe, ensuring all knots are secure to prevent any mishaps with your plant pot.
Customizing Color Patterns
Customizing color patterns for your embroidery floss plant hangers can add a personal touch that enhances your home decor.
Start by selecting a color palette that complements your plants, and consider using macramé techniques for durability and creativity. Here are some ideas to help you customize your hangers:
- Use multiple strands of different colors for gradient effects or stripes.
- Incorporate various knotting styles, like square knots or lark's head knots, for added texture.
- Measure your floss to guarantee you have at least three times the length needed for effective knotting.
- Experiment with intricate designs to create unique plant hangers that stand out in your space.
Get creative and enjoy the process of making something special!
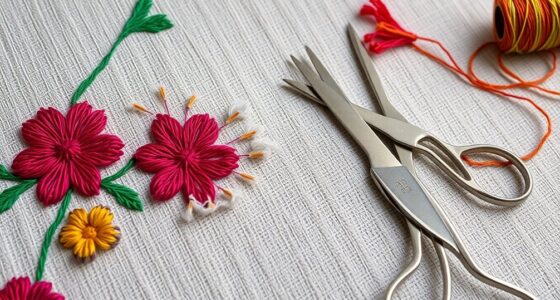
Designing Custom Bookmarks
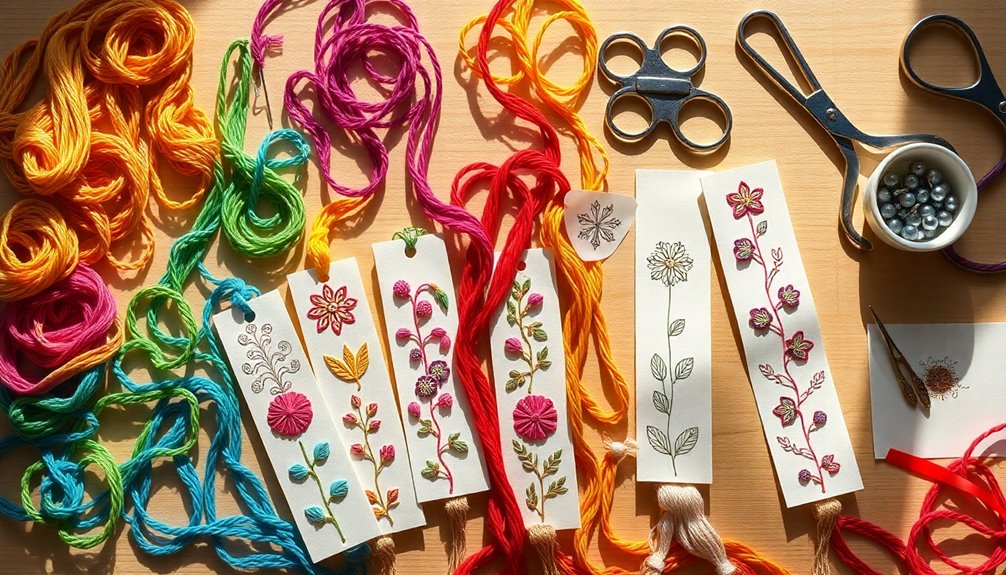
Designing eye-catching bookmarks is a fun and rewarding project that allows you to express your creativity. Start by selecting a sturdy material like cardstock or fabric for durability.
Next, incorporate various embroidery techniques, such as backstitch or satin stitch, to create unique patterns or monograms directly on the bookmark. Use different colors of embroidery floss to add texture and visual interest—consider using multiple strands for a bolder look.
Personalize your bookmarks by adding embellishments like beads, sequins, or charms; just make sure they're securely attached and won't interfere with functionality.
Finally, finish your bookmarks with a ribbon or tassel made from embroidery floss, adding both a decorative touch and a practical way to mark your page.
Transforming Furniture With Thread Techniques

While you might think of embroidery floss as just a crafting material, it can actually transform your furniture into stunning focal points.
With a little creativity, you can elevate ordinary pieces into eye-catching works of art. Here are some ideas to get you started:
- Upholstery Designs: Add colorful stitched patterns to chair backs or cushions for a personalized touch.
- Thread-Wrapped Legs: Wrap furniture legs with embroidery floss to introduce texture and color.
- Decorative Tassels: Create tassels or fringes from floss and attach them to edges of tables or shelves.
- Embellished Drawer Fronts: Stitch intricate designs or monograms on drawer fronts or cabinet doors.
These techniques can breathe new life into your furniture, making them uniquely yours.
Engaging in Floss-Driven Collaborative Art Projects
Embroidery floss offers endless possibilities beyond furniture transformation; it can also bring communities together through collaborative art projects.
You might consider organizing a community stitch-up event where everyone contributes their own creations to a larger art piece.
Another idea is a traveling embroidery floss project, allowing artists to pass along pieces adorned with their unique stitches, showcasing diverse techniques.
Launching a social media challenge with a unique hashtag can encourage individuals to share their floss-driven projects, fostering a sense of community.
Partnering with local schools or community centers to host innovative workshops can spark creativity through weaving and knotting.
Finally, create an online gallery to showcase finished pieces made from donated embroidery floss, celebrating collective creativity and encouraging further engagement.
Frequently Asked Questions
What Can I Do With Extra Embroidery Floss?
You can get creative with your extra embroidery floss in so many ways!
Try making colorful friendship bracelets using various knotting techniques. You could also transform it into decorative tassels or pom-poms for bags or home decor.
If you're feeling adventurous, wrap it around wooden objects for a vibrant look. Mini stitched art pieces on fabric scraps are another fun idea.
Don't forget to organize your floss for future projects, too!
What to Do With Pieces of Embroidery?
When you’ve got pieces of embroidery lying around, don’t just toss them! You can create unique art by incorporating them into mixed media projects or collages. Consider using different fabrics, textures, and colors to enhance your artwork further. You can even explore various techniques and tutorials online to learn how to create embroidery designs that complement your mixed media projects. By combining these elements, you’ll not only breathe new life into your embroidery but also develop a distinctive style that’s all your own.
Try embellishing everyday items like tote bags or keychains for a personal touch. You could even wrap them around jars or wooden hoops for decorative accents.
Finally, consider making small gifts or bookmarks from your leftover pieces, showcasing your creativity in functional ways.
What Can I Make From Threads?
You might think threads are just for sewing, but they're hiding some crafty secrets!
You can create vibrant bookmarks by braiding colorful threads and adding beads for flair. Friendship bracelets? Easy with knotting techniques!
Why not make personalized keychains or colorful wall hangings? You'll love how wrapping threads around a base can transform it into something special.
Don't forget about those cute pom-poms to spice up your bags or home décor, too!
How Do You Deal With Embroidery Floss?
When you deal with embroidery floss, start by organizing it by color or type in trays or containers. This way, you can easily access your threads for any project.
Don't hesitate to use thrifted or leftover threads to create unique combinations. As you stitch, try out different techniques and embrace any mistakes—they're part of your creative journey.
Keep a notebook to document your projects and techniques for future reference.
Conclusion
So, why let those vibrant strands of embroidery floss sit idle? Imagine the burst of colors dancing through your home, transforming your clothing and accessories into wearable art. From whimsical wall hangings to intricate friendship bracelets, the possibilities are endless. Each project not only showcases your creativity but also brings a touch of warmth and personality to your space. Immerse yourself in these 14 ideas, and watch as your world becomes a tapestry woven with joy and inspiration!