
Replacing old elastic without unpicking your waistband is easy and saves time. First, you measure the elastic and thread a new piece through the existing casing using a safety pin or elastic threader. Overlap and sew the ends, then distribute the elastic evenly before closing the casing. This method keeps your original waistband intact and looks professional. Want to know step-by-step tips for a perfect fit? Keep exploring to get all the details.
Key Takeaways
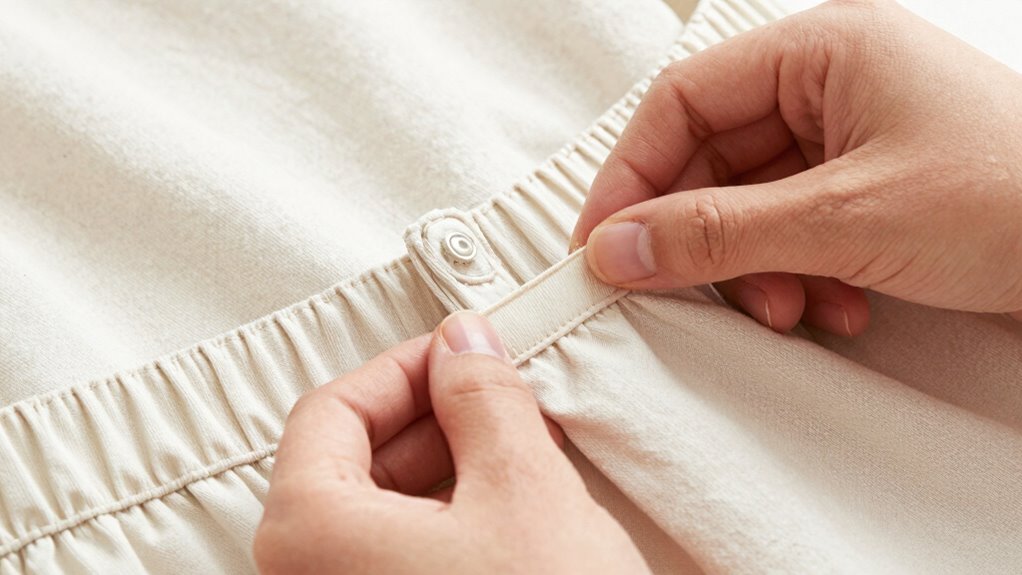
- Open only the waistband casing with a seam ripper, leaving the rest of the stitches intact.
- Thread a new elastic through the casing using a safety pin or elastic threader.
- Overlap and sew the elastic ends securely without unpicking the entire waistband.
- Distribute the elastic evenly to maintain a smooth, snug fit before closing the casing.
- Test the waistband for comfort and adjust tension if necessary, ensuring a professional finish.
How to Tell If Your Elastic Is Worn Out and Needs Replacing
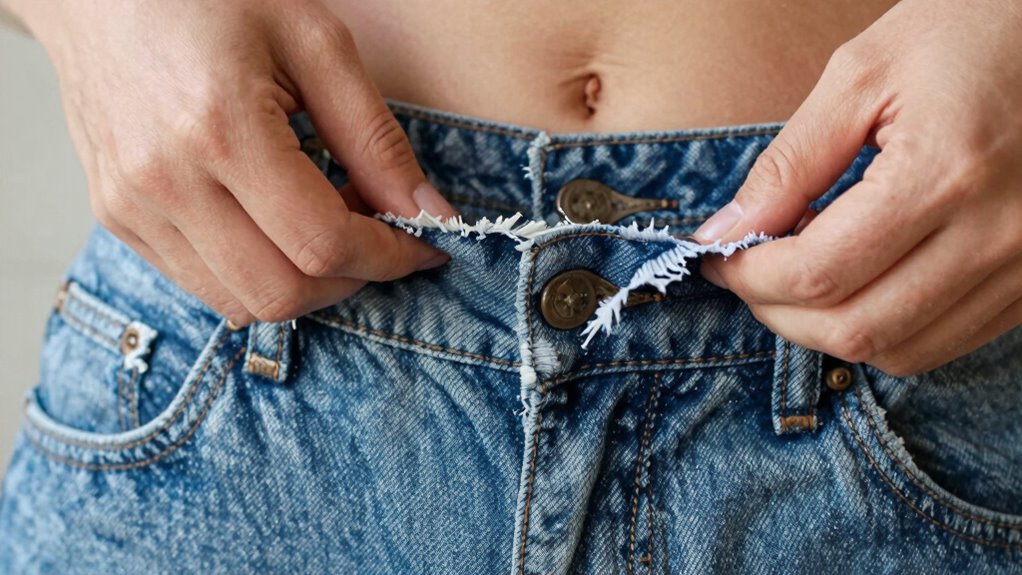
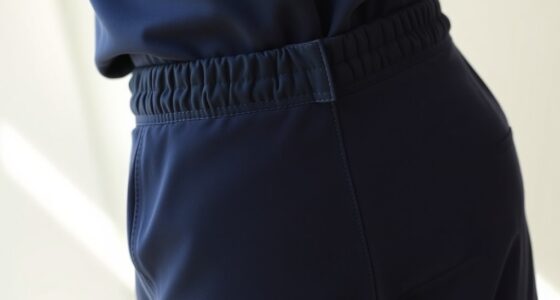
Over time, elastic in waistbands naturally loses its stretch and resilience. If you notice your waistband no longer fits snugly or shifts easily, it’s a sign of diminished elastic durability. Check if the waistband feels loose or saggy, even after washing. If it can be pulled away easily or feels floppy, the elasticity has likely worn out. You might also notice the fabric gathering or bunching, indicating the elastic isn’t holding its shape. Restoring the waistband’s elasticity is essential for comfort and fit. When the elastic no longer provides the necessary support, replacing it becomes a smart solution. Recognizing these signs early helps you avoid uncomfortable clothing and prolongs the life of your garments. Additionally, understanding the concept of Free Floating elastic can help you select the right replacement method for your project, especially when dealing with woven elastic. Knowing how different types of elastic behave can also assist in choosing the best option for long-lasting wear and durability. For example, selecting the appropriate elastic type can significantly impact the longevity and comfort of your waistband. Being aware of the elastic’s composition helps ensure you pick a replacement that matches the original for optimal performance.
Why Replacing Elastic Without Unpicking Is a Game-Changer
Replacing elastic without unpicking can save you a lot of time and effort, especially when you consider elastic durability. Many garments are built with waistband construction that allows for this quick fix, avoiding the hassle of removing stitches and risking damage. This method maintains the integrity of the original waistband design, reducing the chance of altering the fit or look of your clothing. Plus, it’s less invasive and preserves the fabric’s quality, making your repair more durable over time. By not unpicking, you also minimize the risk of accidentally damaging delicate seams or fabric. Additionally, understanding Youngster Choice can provide insight into how different styles and designs are constructed, which can influence the best approach to elastic replacement. Recognizing the importance of projector contrast ratios in image quality demonstrates how subtle details can significantly impact overall performance. Overall, this approach makes replacing old elastic more accessible, efficient, and less stressful, turning a potentially tedious task into a straightforward fix that extends the life of your garment.
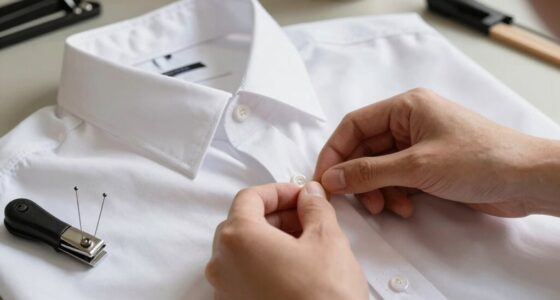
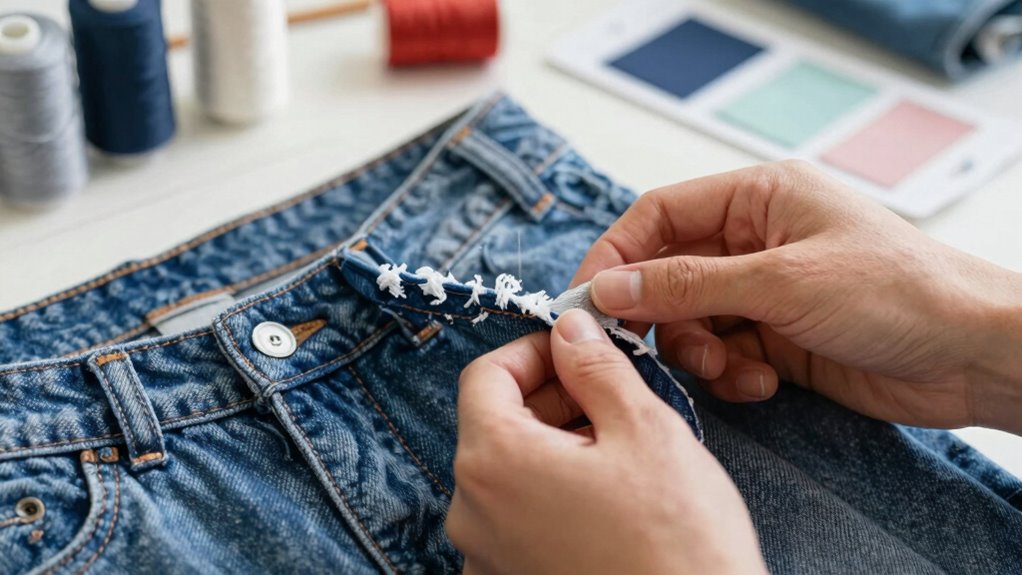
What Tools and Materials You Need for No-Unpick Elastic Replacement

To replace your waistband elastic without unpicking, you’ll need a few key tools and materials. Having the right supplies makes the process smoother and guarantees a professional finish. Let’s go over what you’ll need to get started. Additionally, choosing high-quality, thoughtfully curated essentials can make your repair more durable and satisfying. It’s also helpful to understand sewing techniques to ensure a seamless and long-lasting repair. Being familiar with sustainable fabric handling can further improve the durability and eco-friendliness of your repair. Incorporating minimal invasive methods can help preserve the garment’s original fabric and construction while making the repair less visible. Proper tension control and fabric compatibility are also vital for achieving a secure, durable repair that blends seamlessly with the original garment.
Tools Needed for Elastic Replacement
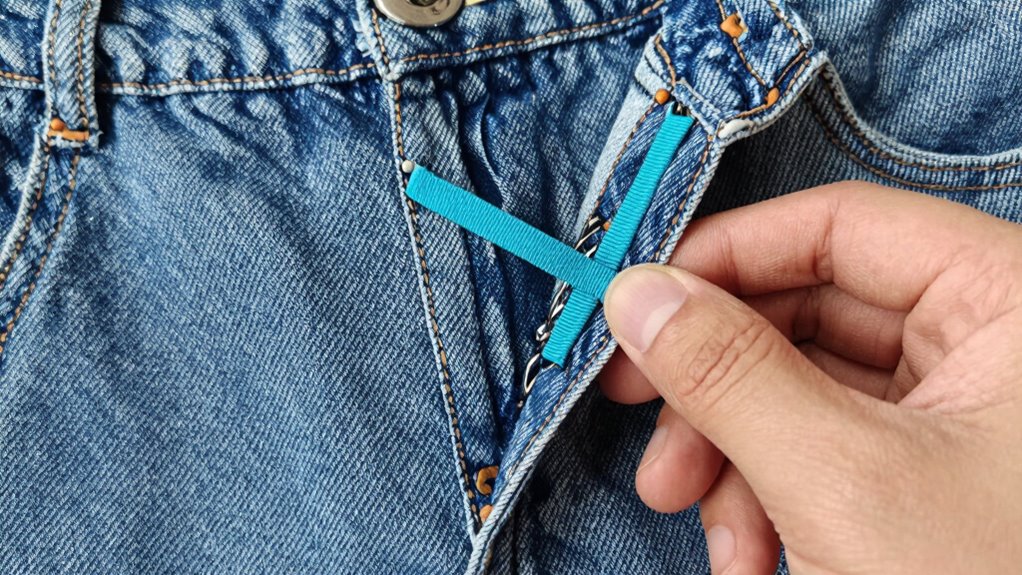
You’ll need a few essential tools and materials to replace your waistband elastic without unpicking the stitches. First, measure your old elastic to determine the correct replacement length, confirming waistband stability. A flexible tape measure works best for this. Next, gather a seam ripper or small scissors to carefully open a small section of the waistband, if needed. You’ll also want a safety pin or elastic threader to help thread the new elastic through the casing smoothly. Additionally, have some straight pins or clips to hold the elastic in place once inserted. Proper elastic selection is important to ensure the durability and comfort of your garment. Lastly, a sewing needle and thread for securing the elastic ends and closing the opening will guarantee everything stays secure. Using an appropriate elastic type that matches your garment can help ensure durability and comfort. With these tools, you can replace your elastic efficiently without disturbing the waistband’s structure.
Materials for Seamless Fix
What materials do you need to guarantee a seamless elastic replacement without unpicking stitches? First, gather elastic threading, which is essential for reattaching the new elastic smoothly. You’ll also need a sewing needle compatible with elastic thread or a sewing machine with stretch stitch capability. To reinforce the waistband, use material like interfacing or extra fabric strips for waistband reinforcement, ensuring durability. Keep a pair of small scissors or seam rippers handy to trim excess elastic or thread if needed. Clear or matching invisible thread can help secure stitches discreetly. Additionally, choosing the right sewing technique can make all the difference in achieving a professional finish. Using a stretch stitch or zigzag setting on your sewing machine helps maintain elasticity and reduces the risk of stitches breaking over time. For added strength, consider using reinforcement materials, which can prevent fraying and prolong the life of your repair. Incorporating stretch-friendly fabrics can also enhance the overall durability of your waistbands. Finally, having pins or clips will help hold the fabric in place during sewing. It’s also helpful to understand the different types of elastic, so you select the most suitable one for your project. With these materials, you can perform a clean, professional-looking fix without unpicking the entire waistband.
How to Replace Elastic Without Unpicking the Waistband : A Step-by-Step Guide

Replacing elastic in a waistband without unpicking it might seem tricky, but with the right approach, it’s entirely doable. To guarantee elastic durability and maintain proper waistband tension, follow these steps:
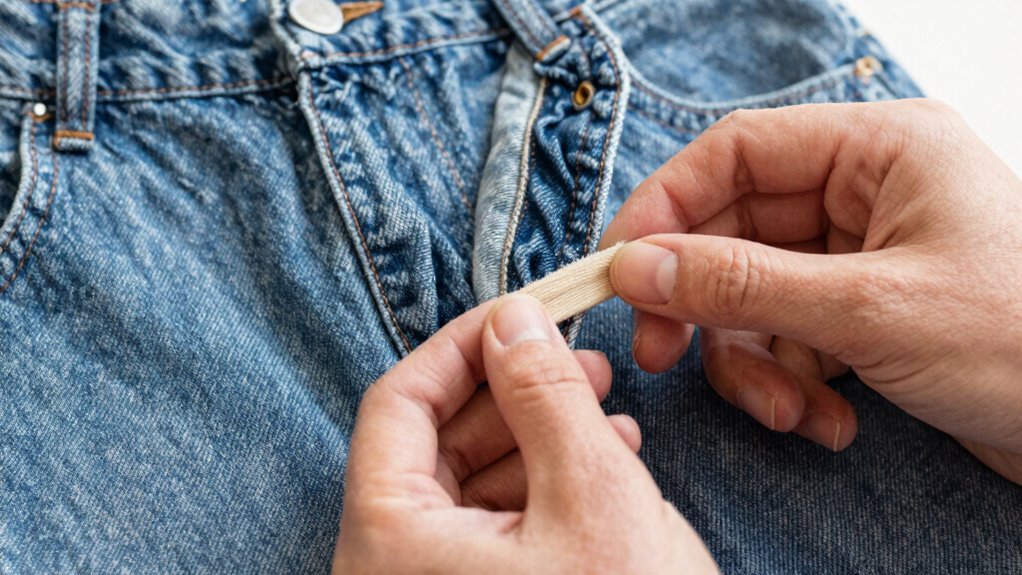
- Measure and cut a new piece of elastic slightly shorter than the waistband’s circumference. Using a high-quality elastic ensures better longevity and stretch retention over time.
- Attach a safety pin to one end of the elastic, then thread it through the waistband casing, keeping it flat. Using a reliable sewing technique can help prevent bunching or twisting as you work.
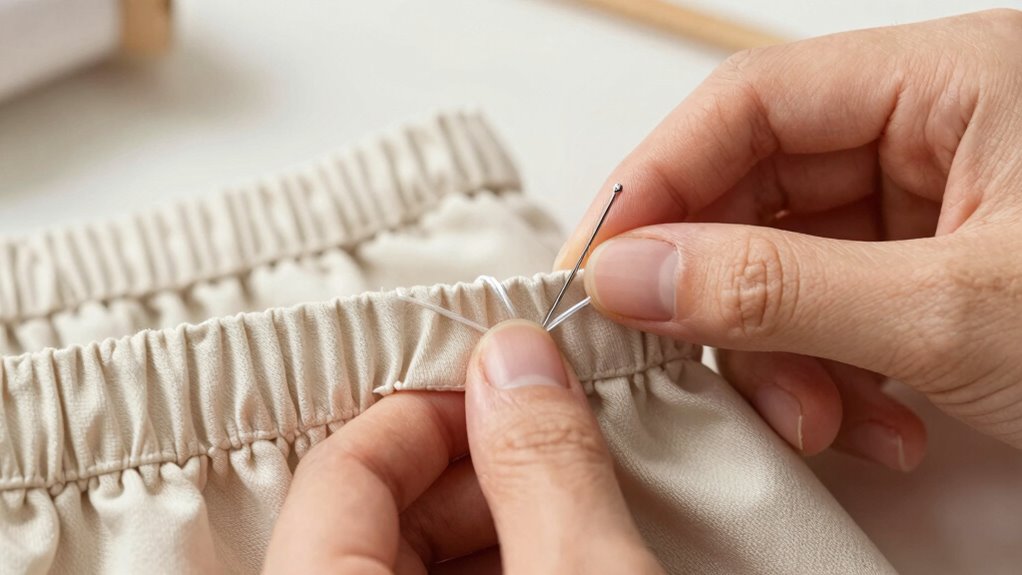
- Overlap the elastic ends by about 1/2 inch and sew them securely.
- Distribute the elastic evenly, then sew the casing closed, making sure the waistband remains smooth and snug.
- To ensure that the elastic maintains its elasticity over time, consider using quality elastic that can withstand repeated stretching and washing. Properly managing digital asset security in your sewing tools, like storing your elastic safely, can help preserve its integrity.
This method preserves the original waistband, saves time, and keeps your garment comfortable and secure.
How to Ensure Your Repaired Waistband Fits Securely and Comfortably
Ensuring your repaired waistband fits securely and comfortably requires careful attention to fit and tension. Start by adjusting the waistband tension so it’s snug but not tight, avoiding discomfort or slipping. Check that the elastic is evenly distributed, preventing bunching or sagging. Consider the fabric’s durability; if the material is delicate, handle it gently to avoid tears or stretching during adjustments. When testing the fit, sit and stretch slightly to confirm comfort and secure hold. Remember, a waistband that’s too tight can cause discomfort, while one that’s too loose may slip. Fine-tuning the tension guarantees a secure fit without sacrificing comfort, making your repaired waistband both durable and wearable for everyday use. Additionally, proper maintenance of the elastic can extend its lifespan and prevent the need for further repairs later on. To achieve optimal results, you may also want to explore home repair techniques that ensure a professional finish. Paying attention to the stretch recovery of the elastic can help maintain its elasticity over time, ensuring lasting comfort and fit.
Common Problems During Elastic Replacement and How to Fix Them
As you replace your waistband elastic, you might notice some common issues crop up. Elastic slipping out or being hard to sew in can be frustrating, and uneven tension can affect both comfort and appearance. Let’s explore how to identify these problems and fix them effectively.
Elastic Slipping Out
One common issue when replacing elastic in waistbands is the elastic slipping out of place. This can cause uneven waistband tension and discomfort. To prevent this, consider these tips:
- Ensure the elastic is the correct length for your waist measurement before inserting.
- Distribute the elastic evenly when sewing, avoiding bunching or twists.
- Use zigzag or stretch stitches to securely hold the elastic without restricting movement.
- Test the waistband tension after sewing to confirm the elastic stays in place and fits comfortably.
If the elastic slips out, it’s often because it wasn’t sewn securely or the tension isn’t right. Correcting these issues keeps the elastic in place, providing a snug fit that doesn’t sag or bunch.
Difficult to Sew In
Sewing elastic into a waistband can be tricky, especially when it refuses to cooperate or keeps bunching up. To tackle this, you need precise sewing techniques that respect your fabric’s durability. Sometimes, elastic resists feeding smoothly, causing uneven stitches or puckering. To avoid this, use a stretch stitch and ensure your machine is set correctly. Keep the elastic slightly stretched as you sew, but don’t overdo it, which can damage the fabric or cause puckering.
| Issue | Solution |
|---|---|
| Bunching or puckering | Use a zigzag or stretch stitch; sew slowly and evenly |
| Elastic slipping out | Secure it with pins or clips before sewing |
| Fabric snagging | Use sharp needles suited for stretchy or delicate fabric |
| Uneven tension | Test tension settings on scrap fabric beforehand |
| Stitch skipping | Replace dull needles and clean machine parts |
Uneven Elastic Tension
Uneven tension in the elastic often causes frustration during replacement, leading to loose or puckered areas that ruin the overall look. To maintain consistent elastic tension and secure waistband comfort, consider these tips:
- Distribute tension evenly by gently stretching the elastic as you sew, avoiding over-stretching in one spot.
- Use even stitching with equal seam allowances, preventing tight or loose sections.
- Adjust tension on your machine for a balanced stitch, helping the elastic feed smoothly.
- Test on scrap fabric first to find the ideal tension setting that keeps elastic tension uniform without puckering.
When to Replace the Entire Waistband or Seek a Professional
Knowing when to replace the entire waistband or seek a professional can guarantee you time and guarantee your garment remains comfortable and durable. If your waistband shows significant wear, persistent stretching, or loss of shape despite repairs, it’s time to contemplate a full replacement. Fashion trends and sewing history teach us that certain styles age better with a complete overhaul, especially if the fabric or construction is compromised. When you’re unsure about your sewing skills or the waistband is complex, consulting a professional saves you frustration and guarantees a polished result. If the garment holds sentimental or high-value importance, seeking expert help is wise. Ultimately, trust your judgment—if repairs seem insufficient or overly complicated, replacing the entire waistband is often the best choice.
Frequently Asked Questions
Can I Replace Elastic in Any Type of Waistband?
Yes, you can replace elastic in most waistband types, but keep in mind elastic durability varies. If your waistband is stretchy or gathered, replacing the elastic can improve waistband comfort and extend the garment’s life. You might need to adjust the new elastic’s length for a snug fit. Always check the fabric and construction first, and choose elastic that offers the right balance of stretch and support for lasting comfort.
How Long Does a No-Unpick Elastic Replacement Last?
Think of your elastic repair as planting a sturdy seed; with proper care, it can flourish for years. Usually, a no-unpick elastic replacement lasts about as long as the original, so you can expect it to hold up through many wears and washes. The repair durability largely depends on the quality of the elastic and how well you maintain it. With careful handling, your waistband can stay comfy and secure for quite some time.
Is This Method Suitable for All Fabric Types?
This method isn’t suitable for all fabric types, especially delicate or stretchy fabrics that require specific elastic stretches. You should consider fabric compatibility and elastic stretch when choosing to replace elastic this way. Thicker or more delicate materials might not hold up well with this technique, so test a small area first. For most sturdy or medium-weight fabrics, though, it works well and keeps your waistband comfortable and secure.
Can I Do This Repair Without Sewing Skills?
Imagine slipping into your favorite jeans, feeling confident you fixed the waistband yourself. You can do this DIY repair without sewing skills, as long as you follow simple steps and use elastic replacement tools. It’s a straightforward process that doesn’t require advanced sewing. With patience and a little guidance, you’ll successfully replace the elastic, saving money and gaining a satisfying sense of accomplishment—no sewing skills needed!
What Are Signs I Need Professional Help Instead?
If your waistband is severely damaged, misshapen, or the elastic is completely broken, it’s time to seek professional help instead of trying DIY alternatives. Struggling with uneven stitches, persistent discomfort, or if the repair isn’t holding can also signal you need expert assistance. Don’t push through if you’re unsure—leave it to a pro to guarantee your garment fits comfortably and looks its best.
Conclusion
Replacing your elastic without unpicking saves time and preserves your garment’s look. Did you know that over 60% of sewists prefer this method for quick fixes? With the right tools and a little patience, you can breathe new life into worn-out waistbands effortlessly. Next time your elastic stretches out, try this method—you might be surprised how easy and satisfying it is! Keep sewing smart and enjoy your refreshed wardrobe.