To take in a too-big sweater safely without creating waves, start by gently measuring and marking the areas you want to resize. Carefully reshape the knit by soaking the sweater in lukewarm water with mild detergent, then lay it flat to dry, gently stretching it to fit your measurements. Reinforce seams and edges smoothly as you go. If you want a polished, wave-free finish, following proper techniques will help you achieve a professional look—exploring the details below will guide you step by step.
Key Takeaways
- Gently measure and mark the areas to be taken in, ensuring accurate, even resizing before cutting or sewing.
- Use controlled, slight stretching during wet blocking to reshape the sweater without creating waves or puckers.
- Reinforce seams and edges with zigzag stitches or overlock finishes to prevent waviness after resizing.
- Handle the knit fabric carefully during soaking and drying, supporting the structure to maintain smoothness.
- Double-check all measurements and seams before finalizing to ensure a snug, wave-free fit.
Why Resizing Knits Safely Is Key to a Perfect Fit

Resizing a knit sweater improperly can easily ruin its shape or damage the fabric. That’s why understanding knit tension is essential; changing it without care can distort the sweater’s structure. You want to maintain consistent tension to avoid puckering or sagging. Additionally, yarn compatibility plays a key role—using incompatible yarns during resizing can lead to uneven results or even fiber damage. If the yarn isn’t suited for resizing, it may not respond well to stretching or shrinking, resulting in a misshapen fit. Taking these factors into account ensures your adjustments look natural and hold their shape over time. Properly managing Free Floating in your knitting process can also help you achieve a more controlled and predictable resize. Ensuring proper knit tension throughout the process is crucial for a smooth and even adjustment. Being aware of sound healing science can also inform gentle techniques to reshape fibers without stressing the material. For example, incorporating fiber elasticity principles can help you gently manipulate fibers while maintaining their integrity. Resizing safely preserves the sweater’s original quality while achieving a perfect fit, so always pay attention to knit tension and yarn compatibility before making any alterations.
How to Check Your Sweater’s Knit Material and Construction
Before you start resizing, it’s important to identify what kind of knit material and construction your sweater has. Knowing the fiber content helps determine how it reacts to alterations, while understanding the knit pattern guides your repair approach. Check these key aspects:
- Fiber content: Wool, cotton, acrylic, or blends—each behaves differently when stretched or sewn.
- Knit pattern: Stockinette, ribbing, or cable—each influences how waves or puckering might form after resizing.
- Stretchiness: Some fibers, like wool, are more elastic; others, like cotton, less so.
- Construction method: Hand-knit or machine-knit—affects how you approach taking in the sweater.
- Yarn weight: Thicker yarns may require different techniques than fine yarns.
- Vetted products like the Flat Iron Bike demonstrate the importance of understanding material properties for optimal performance and durability.
Identifying these elements assures safe, effective resizing without damaging your sweater.
Preparing Your Tools and Workspace for Seamless Alterations
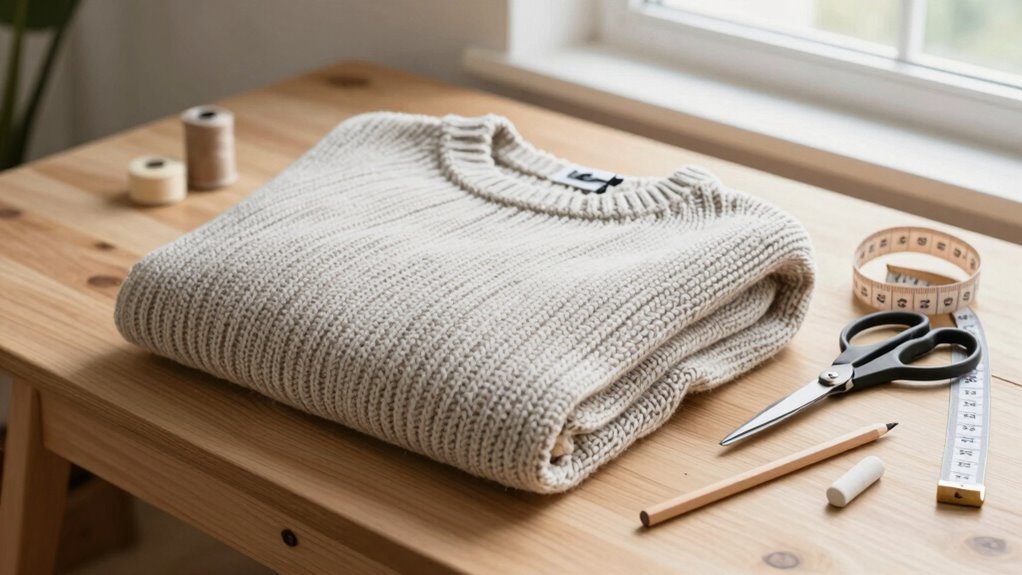
Having your tools and workspace organized sets the stage for smooth and accurate alterations. Make sure you have all necessary tools like sharp scissors, a seam ripper, pins, a measuring tape, and matching yarn for reweaving. Keep your workspace clean and well-lit to maintain consistent knit tension, which is essential for seamless results. Familiarize yourself with different yarn types, as some are more delicate and require gentle handling. Use the table below to confirm your tools and their purpose: Yarn types, as understanding their properties helps prevent damage during alterations. Additionally, knowing fiber content can inform you on the best handling and cleaning practices to avoid shrinking or distortion. Properly handling delicate knits is crucial to prevent stretching or pulling that could ruin the shape of your sweater. Being aware of knit tension and how it affects the final fit can help you achieve a professional-looking result. Taking the time to prepare your workspace ensures you can focus on your project without unnecessary interruptions or mishaps.
Measuring and Marking to Resize Your Sweater Without Waves
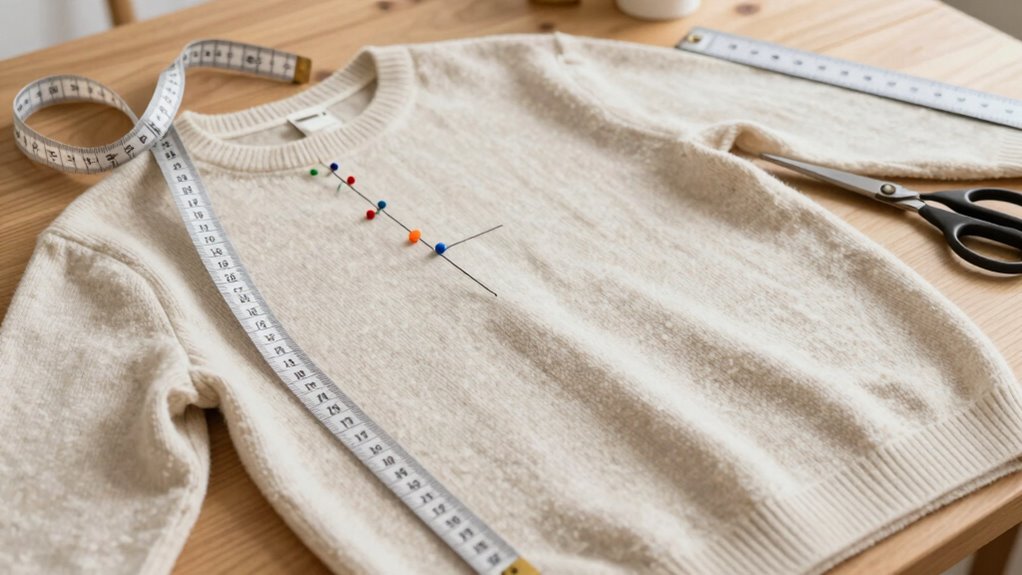
To guarantee your sweater maintains a smooth, even appearance after resizing, accurate measuring and marking are essential. Use precise measurement techniques to determine how much fabric to take in, and employ effective marking strategies to guide your alterations. Start by laying your sweater flat for consistent measurements. Consider these key points:
- Use a flexible measuring tape to record chest, waist, and sleeve dimensions accurately.
- Mark reference points with fabric chalk or a washable marker for clean, precise lines.
- Measure from shoulder to hem to ensure even length adjustments.
- Double-check measurements before making any cuts or stitches.
- Keep markings clear but light to avoid visible marks after finishing.
- Incorporating a creative storytelling approach can help you visualize the desired fit and ensure a harmonious final look.
These measurement techniques and marking strategies will help you resize your sweater smoothly, preventing waves and unevenness.
Step-by-Step: Reshaping Your Sweater Without Distorting the Knit
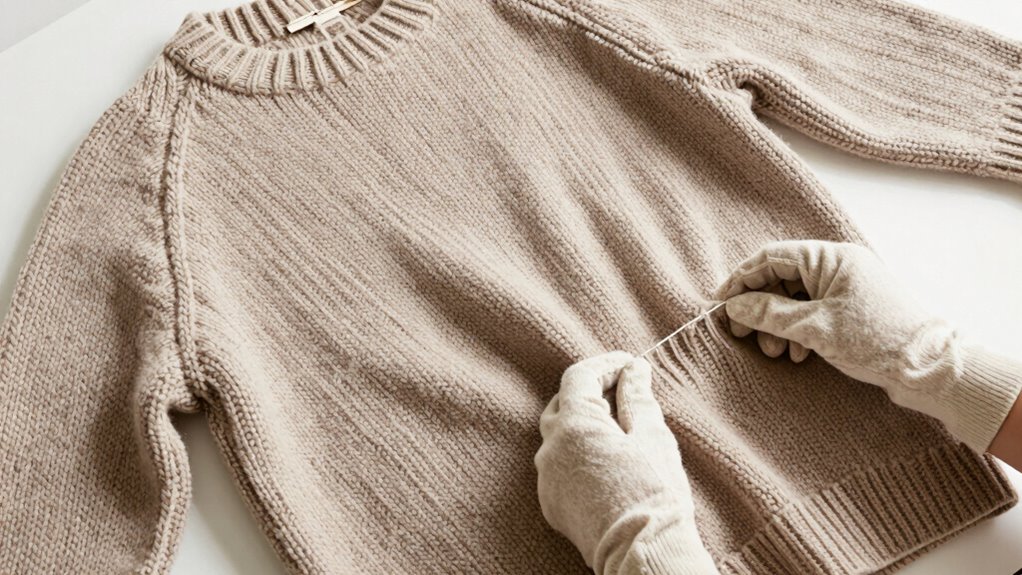
To reshape your sweater without distorting the knit, start with gentle techniques that avoid pulling or stretching too hard. Proper wet blocking helps set the new size evenly while maintaining the fabric’s integrity. Always handle the sweater carefully to prevent any distortion of the knit pattern. Using sound fundamentals in your approach ensures a more reliable and safe reshaping process. Additionally, understanding knitting structure can guide you in applying the correct tension during reshaping to preserve the pattern. Being aware of fabric behavior can help you anticipate how the fibers will respond during the process. Incorporating proper tension control can further minimize the risk of waves or unevenness forming during reshaping, especially when combined with knowledge of fiber elasticity to adjust tension appropriately.
Gentle Reshaping Techniques
Reshaping your sweater gently is essential to avoid stretching or distorting the knit. Different knit fiber types respond uniquely, so understanding their characteristics helps you choose the best approach. When using washing machine settings, opt for gentle cycles with cold water to minimize agitation. To reshape effectively:
- Lay the sweater flat on a clean towel, smoothing out wrinkles gently
- Use your hands to carefully stretch areas that need adjustment, avoiding overstretching
- Focus on reshaping the sleeves and body gradually, maintaining even tension
- Avoid twisting or wringing, which can distort the fibers
- Keep the sweater away from direct sunlight or heat sources during drying
- Being aware of the fiber type can help you select the safest reshaping method for your sweater. Additionally, familiarizing yourself with sound therapy techniques can provide insights into proper care and maintenance of knitwear.
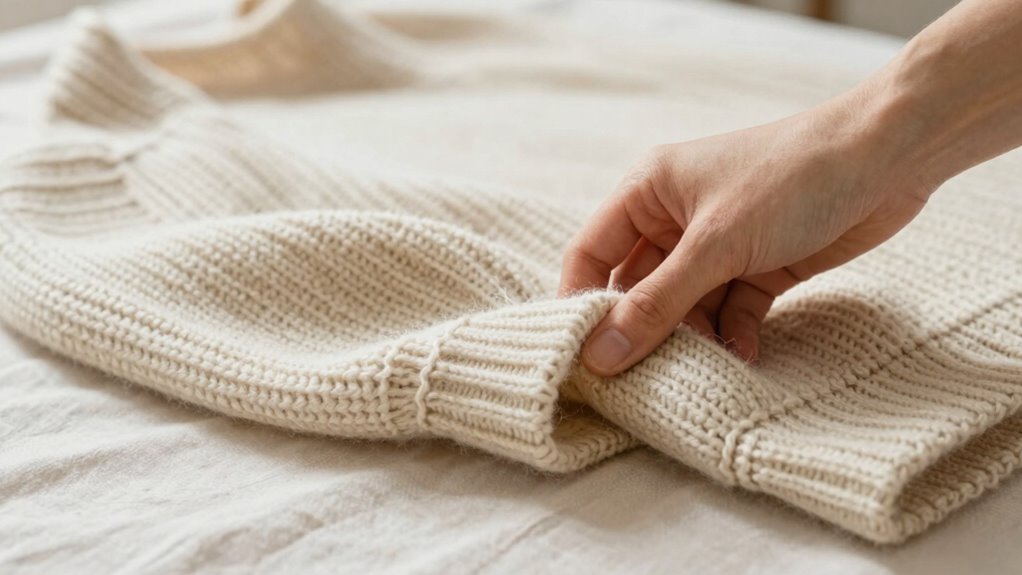
Proper Wet Blocking Methods
When you wet block a sweater, you guarantee the fibers relax evenly and maintain their shape without distortion. Start by filling a basin with lukewarm water and gentle wool wash or mild detergent. Submerge your sweater, carefully spreading out the knit patterns to prevent distortion. Let it soak for about 15-20 minutes, allowing the fibers to relax fully. After soaking, gently squeeze out excess water without wringing, then lay the sweater flat on a clean towel. Gently shape it to your desired measurements, paying attention to any knit patterns or details. Use rust-proof pins or blocking wires to secure the edges. Keep in mind that sweater dyes can fade or bleed if not handled properly, so avoid excessive stretching or heat during drying. Proper air circulation helps the sweater dry evenly and prevents mildew or musty odors. Additionally, ensuring proper humidity levels in your drying area can help prevent the fibers from becoming too stiff or unevenly dried. For better results, consider placing the sweater in a well-ventilated space with controlled moisture to support an even drying process. Maintaining consistent temperature in your drying environment also contributes to a smoother, more uniform finish. Being mindful of the fiber type can influence the overall drying time and outcome, ensuring your sweater retains its softness and shape.
Avoiding Knit Distortion
After soaking and gently squeezing out excess water, it’s important to handle your sweater with care to prevent distortion of the knit. To maintain proper knit tension and avoid stretching or unevenness, support the fabric as you reshape it. Choose the right yarn selection for your project, as softer or loosely spun yarns are more prone to distortion. When reshaping:
- Use blockers or foam boards to hold your sweater’s shape.
- Handle the fabric gently without pulling aggressively.
- Adjust the knit tension evenly across the garment.
- Pin your sweater carefully to avoid overstretching.
- Work slowly and check progress frequently. Incorporating proper care techniques can significantly extend the lifespan of your knitwear.
Avoiding knit distortion is key to preserving the garment’s original fit and appearance.
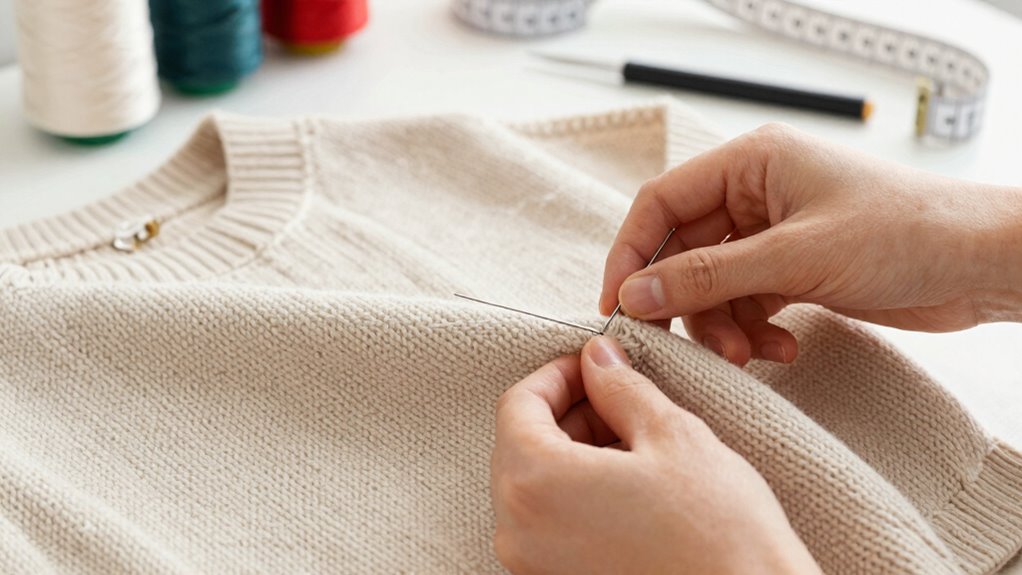
Reinforcing Seams and Edges to Keep Your Reshape Secure

To keep your sweater’s new shape secure, you should reinforce the seams where stress is greatest. Properly strengthening edges prevents fraying and maintains a clean finish over time. Using durable stitching ensures your adjustments stay intact, even after multiple wears and washes.
Strengthen Seams Strategically
Reinforcing your sweater’s seams and edges is essential to guarantee your resize holds up over time. Proper seam reinforcement prevents unraveling and maintains your altered knit’s shape. To do this effectively:
- Adjust your knit tension to ensure seams stay neat and secure
- Use matching thread for seamless seam reinforcement
- Reinforce stress points, like underarms and side seams
- Sew with a zigzag or stretch stitch to accommodate knit movement
- Double-stitch critical seams for extra durability
These steps help keep your reshaped sweater looking professional and prevent seam failure. Focus on consistent knit tension during sewing, and reinforce key areas to distribute stress evenly. Strategic seam reinforcement ensures your sweater remains comfortable and retains its new fit, even after washing and wearing.
Reinforce Edges Properly
Ensuring your sweater’s edges are properly reinforced is key to maintaining its new shape over time. You want the edges to stay smooth and secure, especially after reshaping. Match your thread color carefully to your fabric pattern to blend seamlessly. Reinforcing edges with a narrow zigzag stitch or overlock finish prevents fraying and waviness. For patterned fabrics, pay attention to aligning patterns at seams and edges for a polished look. Use the table below to choose the best edge reinforcement method based on fabric and pattern considerations:
| Fabric Pattern | Reinforcement Method |
|---|---|
| Solid Colors | Overlock or zigzag stitch |
| Stripes, Checks | Match thread color; carefully align pattern edges |
| Textured Knits | Use a narrow zigzag stitch for flexibility |
| Colorful Prints | Blend thread to match dominant hues |
| Fine or Delicate | Hand reinforcement or lightweight finishing techniques |
Use Durable Stitching
Since seams and edges are vulnerable points that can weaken over time, utilizing durable stitching techniques when reshaping your sweater is essential. Strong stitches prevent unraveling and maintain your sweater’s new fit. To reinforce your work, consider these tips:
- Use a tight, sturdy stitch like a backstitch for seams.
- Match your knit yarn to your sweater pattern for seamless reinforcement.
- Double-stitch or zigzag along edges for extra strength.
- Reinforce high-stress areas, such as shoulders and underarms.
- Finish edges with a serger or overcast stitch to prevent fraying.
Common Mistakes That Cause Waves: And How to Avoid Them

Waves often appear in a big sweater when certain mistakes are made during the resizing process, but most of these issues are easily preventable. One common mistake is sewing with uneven tension, which causes the fabric to stretch unevenly and creates ripples or waves. Additionally, seam puckering occurs when stitches are too tight or too loose, leading to an uneven surface. To avoid these problems, always test your tension on scrap fabric before sewing the actual pieces. Use consistent stitch length and ensure your machine’s tension settings are balanced. Pin the fabric carefully and sew slowly to keep seams smooth. Taking these precautions helps maintain even tension and prevents puckering, resulting in a neat, professional-looking finish without waves.
Finishing Seams and Edges for a Professional, Smooth Look
To give your resized sweater a polished finish, focus on effective seam finishing techniques that prevent fraying and create a clean look. Pay attention to neat edges by trimming excess fabric carefully and using appropriate methods like serging or zigzag stitches. These small steps make a big difference in achieving a professional, smooth appearance.
Seam Finishing Techniques
Achieving a professional, smooth finish on your sweater hinges on how well you finish the seams and edges. Proper seam finishing techniques hide raw edges, ensure durability, and enhance overall appearance. Consider these tips:
- Use a yarn color that matches your sweater for seamless blending
- Incorporate pattern matching at seams to maintain visual flow
- Try a zigzag stitch for stretch and flexibility
- Use a serger for clean, secure edges
- Finish edges with a simple binding or crochet for a polished look
These methods help prevent waves and puckering, especially in knit fabrics. When matching yarn color and pattern at seams, your sweater looks store-bought rather than handmade. Good seam finishing elevates your project, giving it a neat, professional appearance that lasts.
Edge Neatness Tips
A clean, polished edge can make all the difference in giving your sweater a professional finish. To achieve this, consider using decorative stitches along the edges for a neat, stylish touch. When working with color blocking, verify each color is carefully aligned at the edges, hiding any raw or uneven seams. If your sweater features decorative stitches, use them along the hem, cuffs, and neckline to create a smooth, finished look. Press your edges gently after sewing to flatten any ridges or waves, especially around color blocks. For extra neatness, topstitch along the edges for added stability and a clean appearance. These tips will help your resized sweater look polished, with crisp edges and a refined finish that elevates your sewing project.
When to Tackle Resizing at Home and When to Call a Pro

Knowing when to resize a sweater at home versus calling in a professional can save you time and prevent frustration. If the change is minor, like taking in a waist or sleeves, you can often handle it with hand sewing or fabric dyeing to match colors. However, for complex adjustments or delicate knits, it’s best to consult a pro. Consider these factors:
- The sweater’s fabric type and stretchability
- Your sewing skills and experience
- The size of the resizing needed
- Whether color matching via fabric dyeing is necessary
- The risk of damaging the knit if mishandled
If you’re unsure or the sweater is expensive, it’s safer to bring it to a professional. They have the tools and expertise to resize without waves or distortions.
Caring for Your Resized Sweater to Maintain Its Perfect Fit
After resizing your sweater, taking proper care is essential to preserve its new shape and fit. To maintain knit softness, always wash the sweater gently using cold water and a mild detergent. Avoid harsh agitation that can cause waves or distortions. When drying, lay it flat on a clean towel, reshaping it to the desired fit to prevent stretching. Be mindful of the yarn color; hot water or aggressive cleaning can cause fading or color bleeding, especially in darker or vibrant shades. Store your sweater folded in a cool, dry place to avoid unnecessary stretching. Regular gentle care helps keep the knit softness intact and ensures the yarn color remains vibrant, so your sweater continues fitting perfectly and looks great for years to come.
Frequently Asked Questions
Can I Resize a Sweater Made of Delicate or Handmade Knit?
Yes, you can resize a sweater made of delicate fibers or handmade knits, but you must be very gentle. Carefully measure and mark the areas you want to alter. Use mild techniques like steaming or hand-washing with gentle detergent, then gently reshape the sweater while damp. Avoid aggressive stretching or sewing, as delicate fibers and handmade knits are fragile. Taking your time guarantees you resize it safely without damaging the fabric.
How Do I Prevent Color Bleeding During Resizing?
Think of dye bleeding as a sneaky river threatening to flood your carefully resized sweater. To prevent this, wash your sweater in cold water before resizing to test for colorfastness concerns. Use a gentle detergent designed for delicate fabrics and add a color-catching sheet during the wash. When resizing, avoid excessive heat, which can cause dye bleeding, ensuring your sweater stays vibrant and true to its original hue.
What Are the Best Tools for Resizing Different Knit Patterns?
You should use knit stitch tools like a tapestry needle, stitch markers, and a measuring tape to help resize different knit patterns accurately. For pattern alteration techniques, consider adding or removing stitches carefully, adjusting the tension, or reshaping areas gradually. These tools and methods guarantee you maintain the integrity of your knit pattern while resizing, preventing distortion and achieving a smooth, professional finish.
How Long Will the Resizing Process Take for a Typical Sweater?
The resizing process for a typical sweater usually takes a few hours to a day, depending on the sweater’s size and complexity. Timing considerations include your skill level and whether you’re hand-washing and drying the sweater beforehand. The process duration involves careful measuring, pinning, and sewing or knitting adjustments. Plan for some extra time to make sure your modifications are even and look professional, especially if you’re new to resizing knits.
Is There a Risk of Shrinking the Sweater Further During Resizing?
Yes, there’s a shrinking risk if you’re not careful during resizing. You need to follow resizing safety tips closely because aggressive stretching or improper washing can cause your sweater to contract further. To avoid this, always test on a small area first, use gentle methods, and avoid high heat. This way, you minimize shrinking risks and ensure your resizing efforts are successful without damaging your sweater.
Conclusion
By mastering mindful measuring, meticulous marking, and gentle sewing, you’ll minimize waves and maximize a flawless fit. Remember, patience and precision prevent pitfalls, preserving your sweater’s shape and style. With a little care, your customized creation can confidently conquer comfort and charm. So, take your time, trust your tools, and transform your too-big sweater into a perfectly proportioned piece — proving that proper planning produces polished, professional results.