
To design your own cross-stitch pattern from a photo, start by choosing a clear image and using digital tools or software to simplify and edit it. Pick a color palette that matches the photo and customize details to fit your style or skill level. Adjust the pattern size and add personal touches like initials or symbols. If you continue, you’ll discover how to turn your ideas into a beautiful, personalized stitch project.
Key Takeaways
- Select a color palette that matches your photo’s dominant tones for authenticity and visual harmony.
- Use cross-stitch software or digital tools to convert your photo into a grid-based chart.
- Customize the pattern size and detail level to fit your project dimensions and stitching skill.
- Simplify complex areas and emphasize key elements to enhance clarity and ease of stitching.
- Add personal touches like initials or symbols to create a unique, meaningful finished piece.

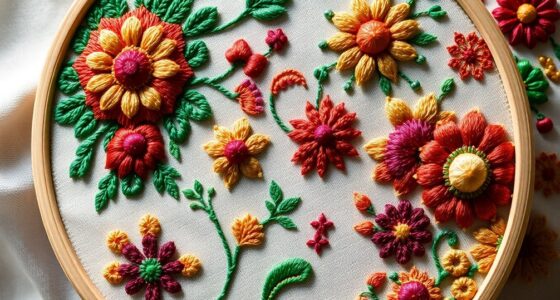
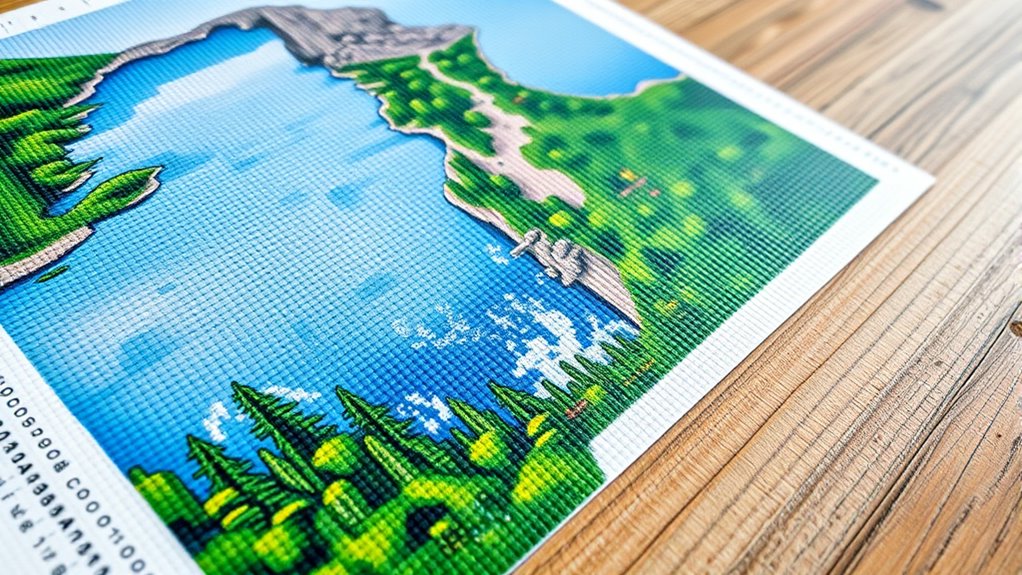
Creating your own cross-stitch pattern gives you the freedom to craft personalized designs that reflect your style and interests. When starting this process, one of the most exciting steps is choosing your color palette. Your color selection influences the overall mood and impact of your finished piece, so think about what emotions or themes you want to evoke. Bright, vivid colors can create energetic, eye-catching designs, while softer shades lend a more subtle, calming effect. Consider the background and the main subject of your pattern to ensure your colors complement each other well. If you’re working from a photo, try to identify the dominant colors and match them as closely as possible with available thread shades. This careful selection guarantees your pattern will be both authentic and visually appealing.
Pattern customization is another key aspect of creating a unique cross-stitch design. Instead of replicating a photo exactly, you have the flexibility to modify details, such as simplifying complex images or emphasizing certain elements. This might mean adjusting the size of your pattern to fit a particular space or simplifying intricate parts to make stitching more manageable. Customization also allows you to adapt the design to your skill level—adding more detail if you’re experienced or keeping it simple if you’re a beginner. You can choose to incorporate personal touches, like initials or meaningful symbols, into the pattern to make it truly one-of-a-kind. When customizing, remember to keep consistency in your style, whether that’s through color choices, stitch types, or the overall composition, so your finished piece feels harmonious. Additionally, incorporating elements inspired by farmhouse bedroom design can add a cozy, rustic charm to your cross-stitch project.
Customize your cross-stitch by simplifying details, adding personal touches, and maintaining style consistency for a harmonious finish.
To facilitate pattern customization, use digital tools or cross-stitch software. These programs let you manipulate your photo, adjust colors, and create grid-based charts that are easy to follow. They also often include features for altering the size of your pattern, so you can tailor it to your project’s dimensions. Once your design is finalized, review it carefully—checking that your color choices and modifications align with your vision. Keep in mind that some detail may need to be simplified depending on the final size of your project, so don’t hesitate to make adjustments that enhance clarity and ease of stitching.
Ultimately, designing your own cross-stitch pattern is a rewarding process that combines creativity with technical skill. By thoughtfully selecting colors and customizing your pattern, you turn a simple idea into a meaningful handmade piece. Whether you’re recreating a cherished photo or inventing a new design from scratch, your personal touches will shine through, making your finished cross-stitch truly unique.
Frequently Asked Questions
What Software Can I Use to Create My Pattern?
You can use embroidery software like PCStitch, WinStitch, or Pattern Keeper to create your cross-stitch pattern. These tools allow you to easily import photos and customize your design. They also feature pattern editing options, so you can adjust colors, symbols, and grid lines to match your vision. With user-friendly interfaces, you’ll find it simple to transform your photo into a detailed, personalized cross-stitch chart.
How Do I Choose the Right Fabric for My Design?
Choosing fabric for your design is like picking a dance partner—get it wrong, and the whole routine falls flat. Opt for a fabric with the right fabric selection, such as evenweave or Aida, that matches your thread types and stitch size. Consider the count—higher counts mean more detail, but less forgiving. Pick a fabric that complements your project’s complexity and your skill level, and you’ll be stitching in perfect harmony.
Can I Incorporate Multiple Photos Into One Pattern?
Yes, you can incorporate multiple photos into one pattern by creating a photo collage or a multi-image design. Start by selecting the images you want to combine, then use photo editing software to arrange them into a single composition. Once you’re satisfied, convert this collage into a cross-stitch chart. This approach allows you to personalize your project with several meaningful images, making a unique and colorful piece.
How Do I Adapt a Pattern for Different Skill Levels?
To adapt a pattern for different skill levels, you should modify its complexity accordingly. For beginners, simplify the design by reducing detail and using larger stitches, making it easier to follow. For more advanced crafters, increase pattern complexity with finer details and smaller stitches. Skill level adaptation involves adjusting pattern intricacy, ensuring it’s challenging yet achievable, so you can enjoy stitching regardless of your experience.
What Are Common Mistakes to Avoid in Pattern Creation?
Avoid amassing mistakes in pattern creation by paying attention to pattern symmetry and color palette choices. Don’t overlook uneven designs or inconsistent color progressions that can confuse or complicate your project. Double-check your pattern for balanced symmetry and harmonious hues, ensuring clarity and coherence. By carefully curating your color palette and maintaining pattern symmetry, you prevent pitfalls, producing a polished, professional-looking cross-stitch chart that’s both beautiful and easy to follow.
Conclusion
So, next time you snap a memorable photo, remember it might just become your next cross-stitch masterpiece. It’s funny how a simple image can turn into a personal work of art, connecting your creativity with cherished memories. As you bring your design to life, you’ll realize that sometimes, the most unexpected coincidences — like a photo turning into a beautiful pattern — remind us how art can truly transform moments into timeless keepsakes.