
Say goodbye to tangled embroidery floss forever! To avoid frustrating knots, cut your floss into shorter lengths, around 18 inches, and store it in organized boxes or on thread bobbins. Separate strands before stitching and let your thread hang freely to minimize twisting. Keep your workspace humid to prevent static cling, and remember to check your collection regularly for any damage. With these simple tips, you can enjoy smoother stitching, and there's even more to discover for effortless crafting!
Key Takeaways
- Cut embroidery floss into 18-inch lengths to minimize friction and reduce tangling during stitching.
- Store floss in organized boxes or on bobbins to keep threads neat and accessible.
- Separate strands before starting to stitch to prevent knots and tangles.
- Keep your workspace humidified to reduce static cling that causes strands to stick together.
- Regularly check inventory for fading or fraying threads to maintain a smooth stitching experience.
Common Causes of Tangling
Tangled embroidery floss can be a major headache, and several common causes contribute to this frustration. One significant factor is improper storage; when you toss your floss into a drawer without organization, it's bound to create tangled threads.
Using long lengths of floss, especially over 24 inches, also increases the chances of tangling. You might find that 15% of your stitching time goes to managing these knots!
Additionally, static electricity can cause strands to cling together, adding to the chaos. To reduce these issues, prioritize organization and regularly check your inventory.
Keep your floss neatly stored and consider using a laying tool to help minimize twists while stitching. With these strategies, you can enjoy a smoother embroidery experience.
The Importance of Proper Floss Management

Managing your embroidery floss properly can save you time and frustration.
By using efficient storage solutions, cutting your floss to manageable lengths, and practicing good thread care, you'll keep tangles at bay.
Let's explore these techniques to make your stitching experience smoother and more enjoyable.
Efficient Storage Solutions
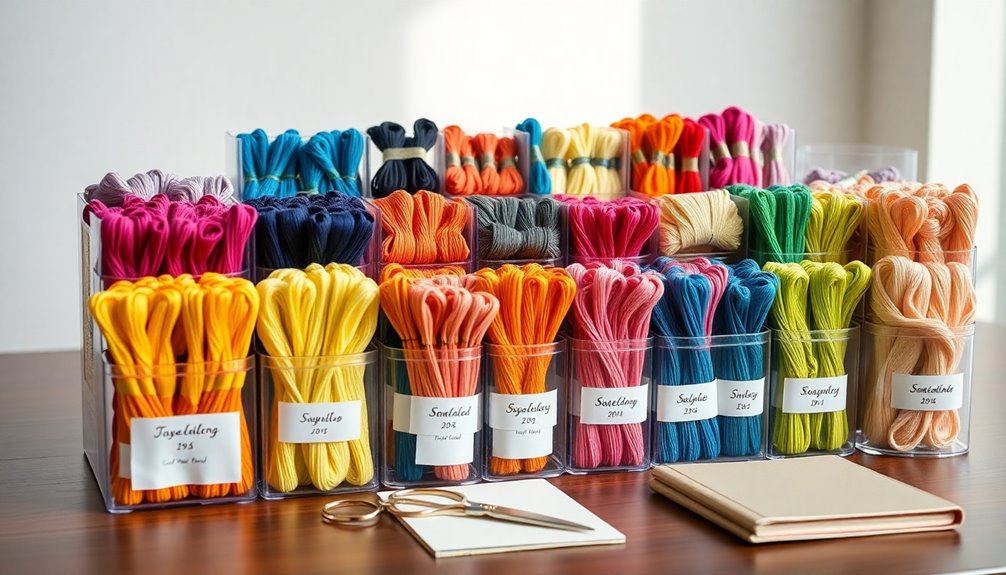
Proper storage solutions can make all the difference when it comes to keeping your embroidery floss organized and tangle-free. Efficient storage solutions, like thread bobbins and floss boxes, are essential for managing your collection.
In fact, 45% of embroidery enthusiasts prefer using floss boxes for this very reason. By regularly organizing and checking your inventory, you can save up to 30% of your stitching time, allowing for a smoother crafting experience.
Storing your floss in individual compartments or bags not only protects it from dust and sunlight but also enhances its longevity. A clean, organized floss collection reduces frustration from tangling, leading to a more enjoyable stitching journey.
Embrace these methods and watch your embroidery projects thrive!
Cutting Techniques Explained
Cutting your embroidery floss into lengths around 18 inches can drastically improve your stitching experience. This length reduces friction, minimizing the chances of thread knots and tangling as you work.
Use sharp scissors to cut your thread cleanly; this prevents fraying, which can lead to even more tangles. After cutting, remember to gently separate the thread strands. This simple step considerably lowers the risk of knots and enhances overall manageability.
In fact, about 78% of embroiderers prefer this working length, as it strikes a perfect balance between control and ease.
Regularly organizing your floss collection can save you up to 30% of your stitching time, highlighting the importance of proper floss management for a smoother embroidery experience.
Thread Care Practices
While you mightn't think about it often, taking care of your embroidery floss is essential for a smooth stitching experience. Proper thread care practices can save you time and frustration.
Here are four tips to keep your floss organized and tangle-free:
- Cut the thread into manageable lengths of about 18 inches to minimize friction.
- Use storage boxes or bobbins to keep your floss neat; this prevents tangling and makes it easier to find colors.
- Separate floss strands before stitching to avoid knots while you work.
- Perform regular inventory checks on your floss collection to maintain order and efficiency.
Effective Storage Solutions for Embroidery Floss
When it comes to storing your embroidery floss, having an organized system can make all the difference.
You can explore various storage options, from DIY ideas to ready-made solutions, to keep your floss neat and tangle-free.
Plus, regular inventory checks will help you stay on top of your collection and save valuable stitching time.
Organized Floss Storage Options
Keeping your embroidery floss organized can transform your crafting experience. With a few effective storage solutions, you can prevent tangles and protect your threads.
Here are four organized options to take into account:
- Bobbins and Floss Cards: These provide neat, compact organization, minimizing damage.
- Floss Boxes: Preferred by 45% of enthusiasts, they feature individual compartments for easy access.
- Storage Bags: Offering flexibility, they protect your floss from dust and sunlight, maintaining quality.
- Regular Inventory Checks: Keeping track of your collection saves you time, helping you stitch more efficiently.
DIY Storage Ideas
If you're looking to spruce up your embroidery floss storage, DIY solutions can be both fun and functional. Utilizing bobbins and floss cards not only reduces tangling but also keeps your collection organized. You might prefer floss boxes with individual compartments, as 45% of embroidery enthusiasts do. Get creative with DIY storage ideas like empty spice jars or small plastic bags for a personalized touch. Additionally, considering compact storage solutions can maximize your workspace efficiency.
Here's a quick overview of effective storage options:
| Storage Type | Benefits | Ideal For |
|---|---|---|
| Bobbins/Floss Cards | Reduces tangling | Compact storage |
| Floss Boxes | Keeps colors separated | Easy access |
| Spice Jars | Cost-effective and customizable | Unique organization |
These efficient storage solutions will enhance your embroidery experience!
Monthly Inventory Maintenance Tips
Regularly checking your embroidery floss inventory can save you valuable stitching time and keep your collection in top shape.
By organizing your threads and maintaining a neat arrangement, you'll enhance both efficiency and quality. Here are some effective storage solutions:
- Use a DMC thread organizer with individual compartments to prevent tangling.
- Store your embroidery floss in boxes to protect them from dust and sunlight while allowing for easy color coding.
- Implement thread bobbins to keep floss neat and accessible.
- Regularly update your inventory, discarding any damaged or unused threads.
Following these tips not only prolongs the lifespan of your embroidery floss but also guarantees you're always ready for your next project!
Techniques for Cutting and Separating Floss

When tackling the challenge of cutting and separating embroidery floss, it's essential to start with manageable lengths of around 18 inches. This length reduces the likelihood of tangling, as longer threads tend to knot easily.
Use sharp scissors for cutting embroidery floss; clean cuts prevent fraying and tangling later on. When separating strands, grip the cut end and gently pull to separate individual strands without twisting, allowing them to untwist naturally. This method enhances your tangle-free experience.
Consider employing the loop start technique, where you fold the floss in half and thread both ends through the needle, minimizing tangles during setup. Additionally, maintaining proper nutrition can support fine motor skills, which are essential for managing delicate tasks like embroidery.
Stitching Methods to Prevent Tangling

To keep your embroidery floss tangle-free, consider using stitching methods designed to minimize twisting and knots. Here are some effective techniques:
- Loop Start Method: Fold the floss in half and thread both ends through the embroidery needle. This method can reduce tangling by 78%.
- Optimal Thread Length: Use a working thread length of about 18 inches to reduce friction against the fabric and itself.
- Needle Threader: Employ a needle threader for threading multiple strands quickly, saving time and minimizing tangling.
- Shorter Lengths: Stitch with shorter lengths of floss to prevent knots—longer threads are more prone to tangling.
Also, allow the thread to dangle freely while stitching; this helps untwist the floss naturally.
Troubleshooting Common Tangling Issues

Even with the best stitching methods, tangling can still occur, leaving you frustrated in the middle of a project. To tackle these pesky knots, try separating embroidery floss before you start. Allowing the thread to hang freely can reduce the chance for it to twist.
If you encounter a stubborn knot, use the pinch and roll technique to loosen it gently. For more complicated tangles, the railroad method with two needles can make it much easier to untangle without damaging your fabric.
If all else fails, don't hesitate to cut the knot out; it's sometimes necessary to prevent further issues. Finally, humidifying your workspace can help keep your floss less prone to static cling and tangling during your embroidery endeavors.
Maintaining Your Embroidery Floss Collection

Maintaining an organized embroidery floss collection is essential for a smooth stitching experience, as it not only saves you time but also minimizes tangling.
To thread right and keep your DMC Embroidery collection in top shape, follow these tips:
- Use a DMC thread organizer to neatly arrange your floss, making colors easy to find.
- Invest in proper storage solutions like thread bobbins and floss boxes to protect your floss from dust and damage.
- Regularly check your collection for fading, fraying, or stiffness to guarantee you're using quality threads.
- Conduct inventory checks periodically to save up to 30% of your stitching time.
With a well-maintained collection, you'll enhance your stitching efficiency and enjoyment!
Frequently Asked Questions
How to Keep Embroidery Floss From Getting Tangled?
To keep your embroidery floss from getting tangled, start by cutting it into 18-inch lengths.
Use floss boxes or bobbins for neat organization, as many enthusiasts do.
When you stitch, try the loop start method by folding the floss in half and threading both ends through the needle.
Regularly check for twists and let the floss hang freely between stitches.
Finally, do monthly inventory checks to maintain organization and save time.
Why Does My Embroidery Thread Keep Getting Tangled?
Your embroidery thread keeps getting tangled due to several factors.
If you're storing your skeins haphazardly, it's likely causing friction and knots. Using long lengths of thread over 18 inches can also lead to tangling as it twists against itself.
Static electricity in dry conditions can make strands cling together. To reduce tangling, check your thread tension regularly and try the loop start method; you'll find it makes a big difference!
How Do You Unwind Embroidery Floss Without Tangling?
Unwinding embroidery floss can feel like trying to untangle a cat's favorite toy! But don't worry, you can do it without the chaos.
Always pull the thread from the bottom of the skein, letting it unravel naturally. Cut the floss into 18-24 inch lengths for easier handling.
Gently separate strands and let your needle hang occasionally to unwind twists. A little thread conditioner can work wonders, keeping tangles at bay while you stitch!
How Do You Untangle Embroidery Thread?
To untangle embroidery thread, start by gently pinching and rolling the knot between your fingers. This loosens it, making it easier to pull apart.
If the knot's stubborn, try the railroad method with two needles to tease the threads apart. If all else fails, don't hesitate to cut the knot out.
While stitching, let the thread hang freely and take regular breaks to prevent future tangling. You'll enjoy a smoother stitching experience!
Conclusion
Say goodbye to the frustration of tangled embroidery floss! By implementing proper storage solutions and mastering a few simple techniques, you'll keep your threads as organized as a well-tuned orchestra. Remember, a little care goes a long way in maintaining your collection for years to come. With these tips in hand, you can stitch your way to creativity without the knots and tangles holding you back. Now, go ahead and let your imagination soar!