
Instead of backstitching, start your seams with a lockstitch to get cleaner, more professional results. Begin by sewing a few forward stitches, then stop with the needle down and sew a small stitch backward to lock the seam instantly, avoiding the excess bulk and puckering caused by backstitching. Using this method keeps your seams smooth and neat, and you’ll find it easier to achieve polished finishes. Keep going to learn step-by-step tips for perfect lockstitch starts.
Key Takeaways
- Begin sewing with forward stitches to lock the seam securely without backstitching.
- Set an appropriate stitch length (around 2.0–3.0 mm) for smooth, even stitches.
- Ensure machine tension is properly adjusted to prevent puckering or loose stitches.
- Hold fabric steady and lower the needle gently to start, avoiding rushing or uneven tension.
- Practice starting with forward stitches and slight reverse to create a clean, durable seam without backstitching.
What Is a Lockstitch Start and Why Is It Better Than Backstitching?

Have you ever noticed how backstitching can leave your seams looking bulky or uneven? A lockstitch start offers a cleaner, more professional finish without adding extra bulk. Unlike backstitching, which involves sewing backward over stitches, a lockstitch begins with a few forward stitches that lock the seam in place seamlessly. This method reduces tension issues and minimizes puckering, especially with delicate fabrics. Proper sewing machine maintenance guarantees your stitches stay even and secure, making lockstitch starts more effective. When selecting fabric, choosing the right type can also enhance seam quality. Using a lockstitch start not only improves seam appearance but also simplifies your sewing process, making your finished project look polished and durable without the bulkiness caused by traditional backstitching. Understanding sewing machine mechanics can help you troubleshoot and ensure consistent stitch quality.
Why Do Backstitches Cause Puckering and Bulky Seams?

Backstitches can often cause puckering and bulky seams because sewing backward places extra tension on the fabric and thread. This increased tension can distort the fabric, creating unwanted gathers and uneven seams. When you backstitch, the thread tension isn’t evenly distributed, leading to tighter areas that pull fabric in different directions. To visualize this, imagine:
| Fabric Layer 1 | Fabric Layer 2 |
|---|---|
| Tightened thread | Loosened thread |
| Slight puckering | Smooth seam |
| Distorted fibers | Flat surface |
| Uneven tension | Uniform tension |
| Bulky seam | Flat, neat seam |
This tension imbalance causes fabric distortion and puckering, resulting in bulky, unattractive seams. Switching to a lockstitch start helps maintain even thread tension and keeps your fabric smooth.
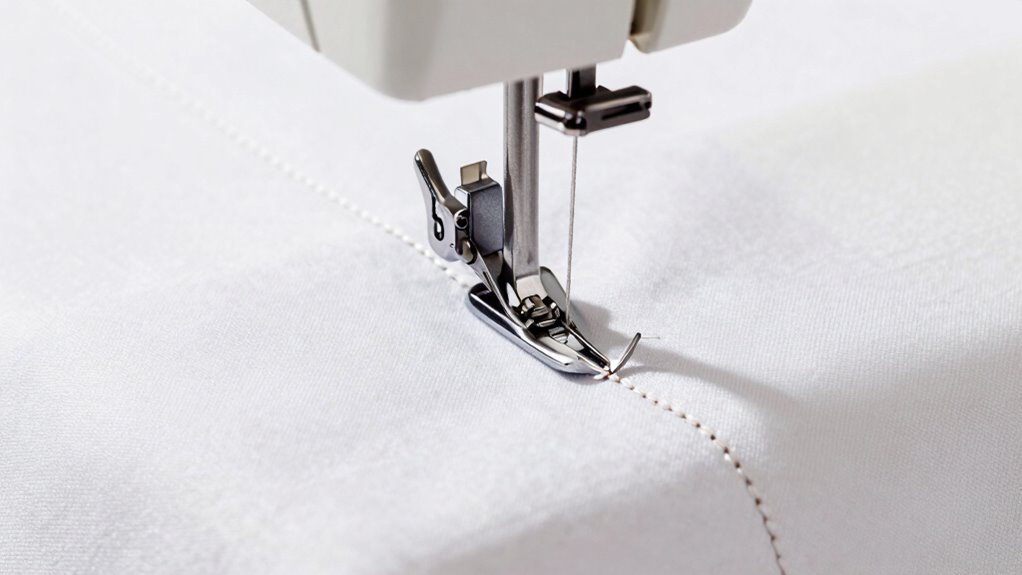
How to Start a Seam With a Lockstitch (Step-by-Step Guide)
To start a seam with a lockstitch, begin by setting your sewing machine to the correct stitch length—usually around 2.0 to 3.0 mm for most fabrics. Before sewing, verify your sewing machine maintenance is up to date, including cleaning and oiling as needed, to keep stitches even. Adjust your fabric tension to prevent puckering or loose stitches; proper tension ensures a smooth start. Proper attention to detail in setting up your machine can make a significant difference in stitch quality from the very first stitch. Position your fabric with the raw edges aligned, then lower the presser foot. Start sewing slowly, guiding the fabric steadily to create a secure lockstitch at the beginning of your seam. This technique avoids backstitching, resulting in cleaner, more professional seams. Proper setup and tension adjustment are key to a flawless lockstitch start. Ensuring your machine’s thread tension is correctly calibrated can significantly improve stitch quality from the very first stitch. Additionally, checking that your needle is sharp and appropriate for your fabric type will help produce consistent stitches right from the start. Regularly inspecting your sewing machine components can prevent issues like uneven stitches or thread breakage. Paying attention to sewing machine maintenance can also prevent issues like uneven stitches or thread breakage.
Common Mistakes to Avoid When Lockstitching Seams

One common mistake when lockstitching seams is applying uneven tension, which can cause puckering or loose stitches. Incorrect thread tension affects stitch quality, making seams look unprofessional. Additionally, rushing your sewing speed can lead to inconsistent stitches and uneven seam allowances. To avoid these issues, always check your thread tension before starting and adjust it for the fabric you’re working with. Maintain a steady sewing speed, especially when starting and stopping stitches, to keep tension even. Properly maintaining machine settings is essential for consistent stitch quality and a professional finish. Also, regularly inspecting your sewing machine ensures that all components are functioning correctly, helping you achieve the best results. Being aware of sewing machine maintenance routines can prevent technical issues that may compromise seam integrity. Moreover, understanding thread tension adjustments can significantly improve stitch consistency and overall seam appearance.
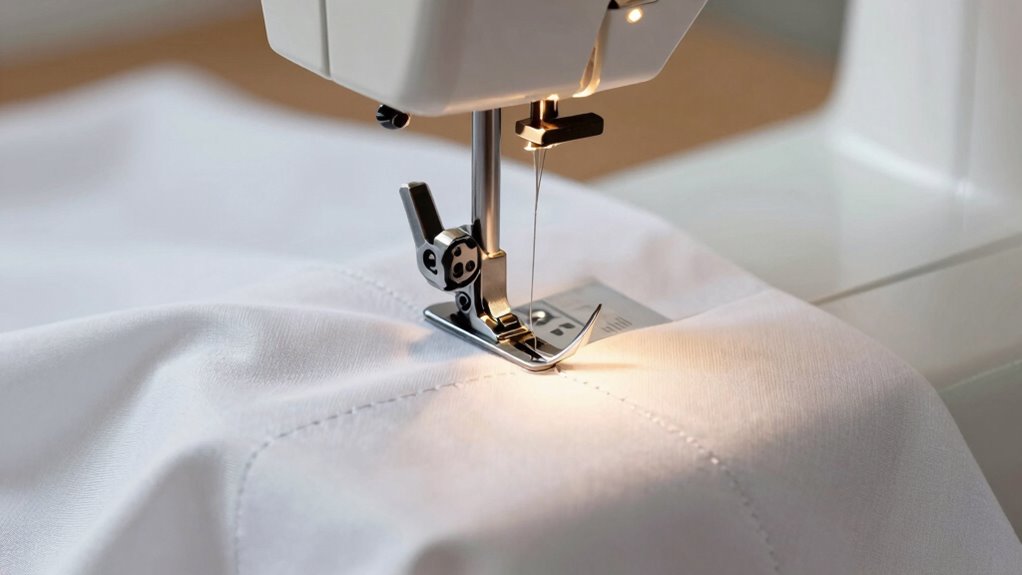
Easy Tips to Practice and Perfect Your Lockstitch Starts

Practicing proper lockstitch starts is essential for achieving neat, professional seams. To do this, focus on adjusting your sewing tension so the stitches are even and secure from the beginning. Before sewing, test your stitch length on scrap fabric—aim for a consistent length that suits your project. When starting, hold the fabric firmly and gently lower the needle into the fabric, then begin sewing slowly, ensuring the machine’s tension is balanced. Practice starting with a few stitches forward, then reversing slightly before continuing, which helps create a strong lockstitch. Repetition builds muscle memory, so take time to practice these steps until your lockstitch starts are smooth and precise, leading to cleaner, more professional seams every time. Additionally, understanding your sewing machine’s thread tension settings can greatly improve the quality of your stitches and help prevent skipped stitches or uneven seams. Regularly maintaining your sewing machine ensures consistent tension and stitch quality over time. Incorporating proper machine setup into your routine can further enhance your sewing results, especially as you learn to adjust tension correctly for different fabrics and thread types.
Frequently Asked Questions
Can Lockstitching Be Used on All Fabric Types?
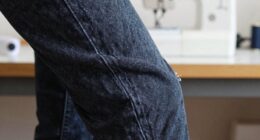
Lockstitching works on most fabric types, but fabric compatibility and thread selection matter. For delicate fabrics like silk or chiffon, choose a fine needle and lightweight thread to prevent damage. Heavy fabrics like denim may require stronger thread and heavier needles for secure stitching. Always test on a scrap first to confirm the lockstitch holds well without puckering or breaking, guaranteeing your seams stay neat and durable across different fabric types.
What Sewing Machine Settings Optimize Lockstitch Starts?
Imagine guiding your fabric smoothly into a well-orchestrated dance. To optimize lockstitch starts, set your thread tension just right—neither too tight nor too loose—and adjust the stitch length to match your fabric type. A slightly longer stitch can help prevent puckering, while proper tension guarantees even stitches. With these settings, your machine glides effortlessly, creating clean, professional seams that look as polished as a finished masterpiece.
How Does Lockstitching Impact Seam Strength Over Time?
Lockstitching enhances seam durability over time because it creates consistent stitches that resist unraveling. Proper thread tension ensures the stitches stay tight and balanced, reducing the risk of seam failure. When you start with a lockstitch, the seam remains strong, even after washing or stretching. Maintaining ideal thread tension and using correct sewing machine settings help preserve the integrity of your seams, guaranteeing they last longer and hold up well.
Are There Specific Needles Recommended for Lockstitch Starts?
You should use sharp, light- to medium-weight needles, like universal or quilting needles, for lockstitch starts. These needle types are compatible with most sewing machines and help create clean, even stitches without snagging or skipped stitches. Always check your machine’s manual for compatibility, as some specialty fabrics or machines may require specific needles. Using the right needle type guarantees your lockstitch starts are smooth and professional-looking every time.
Can Lockstitch Techniques Be Applied to Decorative Sewing Projects?
Yes, lockstitch techniques work great for decorative sewing projects. You can incorporate embellishing techniques and decorative topstitching to add visual interest and professional finish. Use a matching or contrasting thread to highlight your stitches, and experiment with different stitch lengths and patterns. Lockstitch provides a strong, neat seam that enhances your project’s overall look, making your decorative work appear polished and intentional.
Conclusion
By switching to a lockstitch start, you’ll achieve cleaner seams, reduce puckering, and build confidence in your sewing. Embrace the precision, enjoy the control, and experience the satisfaction of professional-looking finishes. Practice consistently, avoid shortcuts, and stay patient as you refine your technique. With each stitch, you’ll sew more smoothly, more securely, and more beautifully—because better seams come from better starts. Keep stitching forward, and watch your skills—and your projects—improve.