To achieve perfect Peter Pan collars, carefully align the collar pieces by pinning matching centers and edges, then baste to check fit before sewing permanently. Use sharp needles and matching thread for topstitching about 1/8 inch from the edge, keeping stitches even and close to the edge for a clean finish. Press seams open and double-check symmetry to guarantee a crisp, polished look. Mastering these steps will help your collar look balanced and professional—if you want even more tips, keep going.
Key Takeaways
- Carefully align collar pieces, matching center points and edges before pinning to ensure symmetry.
- Use basting stitches to check fit and alignment prior to permanent sewing.
- Pin the collar precisely, paying attention to grainline and edge matching for a crisp finish.
- Topstitch about 1/8 inch from the edge with consistent stitches for a neat, secure look.
- Press seams open and after topstitching to set stitches and maintain collar shape.

Adding a Peter Pan collar to your outfit instantly elevates your style with a touch of vintage charm and playful sophistication. To achieve a polished look, paying attention to fabric selection and sewing techniques is essential. The right fabric can make all the difference in how your collar looks and feels. Opt for medium-weight fabrics like cotton, linen, or silk blends, which hold their shape well and provide a smooth, crisp finish. Avoid flimsy or overly stretchy fabrics, as they can distort the collar’s shape and make alignment more challenging. When choosing fabric, consider the garment’s overall style and the desired drape; stiffer fabrics give a more structured look, while softer materials lend a gentle, rounded appearance.
Adding a Peter Pan collar elevates your style with vintage charm and playful elegance.
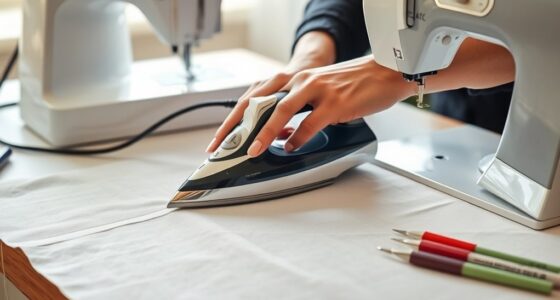
Once you’ve selected your fabric, focus on sewing techniques that ensure precision and durability. Start by carefully cutting your collar pieces, paying close attention to the grainline to prevent warping or distortion. Use sharp scissors or rotary cutters for clean edges, and mark your sewing lines clearly. When sewing the collar pieces together, stay consistent with seam allowances—most collars benefit from a 1/4 to 1/2 inch seam allowance for neatness. Press your seams open as you sew; this not only helps in aligning the pieces accurately but also creates a smooth, professional finish. Additionally, understanding how proper fabric selection can impact the final look will help in achieving the best results.
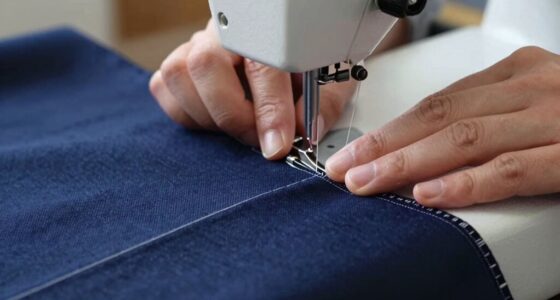
Alignment is key when attaching the collar to your garment. Pin the collar carefully, matching the center points and edges precisely to avoid puckering or misplacement. For a flawlessly aligned collar, you might want to baste it first, checking the fit and symmetry before permanently sewing. When topstitching around the collar, use a fine, sharp needle and a matching thread for a seamless look. Keep your stitching even and close to the edge—about 1/8 inch—so it securely holds the collar in place and enhances its shape. A well-executed topstitch not only reinforces the attachment but adds a subtle decorative detail that elevates your overall design.
Incorporating these fabric selection tips and sewing techniques guarantees your Peter Pan collar will look crisp, balanced, and stylish. Remember, patience during the cutting and sewing process pays off in a neater, more professional finish. With careful attention to detail, your collar will sit perfectly atop your outfit, exuding vintage charm and playful elegance. Whether you’re creating a statement piece or a subtle accent, mastering alignment and topstitching makes all the difference in turning a simple collar into a standout detail.
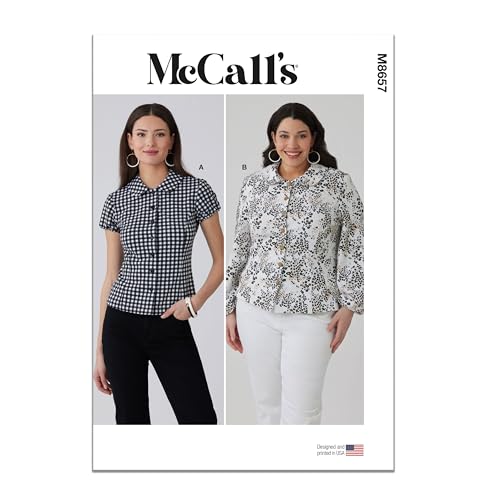
McCall's M8657 Sewing Pattern for Misses' and Women's Peter Pan Collar Knit Top with Sleeve Variations
- Available Sizes: Sizes 10-20 for misses and women
- Complete Sewing Instructions: Includes pattern pieces and step-by-step guides
- Fabric Recommendations: Suitable for stretch knits like cotton, ponte
As an affiliate, we earn on qualifying purchases.
As an affiliate, we earn on qualifying purchases.
Frequently Asked Questions
What Fabrics Work Best for Peter Pan Collars?
When choosing fabric for Peter Pan collars, you want options that enhance style and collar durability. Lightweight cottons, linens, and silks work well because they hold their shape and provide a crisp look. Avoid flimsy or stretchy fabrics that may warp or lose shape over time. Your fabric selection directly impacts how well the collar maintains its structure, so opt for sturdy, high-quality materials to achieve a polished, long-lasting finish.
How Do I Fix Uneven Collar Edges?
Did you know that uneven collar edges are a common sewing challenge? To fix this, start by checking your seam allowance—aim for consistency to prevent unevenness. Use pressing techniques like pressing the collar edges after sewing to smooth out any irregularities. If edges are still uneven, carefully trim and re-press, then topstitch for a polished finish. This simple approach guarantees your collar looks perfectly aligned and professional.
Can I Add Embellishments to the Collar?
Yes, you can definitely add embellishments to the collar. Consider embellishment ideas like embroidery, appliqué, or small fabric flowers to enhance its look. Use collar decoration techniques such as sewing on beads, lace, or sequins for extra flair. Just make certain your embellishments are securely attached and don’t interfere with the collar’s shape or comfort. Have fun experimenting with different textures and styles to make your collar uniquely yours!
What Sewing Machine Settings Are Ideal?
When sewing your Peter Pan collar, use a straight stitch with a medium stitch length, around 2.5mm. Make sure your machine is well-maintained, with clean and oiled parts, to avoid uneven stitches. Adjust your tension if needed for smooth topstitching. For collar pattern drafting, test on scrap fabric first to perfect your settings. Proper machine maintenance and accurate pattern drafting help achieve professional-looking, perfectly aligned collars.
How Do I Attach a Detachable Collar?
To attach a removable collar, first choose your preferred collar attachment method, like snaps, buttons, or hooks, suitable for your removable collar design. Position the collar on your garment, ensuring it’s aligned properly, then secure it using your chosen attachment method. This way, you can easily remove or reattach the collar whenever you want, keeping your options versatile and your sewing neat.
Conclusion
Now that you know how to achieve flawless Peter Pan collars with proper alignment and topstitching, you might worry it’s too tricky. But with patience and these simple tips, you’ll find it’s easier than you think. Don’t let perfectionism hold you back—practice makes perfect. Soon, you’ll be sewing charming collars that add a polished touch to any project. Keep experimenting, and enjoy the process of creating beautiful, professional-looking details!