To sew a clean yoke or lining using the burrito method, start by assembling and pressing your fabric pieces, then sew the yoke or lining to the main fabric at the shoulder seams. Next, fold and roll the yoke or lining inside along the seam, encasing the raw edges as you fold. Carefully sew along the rolled edge to secure everything in place. If you keep going, you’ll discover how to perfect this neat, professional finish step by step.
Key Takeaways
- Sew the yoke or lining pieces right sides together along the curved or angled edge, using consistent seam allowances.
- Press the seam allowances open or to one side for a neat finish and easier folding.
- Turn the fabric right side out through the unstitched section, encasing the seam allowances inside.
- Press the turned edge flat, ensuring the seam is smooth and flat for a clean appearance.
- Topstitch or finish the opening to secure the lining or yoke neatly in place.
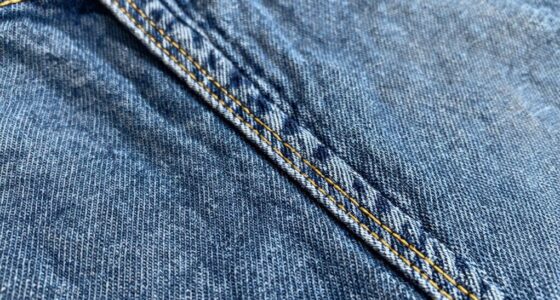
If you’ve ever struggled with keeping your burrito intact, you’re not alone. Achieving a neat, professional finish can be tricky, especially when sewing a clean yoke or lining. The key lies in choosing the right fabric and managing seam allowances carefully. Your fabric choice markedly impacts how well the final piece holds together. Opt for stable, medium-weight fabrics that aren’t too slippery or too thick, which makes sewing and pressing much easier. Cotton or cotton blends work well for most projects, providing enough structure without adding bulk. Steer clear of fabrics that fray excessively or are prone to shifting, as they can undermine the neatness of your finish. When selecting your fabric, consider how it will behave during sewing, especially around curved or angled seams, which are common when constructing a burrito-style yoke or lining.
Once you’ve picked the appropriate fabric, pay close attention to seam allowances. These are your safety margins—typically 1/4 to 3/8 inch—that determine how much fabric gets sewn together. Consistent seam allowances are essential for achieving a smooth, flat finish. Use your sewing machine’s guides or markings to keep your seams even, which helps prevent puckering or uneven edges. When sewing the yoke or lining, press your seam allowances open or to one side, depending on your pattern instructions. This step ensures that the layers lie flat and that the final look is crisp and tidy. If your fabric tends to fray, finish your seam allowances with a zigzag stitch or serging to prevent unraveling, making your project more durable and easier to handle during assembly.
Incorporate the seam allowances into your construction process by sewing precisely along your marked lines, avoiding the temptation to sew outside or inside the designated seam. Accurate seam allowance management helps your pieces align perfectly, which is critical when creating a clean, professional-looking burrito finish. When turning your yoke or lining right side out, ensure the seam allowances are pressed neatly, and trim any excess bulk if necessary. This careful attention to fabric choice and seam allowances will result in a smoother, more polished finish that holds together better over time. With practice, you’ll find that mastering these details makes a noticeable difference in the quality and appearance of your sewing projects, giving your burrito-style construction a clean, professional look every time.
Frequently Asked Questions
Can the Burrito Method Be Used for All Types of Fabric?
Yes, you can use the burrito method on most fabrics, but be mindful of fabric stretch and thickness. Stretch fabrics may need extra stabilizing or different techniques to prevent distortion, while thick fabrics can be tricky to sew through smoothly. Adjust your sewing machine settings accordingly, and use appropriate needles. Test on scrap material first to verify a clean finish, especially with challenging fabrics.
What Tools Are Essential for Executing the Burrito Technique?
You’ll need a sewing machine that’s ready to tackle this intricate technique, plus pressing tools like an iron and pressing cloths that work magic on fabric edges. Think of your sewing machine as the powerhouse that stitches everything smoothly, while pressing tools are your secret weapons to keep seams crisp and flat. Together, they transform your fabric layers into a perfectly sewn burrito, making your project look flawless and professional.
How Do I Troubleshoot Puckering or Uneven Seams?
To troubleshoot puckering or uneven seams, first check your sewing tension and adjust it if needed to guarantee smooth stitching. Make sure your seam allowances stay aligned, as misalignment causes puckering. Use a slightly longer stitch length for better fabric distribution, and press your seams carefully to set everything flat. Also, double-check your fabric and interfacing for any unevenness that could cause uneven seams or puckering.
Is the Burrito Method Suitable for Beginners?
Yes, the burrito method is beginner-friendly because it simplifies sewing yokes and linings with minimal turning. You’ll find it easy to master thanks to its straightforward technique. Plus, it’s versatile across various fabric types, making it a great choice for beginners exploring different textiles. This method helps you achieve clean, professional finishes without complicated steps, boosting your confidence as you learn essential sewing skills.
How Do I Finish Raw Edges After Sewing the Burrito?
To finish raw edges after sewing the burrito, you gently tidy up the edges with an edge finishing technique like serging, zigzag stitching, or pinking shears. Keep seam allowances in mind, ensuring they’re slightly trimmed if needed, so your edges stay neat and durable. This smooth finishing helps prevent fraying and creates a polished look, making your project look professional and well-crafted without adding complexity.
Conclusion
Now that you’ve mastered the burrito method, sewing a clean yoke or lining becomes a breeze. With your newfound skill, you’ll craft professional-looking garments faster than you can say “by the power of Grayskull.” Remember, patience and precision are key—like a Jedi wielding a lightsaber. Keep practicing, and soon this technique will feel as natural as a knight’s armor. Happy sewing, and may the thread be ever in your favor!