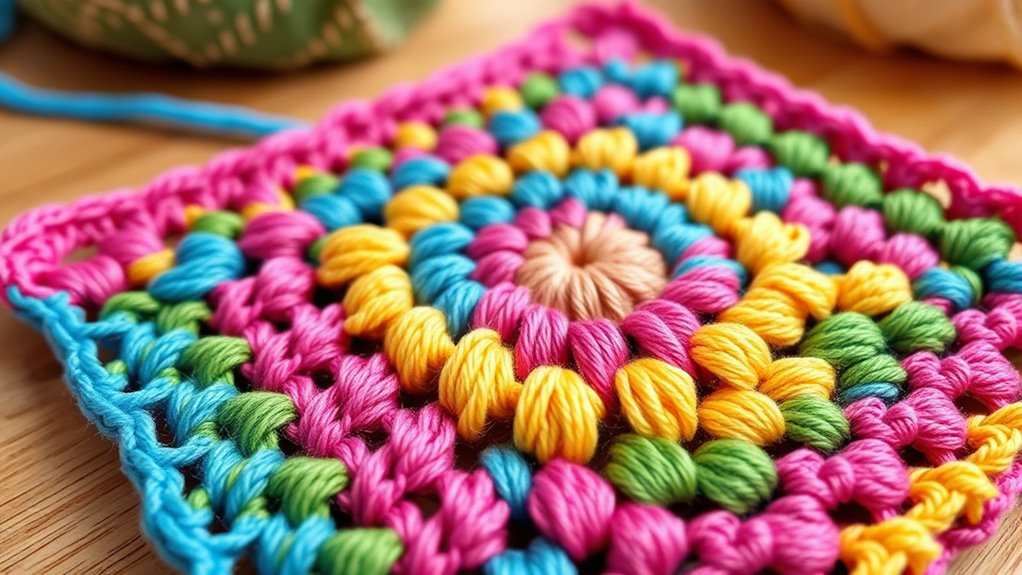
To create a classic granny square, start with a slip knot and make a chain four, then join with a slip stitch to form a ring. Work double crochets and chains into the ring, changing colors as desired for vibrant effects. Maintain consistent tension and experiment with hook sizes to achieve your preferred look. With practice, you’ll master the technique, and if you keep exploring, you’ll discover tips to perfect your granny squares even further.
Key Takeaways
- Start with a slip knot and create a magic ring or chain four, then join to form a central ring.
- Work the first round with double crochets and chain stitches inside the ring, following pattern instructions.
- Change colors at the end of rounds to add variety, maintaining consistent tension for neatness.
- Use a suitable crochet hook size (commonly H-8 or I-9) to achieve the desired texture and stitch density.
- Continue adding rounds to expand the square, keeping tension even and practicing for uniform, professional-looking squares.
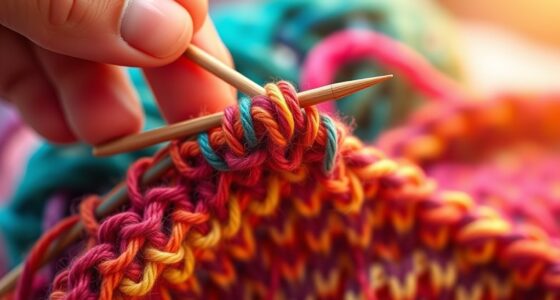
Have you ever wanted to create colorful, cozy blankets or accessories with just a simple crochet technique? The classic granny square is perfect for beginners and seasoned crafters alike, offering endless possibilities for customization. To get started, you’ll want to choose your color combinations carefully. Bright, contrasting colors can make your squares pop, while soft pastels lend a more subdued, elegant look. Think about how your finished project will fit into your space or wardrobe, and select shades that complement each other. Once you’ve settled on your color palette, it’s time to pick the right crochet hook sizes. For granny squares, most patterns recommend a size H-8 (5mm) or I-9 (5.5mm) hook, which strikes a good balance between tightness and flexibility. Using a slightly larger hook can make the stitches looser and more airy, while a smaller one results in a denser, warmer square. Experiment a bit to find what feels best for your tension and project.
Now, let’s get into the actual process. Start with a slip knot, then create a magic ring or chain four and join with a slip stitch to form a ring. This will be the center of your square. From there, you’ll work double crochets and chain stitches, following your pattern or your preferred design. When making each round, pay attention to the tension you hold the yarn with; consistent tension ensures your squares will be uniform and neat. As you work outward, switch colors if you wish to incorporate multiple shades, changing yarns seamlessly at the end of each round to create vibrant, eye-catching patterns. Remember, the choice of crochet hook size can influence not only the look but also the ease of crocheting. A larger hook might make the stitches more open and lacy, perfect for lightweight projects, while a smaller hook creates a tighter, warmer square.
Once you’ve completed your first few squares, you’ll notice how quickly the technique becomes second nature. The key is to keep your tension even and to choose color combinations that inspire you. Each square is a mini work of art, and with practice, you’ll develop your own signature style. Whether you’re making a blanket, pillow, or wall hanging, the versatility of granny squares makes them a go-to project. Use your crochet hook sizes thoughtfully to achieve the texture and look you want, and don’t be afraid to experiment with different color combinations to make each square uniquely yours. With patience and creativity, you’ll be creating beautiful, colorful crochet pieces in no time.
Frequently Asked Questions
Can I Customize the Size of My Granny Square?
Yes, you can customize the size of your granny square easily. To do this, adjust the number of rounds you crochet, adding more for larger squares or stopping sooner for smaller ones. Play with different color combinations and square shape options to make them unique. Keep in mind that using thicker yarn or larger hooks will also create bigger squares, giving you full control over your project’s size and style.
What Types of Yarn Are Best for Granny Squares?
You should choose soft, durable fiber options like acrylic, cotton, or wool for your granny squares. Acrylic is affordable and comes in many colors, making it great for vibrant color combinations. Cotton offers a crisp finish and is perfect for warm-weather projects. Wool adds warmth and texture. Consider your project’s purpose and desired look when selecting fiber options and color combinations to create beautiful, personalized granny squares.
How Do I Join Multiple Granny Squares Together?
To join multiple granny squares, you use sewing techniques like slip stitches or whip stitches along the edges, ensuring a seamless look. Start by arranging your squares with your desired color coordination, then carefully sew them together along the edges, keeping stitches even. This creates a cohesive, polished finish. Practice different sewing techniques to find what works best for your project and achieve a smooth, professional appearance.
Are There Variations for Different Skill Levels?
Think of your crochet journey as climbing a mountain where each skill level open up new vistas. Yes, there are technique variations and design options for different skill levels. Beginners might stick to simple square patterns, while advanced crafters can explore intricate stitches and colorwork. As you progress, you can adapt techniques to challenge yourself and create unique designs, transforming your granny squares from basic to breathtaking masterpieces.
How Do I Prevent My Granny Squares From Curling?
To prevent your granny squares from curling, you should use blocking techniques by wetting or steaming your squares and pinning them flat until they dry. Proper edge finishing also helps, so weave in loose ends neatly and consider adding a border to stabilize the edges. These steps keep your squares flat and even, ensuring they look polished and prevent unwanted curling in your final project.
Conclusion
As you finish your granny square, remember it’s more than just stitches—it’s a tapestry of patience and creativity. Each square symbolizes your journey, a small yet essential piece of a larger masterpiece. With every completed square, you’re weaving together a story of perseverance and artistry. Keep adding these vibrant symbols to your collection, and soon, you’ll see how your simple beginnings can transform into a beautiful, intricate quilt of memories and craftsmanship.